For most car owners, a garage is not only a parking place for a car, but its own workshop, which allows minor repairs to a four-wheeled unit. Due to the lack of sources of natural light, even during daylight hours, all repairs are carried out with artificial lighting in the garage. Therefore, the quality of repairs and other works will directly depend on a competent choice and arrangement of lighting. Consider DIY lighting in the garage.
Content
- Garage Lighting Options
- Garage Lighting Requirements
- Step-by-step instructions for organizing lighting in the garage
- The choice of wiring diagram in the garage
- Calculation of the number and power of lighting points
- Choosing the location of light sources
- Necessary tools and materials
- Basic work step by step
- Inspection pit lighting
- Installation and installation of the electrical panel
- Useful tips from an electrician
- Video Guide
Garage Lighting Options
Depending on the type of appliance, lighting in the garage can be performed:
- Incandescent bulbs;
- Fluorescent lamps;
- Halogen lamps;
- LED lighting.
The main difference between the above options is the ratio of the generated light flux in Lumens per 1 Watt of electricity. Therefore, before choosing a specific type of device for stationary lighting, consider the pros and cons for each of them.
Advantages and disadvantages of lighting devices.
Incandescent bulbs are of relatively low cost, they are much less capricious in operation. But, in comparison with other types of lamps, they give a luminous flux of only 7 - 17 Lm / W. They are also afraid of the depressurization of the glass bulb.
Fluorescent lamps are many times more expensive than incandescent, but give out about 45 Lm / W, which makes them much more economical. But the glass bulb of such a lamp is filled with a mixture of gases and mercury, which can be harmful during depressurization. Another significant drawback - the lamp takes a while to warm up until the claimed level of luminous flux is reached. And at a temperature of less than + 5ºС, such a lamp does not light up well.
Halogen lamps produce from 15 to 22 Lm / W, but unlike the previous ones, they must be powered from a low voltage of 12 V. Also, these lamps are afraid of touching with their bare hands, which is why they are very demanding during installation and operation.
LED bulbs can provide about 120 Lm / W, which is why they are considered the most economical lamps. An important advantage of LED spotlights is independence from bulb depressurization - LEDs will provide the same illumination even when a bulb is broken. The disadvantages of such lamps include sensitivity to the shape and magnitude of the supply voltage.
Garage Lighting Requirements
All requirements can be divided into three categories:
- Adequate and uniform distribution of light flux, both over the entire garage area and over the height of the vehicle;
- Sectioning the lighting in the garage so that only a certain area can be illuminated during work on it;
- Profitability - with prolonged production of any manipulations in the garage, a minimum energy consumption should be ensured.
Step-by-step instructions for organizing lighting in the garage
To ensure proper lighting of the premises, the owner of the garage must adhere to the proposed sequence. Pre-selected type of lighting equipment.
The choice of wiring diagram in the garage
The wiring diagram is compiled based on the type of fixtures (spot or general) and the needs of the garage. Decide on the location of the wiring (hidden or external). Display the general view of the garage on the diagram, mark on it:
- Place of installation of distribution meter and shield;
- Places of cable laying - on the walls or ceiling;
- Installation points for junction boxes, sockets and switches;
- Connection points for general and local lighting;
- If necessary, binding to any equipment.
After that, all data is transferred to the wiring diagram. An example of such schemes is shown in the figures.


Calculation of the number and power of lighting points
To begin with, the lighting power needed for the garage is determined. For example, you chose 20 W LED lights and decided that 5 W would be enough for one square meter. Measure the area of the garage, for example, the dimensions of the garage are 6 m × 4 m = 24 m2.
The number of points is calculated by the formula: N = (S × Pm) / Plwhere S is the area of the entire room, Pm - lighting power for one square meter, Pl - power of one light bulb. For the above parameters, we obtain the calculation N = (24 × 5) / 20 = 6. Accordingly, it will be necessary to install 6 fixtures, but their location in the garage should provide uniform lighting, so the next step is to choose the place and method of their location.
Choosing the location of light sources
Depending on the selected type of fixtures and the area of the room, lighting can be realized with one lighting device in the center of the ceiling. But this will not always provide the desired level of illumination near the wheels, bumpers, under the hood, etc. Therefore, when choosing the location of artificial lighting in the garage should be guided by such principles:
- Spotlights should not only be removed at an equal distance from each other, but also sent strictly to the work area from different sides. Avoid useless flow dispersion through walls and ceilings.

Fig. 4: An example of the location of the fixtures on the ceiling - In addition to general lighting devices, portable luminaires can be used to provide light in hard-to-reach places. For them, install a sufficient number of available outlets around the perimeter.

Figure 5: Installation example of a portable lamp - If you install one lamp on the ceiling, then it is better to mount it on a swivel bracket, which will allow you to change the angle and redistribute the light flux.
- With a ceiling height of 3 m or more, it is necessary to provide light from three levels at different heights, for example, the first at a height of 0.4 - 0.5 m from floor, the second 0.75 - 1 m and the third 1.5 - 1.8 m. The specific height should be selected on the spot, in accordance with individual characteristics premises.
- In the presence of a bench or workbench above it is advisable to install a separate lighting element, directed to the surface of the table, a mobile spotlight and a group of outlets for connecting power tool.

Fig. 6: table lighting
Necessary tools and materials
To mark the walls under the wiring, use the level, marking pencils. Drawing lines on the walls for gating, placing cable channels or corrugations, designate the points of attachment of lamps and sockets.
From the tools, take those that will help in installing the lighting and mounting under it: a puncher for drilling walls and a screwdriver for installation works. A screwdriver can be replaced with a conventional screwdriver, but it will require much more effort and time.
From the materials you need lighting devices (lamps, lamps, LED strips) and switches for them. For the point of entry and distribution of the electrical network, take a shield with RCD. Sockets and electrical wires are selected based on the load on them. To do this, the power of the devices powered from them is summed, by which the minimum cross section is determined according to table 1.
Table 1 wire section selection
| Copper wire | Aluminum wire | ||||
|
Section lived. mm |
Current. BUT | Power. kW | Cross section lived. mm | Current. BUT | Power, kWt |
| 1.5 | 19 | 4.1 | 2.5 | 22 | 4.4 |
| 2.5 | 27 | 5.9 | 4 | 28 | 6.1 |
| 4 | 38 | 8.3 | 6 | 36 | 7.9 |
| 6 | 46 | 10.1 | 10 | 50 | 11 |
| 10 | 70 | 15.4 | 16 | 60 | 13.2 |
| 16 | 80 | 18.7 | 25 | 85 | 18.7 |
| 25 | 115 | 25.3 | 35 | 100 | 22 |
| 35 | 135 | 29.7 | 50 | 135 | 29.7 |
| 50 | 175 | 38.5 | 70 | 165 | 36.3 |
| 70 | 215 | 47.3 | 95 | 200 | 44 |
| 95 | 265 | 57.2 | 120 | 230 | 50.6 |
| 120 | 300 | 66 |
For example, on one wire you plan to connect 10 fixtures of 100 W each, respectively, the total power will be 1000 W or 1 kW. For them, a 1.5 mm copper conductor will be enough2 or aluminum 2.5 mm2. A sectional margin should also be provided.
Another option is a cable that feeds a group of outlets for portable fixtures and heating stoves, for example, you use 3 furnaces of 2.5 kW and 2 portable fixtures of 0.5 kW. In total, we get a power of 3 × 2.5 + 2 × 0.5 = 8.5 kW. For the second option, a 6 mm power cable is suitable2 copper or 10 mm2 on aluminum.
Basic work step by step
Installation of lighting in the garage can be conditionally divided into the following stages:
- marking - transfer the previously made connection diagram to the walls of the garage;

Fig. 7: Wall marking - wall chippingif you plan a hidden wiring or install cable channels for an open method;
- wiring - place and secure the cable in the strobes or trays;

Fig. 8: Laying the wire in the gates - installation of boxes - carry out installation of boxes for sockets, switches, for breeding wires;

Figure 9: Junction Box Installation - installation of stationary fixtures - depending on the method of mounting the selected lighting fixtures, install them on the ceiling and walls of the garage;

Fig. 10: Mounting the lamp - wire connection - connect the cable to the terminals of sockets, switches and fixtures;
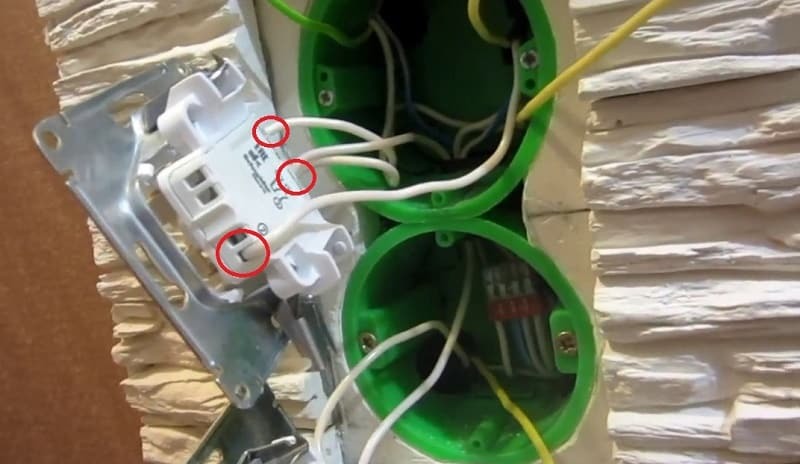
Fig. 11: Connecting sockets and switches - installation of glasses on lamps, sockets and switches - place power points and switching devices in socket boxes and boxes;
- try the performance - before finishing work, turn on the garage lighting from an electric power source, maybe the lamp will not light up somewhere or there will be no voltage in the outlet;
- Finishing work - after testing the performance and correcting the defects, close the strobes or trays, install decorative panels on sockets and switches, close the garage lighting.
Inspection pit lighting
Unlike the rest of the room, the inspection pit is characterized by increased humidity, which poses a threat not only to metal elements, but also to humans. Since moisture can cause electric shock, it was previously thought that the pits must be carried out from a safe voltage of 12 V, which cannot be harmful to man. But with the advent of circuit breakers, the power supply can also be performed from a 220 V network, provided that there is an RCD with a tripping current of at least 30 mA and a lamp with a protection level of 1 to 3 according to clause 6.1.14 of the PUE.
In relation to the illumination of the inspection pit, it goes up. Due to the small space, the luminaires should protrude as little as possible or even be recessed flush with the wall.

Installation of electrical wiring differs from garage lighting in the need to protect it from contact with water in case of flooding. To do this, use a plastic corrugation, make the wiring hidden in the wall, seal and electrically seal the contacts.

Installation and installation of the electrical panel
The electrical panel is intended for the redistribution of electrical energy from input to consumers through circuit breakers. For installation, the most convenient place at the entrance is selected. If you arrange viewing lighting, you can mount a separate shield for it.

In the shield, install the machines of the corresponding nominal value, according to the calculation of the loads for each group of consumers that you made when choosing the wire section. Most guards are typesetting, so you can set the number of RCDs in them depending on the layout. For example, separately for general lighting, separately for sockets and locksmith's corner. This principle of sectioning will only disable the area where the damage occurred, while the rest of the room will receive power.

Useful tips from an electrician
- If you have divided all the lighting into specific zones, it is advisable to install a switch directly next to it. For example, near the bench, near the hood, etc. If desired, you can install breakers, which will enable you to turn on and off the lighting, both from the entrance and from the zone itself.
- In case of a power outage, do emergency lighting in the garage. For this, halogen lamps or led lamps at 12 V are perfect. If the power supply fails during the repair, you can always continue by energizing the emergency light from the battery.
- If there is a spotlight at the entrance, connect it through a motion sensor, so you save on street lighting and can create a kind of alarm.
- For greater efficiency, the luminous flux from stationary lighting in the garage should be scattered, which can be achieved using shades and reflectors. But portable local illumination can be done with one beam of light for a specific point.
- Install the ground loop and lay the third core in the wiring, this will prevent electrical injuries and fire due to a short to the housing.
- When choosing materials and devices, purchase products from well-known manufacturers.
Video Guide
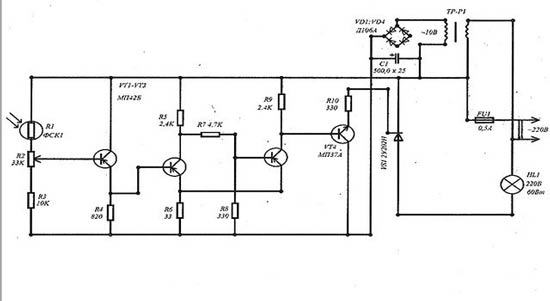
- Emergency lighting - types, requirements, schemes ...
- How to make a repair of an energy-saving lamp with your own hands?
- How to make a do-it-yourself nightlight
- How to remove a do-it-yourself lamp for car interior lighting?