With the advent of a small child in the family there is a question about the place of toys placement. It is impossible to deny the favorite child in the purchase of vending machines or pupa. Over time, parents get tired of stepping on objects scattered throughout the apartment. Then there comes a time when you need to buy or build a special place to store toys. The store is rare to find storage box that meets all requirements. It is important that he was quite roomy, durable and safe. A good alternative would be the production of a chest for toys with their own hands.
How to make a box for toys
The content of the article
-
How to make a box for toys
- How to choose material
- Required tools
- Chest for toys with their own hands: step by step
Safe and clean storage for favorite toys of the child can make any of the carton, paper, plywood or wooden billets. It is possible to make a flexible container made of thick material. Each type has its own characteristics and different life. Before you begin construction, it is necessary to understand which option is best for you.
Reference! In choosing the material necessary to consider not only its characteristics, it is important to take into account the age, character and balance of the child. If you fidget a lot of runs and falls, it is better to choose as storage for toys soft cover or paper box.

How to choose material
If you prefer a box of paper or cardboard box, the product will turn out easy and completely safe for a young child. But this did not last for long storage. After some time, we will again have to do the work. Soft Case for toys completely traumatic, but not very easy to use. The child will be difficult to put his toys himself. Trunk of a tree, made by yourself, you can make any size. The product will last a long time, and if it is to make a carved or decorate applications, the object becomes part of the interior of the original children's room.
Required tools
For the manufacture of wooden chest it does not take long. The most important thing to prepare all the necessary tools and materials. Boards need to take depending on what size of the finished product need. Master should be using these tools: handsaw, jigsaw, screws, glue, pencil to mark the place of sawing, a ruler, a hammer and accessories.
Important! Before you get started, you need to check the board and blanks for integrity. To work after the product has served more than a year.

Chest for toys with their own hands: step by step
After the wizard will determine the shape and size of the product, you can start the work itself on manufacturing.
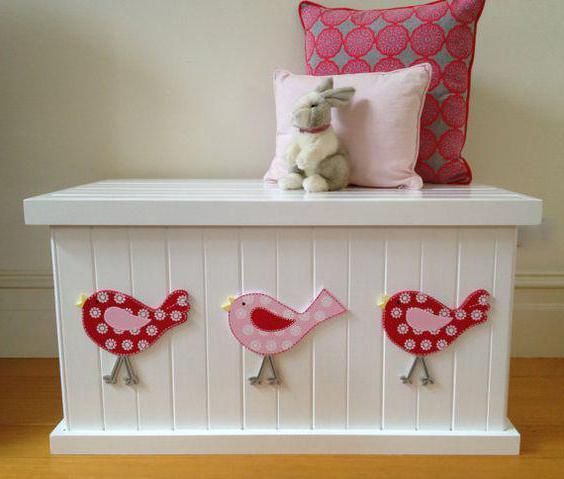
Beautiful and original products for storage of toys will be a chest with a semicircular cover. To object turned out beautiful and the quality, you need to adhere to the step by step instructions:
- First, you need to take a board designed for sidewall and saw off the excess. To do this, using a ruler and pencil, it is necessary to do the layout.
- Sides should be attached to the bottom of a future product using glue and screws. Thus, you get the frame. Pre-need to determine product size and shape, if preferred to make a convex cap, the sidewall saw off the top semicircle.
- The next step - lacing wall boards. They must be the same size and mounted from the top, from the place where it will be installed the product lid. If sidewall semi-circular, the board need to begin to stick just below the semicircular Spila.
- For the manufacture of the cover is better to use a narrow plank. So it will be more smooth and acquire the desired semicircular shape. The blanks are joined to each other and to the sidewalls of the chest.
- Jigsaw should saw off the cover on marked lines at the point where a half-circle begins.
- Cut-off cover can be attached with screws on the one hand to the box pre varnish or stain.
- Now you need to attach the handle to the sidewalls, and decorate it on your own. Decorate the chest can, stuffed angle irons at the corners.
- This last point involves design interior decoration chest. For this fit velvet or other dense material.

After the trunk to store toys ready, the parents will no longer have to wrestle with where to put bunnies and trains. In addition, the child quickly accustom himself to collect his toys into a beautiful chest. Hand made wooden product will be a real decoration for any child's room.