A cassette air conditioner is a high-performance technique with a modern design and low noise characteristics. This is ideal for air conditioning, but cassette air conditioners can only be installed if the room has a false ceiling and adequate dimensions.
In the article we will talk about the operational capabilities of cassette-type air conditioners. Let's get acquainted with the installation rules for this technique.
The content of the article:
- Design features of the "cassette"
- Advantages of a cassette air conditioner
-
Installation of cassette air conditioner
- Indoor unit installation
- Outdoor unit installation
- The nuances of installing the pipeline and drainage system
- Connecting the air conditioner to the mains
- Conclusions and useful video on the topic
Design features of the "cassette"
The cassette air conditioner, although it is a type of split system, differs from other types in the specific device of the indoor module. It is predominantly in the shape of a square and is designed to be embedded in a suspended ceiling structure.
For the task of installing a cassette-type air conditioner in the ceiling, all its parameters are sharpened:
- the outer panel measures about 50x50 cm;
- the depth, from 20 to 35 cm, coincides with the corresponding parameters of the suspended ceiling - the standard cell size and the distance from the surface of the canvas to the ceiling.
The air conditioner can work both in cooling mode and heat the room if necessary.
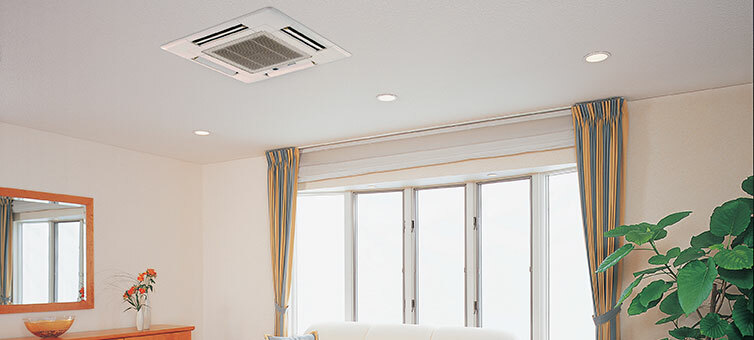
Built into the false ceiling, the cassette air conditioner looks like a blind. Cooling occurs through them. It is used mainly in large rooms.
The outdoor unit is equipped with a compressor and a condenser. The inside has an evaporator and drainage system.
Advantages of a cassette air conditioner
Structurally, the "cassette" is designed so that the cooled air is blown out in 4 directions. While the wall-mounted counterpart cools relatively small rooms, cassette air conditioner can cover a large enough area.
In addition to the large coverage area, this practical technique has a number of other advantages:
- Aesthetics. Indoor units remain invisible as they are located behind a false ceiling. Concealed installation does not change the interior of the premises, which allows the use of such climatic equipment in representative premises and offices.
- Almost complete absence of noise during operation. The fan built into the unit creates a natural circulation of air masses, does not arrange turbulence, and efficiently pumps air.
- Maximum coverage of the room. Since warm air accumulates in the area where the air conditioner is located, the room temperature will gradually decrease from top to bottom.
- Convenient airflow control. With the help of the swing bars, you can direct the air jets as you wish.
Cassette air conditioning systems in large rooms are controlled not only by portable remote controls, but also by installing stationary panels connected to the building's power grid.
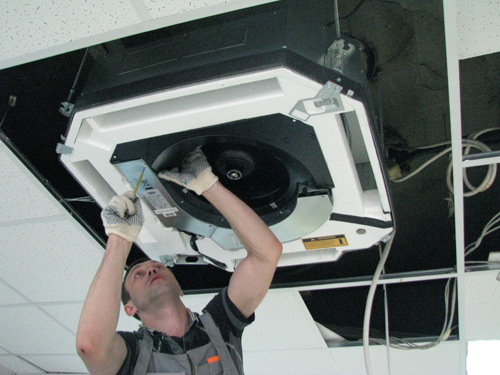
The installation of the cassette air conditioner should be planned prior to making repairs to the room. In this case, the presence of a tension structure with an inter-ceiling space of 15-30 cm is required
Many cassette systems have additional features. They can heat the room, ionize and humidify the air. To be able to fully coordinate the operation of air conditioners, you can install a single climate control system.
Installation of cassette air conditioner
Installation in new buildings and other premises is identical. Although there are some nuances, the technology is generally similar.
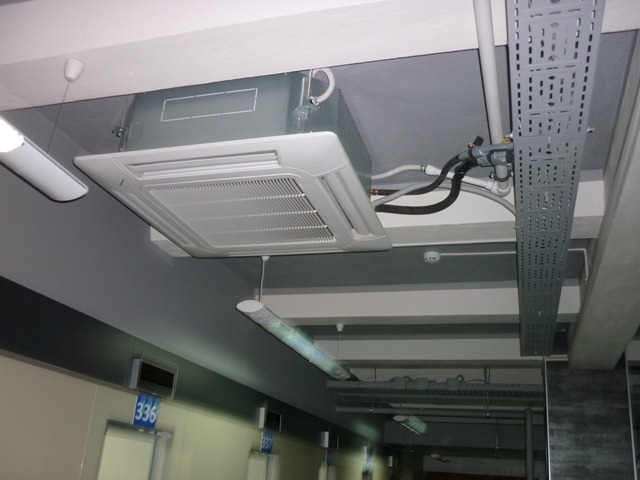
When choosing a split-system of a cassette type, you need to remember that its size matters. The deep body may not fit into the narrow gap between the ceiling slab and the suspended curtain
The whole process can be roughly divided into several stages:
- installation of blocks - outdoor and indoor;
- laying of air ducts and power supply lines;
- installation of a control panel if the air conditioner is installed at a large facility;
- testing, adjustment.
The installation of the air conditioner must be carried out taking into account the climatic conditions of the region. If the air contains corrosive substances, they can adversely affect the operation of the device, therefore, an additional air filter will be required.
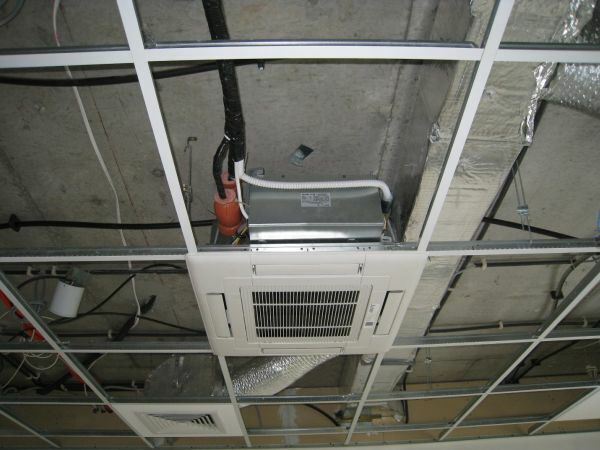
The cassette air conditioner can be adversely affected by high frequency equipment installed nearby. It can act as a barrier in the path of inductive current that must function in an air conditioner motor.
Compliance with all the rules is a guarantee of the successful operation of the air conditioner. outdoor unit installation and the internal module:
- The wiring must be thick enough to withstand high loads.
- It is not recommended to install any air conditioners in industrial premises, in the air of which there are fumes of acids, other toxic and flammable substances in high concentrations.
- Do not install cassette air conditioners in places where they can come into contact with technical oils.
- The height of the room should not be less than 2.6 m.
- The ceiling must be strong and as horizontal as possible.
- The unit must be grounded completely, both the circuit and the metal base.
- There should be no obstacles in the installation area of the air conditioner after completion of the work.
- The gaps should be the same between the air conditioner case and the extreme points of the holes.
The order of installation of the air conditioner units does not matter, but until it is at the installation site, it is not recommended to unpack it. The cassette player works most effectively when the indoor unit is installed in the center of the ceiling.
Indoor unit installation
In most cases, the air conditioner comes with a cardboard sample with identical dimensions. But even if it is missing, you need to complete it yourself. It comes in handy as a layout template.
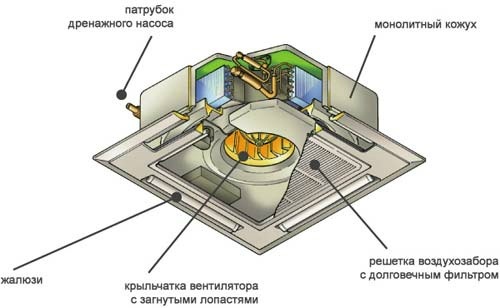
The site for the location of the air conditioner depends on the capacity. The standard size is 600x600 mm or 1200x60 mm. The outer panel is endowed with a beautiful design
Before proceeding with fixing the internal cassette units of air conditioners to the ceiling, you must first draw a contour on the floor, and then transfer it to the ceiling. Next, a small incision is made in the ceiling profile. If the suspended structure vibrates, a piece of styrofoam is glued to the ceiling.
Next, the locations of the module attachment are marked, holes are drilled in the marked places to a depth of about 50 mm with a diameter of 12 mm and pins are inserted into them. A nut, washer and one more nut are screwed onto each stud. After that, the internal module is lifted up, the pins are inserted into the grooves intended for them, the nuts are screwed on.
The indoor unit is installed in such a way that it fits flush with the surface of the ceiling sheet. This will happen if the distance between the main and suspended ceilings is identical to the immersion depth of the cassette case.
The horizontalness of the plane is controlled by the level. If this procedure is omitted, drainage fluid inside the module will leak out and drip onto the head. When the flatness condition is met, tighten the nuts well. The distance between the units of the unit is measured in order to subsequently lay the freon line.
At the next stage, the highway is cut off. This operation requires great precision, down to the millimeter. The size error will complicate things a lot. Insufficient length is an additional financial investment. More can be hidden in the inter-shelf space.
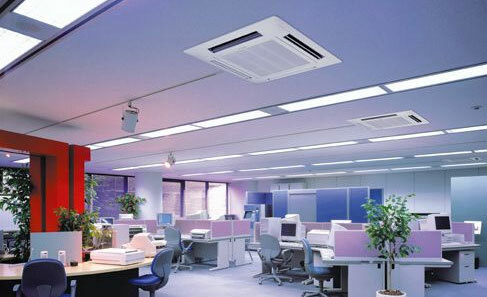
Since the indoor unit of the air conditioner is located in a suspended ceiling structure, this saves space on the wall, and most importantly, does not spoil the interior
A circular pipe cutter is most suitable for cutting a line. You can not cut with a hacksaw for metal or a grinder. These tools can leave metal shavings, and their presence will subsequently adversely affect the performance of the air conditioner.
The cut is carefully cleaned with a file or sandpaper, the shavings are crushed. The hole formed as a result of cutting the pipe is closed with tape or electrical tape, the pipe itself is insulated.
Studs with hooks are attached to the ceiling to fix the freon pipeline. If it is necessary to change the geometry of the pipe, a pipe bender is used, but before that, the insulation is cut and slightly pushed aside. After completing the procedure, the ceiling surface is glued back.
If it is necessary to build up the pipeline, a special expanding machine is used to increase the internal section of the pipe to match it with the external one. Adjust the size gradually - making about three passes, each time increasing the collet size. Otherwise, the pipe may burst.
The hoses are led to the openings of the indoor unit, the fixing nuts are unscrewed and put on the tubes. The ends are cleaned with a file, the shavings are collected with a vacuum cleaner. Using a flare tool, expand the diameter of the nozzle to cover the nozzle of the indoor unit. The tube is clamped, fixed with a nut using keys. One of them holds the nozzle, and the other tightens the nut.
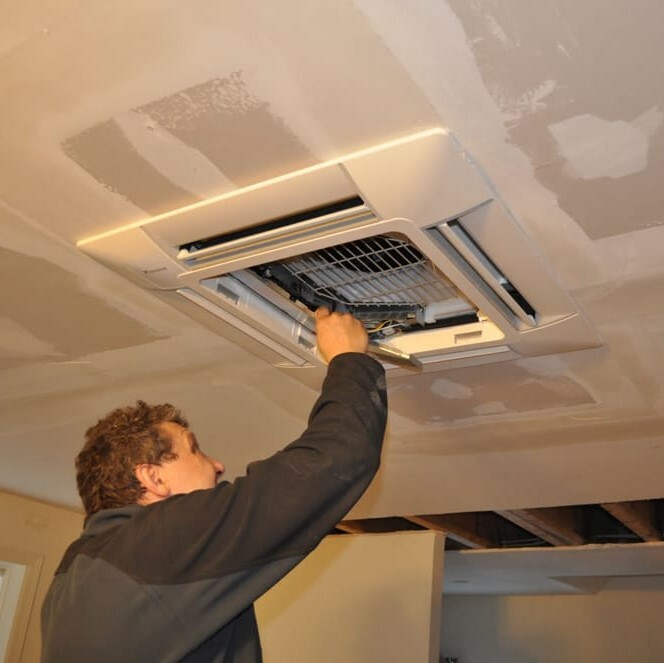
If the nuts are tightened unevenly or insufficiently, there will be a possibility of moisture leakage into the room. If the air conditioner does not fit tightly to the ceiling, the gap is eliminated by tightening the nuts on the studs.
The docking place is insulated, tightened with clamps. Next, remove the air intake grille and put it aside for a while. Then 4 corner plugs are taken out, the motor is found, with the help of which the blinds are moved. This position must necessarily be combined with the connection point of the freon line.
Fix the pad in the area of the brackets on the block, carefully move the latter so that it fits exactly into the hole. With the help of a level, the facing is exposed, the air intake grille is returned to its place, fixing it with plugs on the sides.
The use of the units is limited by the installation height of the cassette air conditioner, because they cannot be mounted in an apartment with a ceiling height of 2.5 m. Based on this requirement, it is recommended to use "cassettes" in rooms with a height of at least 3 m.
Outdoor unit installation
Installation of a street block is possible subject to certain points:
- the rigidity of the surface intended for installation;
- absence of obstacles on the way of air flow exit;
- the presence of metal plates to protect the unit from strong gusty winds;
- the closest possible distance between blocks;
- accounting for the difference between the geometric center of the block and its center of mass.
When moving the unit, do not tilt it more than 45⁰. It is strictly forbidden to lay the module on its side.
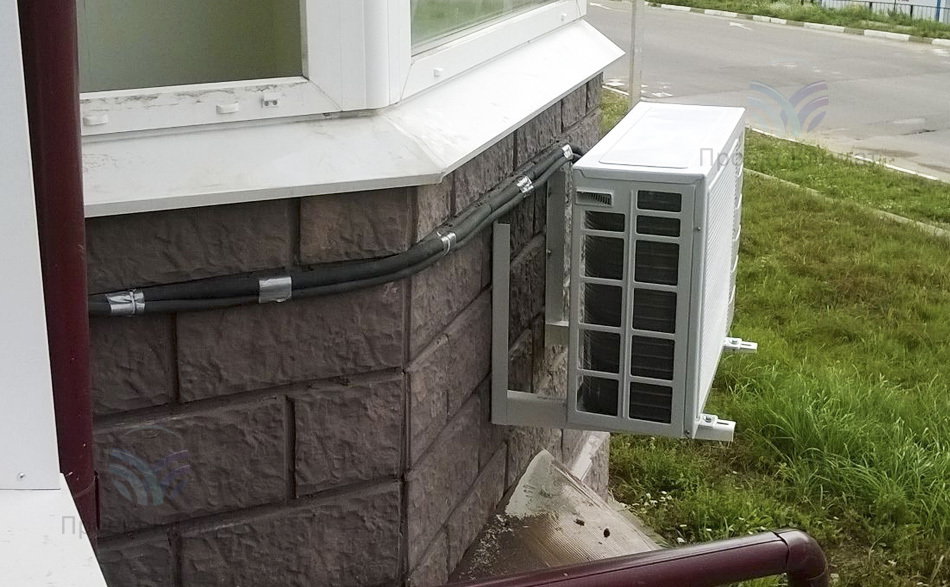
The street block is mounted on a support surface made of brick or concrete. At the same time, the fastening rules and applicable standards are observed, and also the weight of the unit is taken into account.
In the case when the option of "floor" fixation of the external block is chosen, it needs its own concrete foundation, otherwise the structure will not be able to resist the gusts of wind. Fastening is carried out by means of an air conditioner bracket.
After that, a pipeline is brought into the room to remove the refrigerant from the condenser. The main thing is to ensure a minimum of cold losses on the section of the line from the external to the indoor unit.
The place of installation should be chosen so that snow and foliage do not sweep over the module. When the air conditioner is running for heating, condensation discharged from the outdoor unit should not cause any inconvenience.
The nuances of installing the pipeline and drainage system
To increase the service life of the air conditioner, it is necessary to take into account several nuances:
- Do not exceed the length of the refrigerant circuit.
- More than 15 bends in the pipeline must not be allowed. Bends of more than 90⁰ and a radius of more than 9-10 cm are unacceptable.
- After the installation of the sockets, mandatory vacuum cleaning of the circuit from excess air, dust, moisture is required. For this, a valve is connected to the pump along the external circuit. During the procedure, all tubes should be visually checked for integrity.
- To fully ensure the integrity of the system, the joints can be coated with soapy water after filling the tubes with freon.
If necessary, the system is topped up with refrigerant. Refueling is required when the pipeline in one direction has a length of more than 8 m.
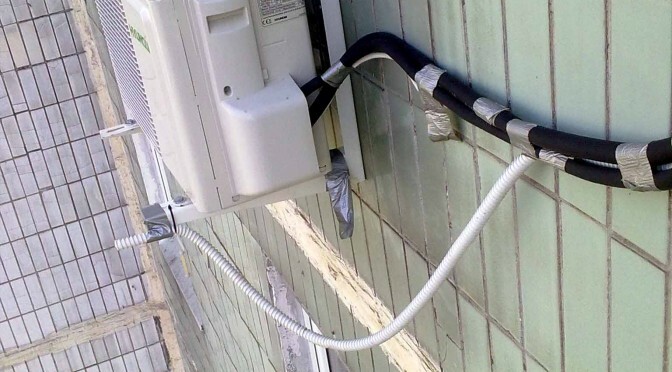
Ideal for draining condensate, when it does not drip on the heads of passers-by, but goes down the drain. This can be done only at the stage of construction or overhaul of the building.
The work on installing the drainage system begins by connecting the plastic pipe to the drainage pump of the indoor unit. It is put on the branch pipe and secured with a clamp. Next, the pipe is pulled to the drain. Usually the outer diameter of the pipe is 37-39 mm, the inner diameter is 32 mm.
The gasket is performed at a slight slope - literally a few centimeters for every square meter. In general, the slope is a maximum of 30⁰, ─ the rise is no more than 20 cm. The waste should leave the air conditioner by gravity and in no case return to the collection.
The other end of the drain pipe should not be immersed in liquid. To check the performance of the drainage system, water is poured into a special hole and the air conditioner is turned on in cooling mode. In this situation, the pump and drain will show their work.
Connecting the air conditioner to the mains
A feature of the cassette air conditioner connection diagram is that it can only be connected to an individual machine. If there is no voltage stabilizer in the common wiring, it is advisable to add this element to the circuit.
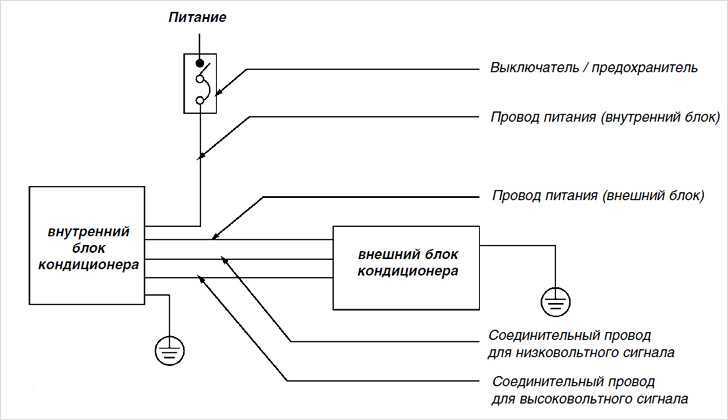
The wires from the evaporator of the cassette-type air conditioner are connected to the corresponding contacts of the outdoor unit. On the inside of the lid, manufacturers usually place a diagram, which greatly simplifies the process.
Both indoor and outdoor units must be grounded. Subsequently, the grounding will be combined into a single loop. If an extension cord is needed, it needs a cable of the same type and section.
It should be noted that the wires must not intersect with refrigeration pipes or shut-off valves. Fuses must be present in the power circuit.
Upon completion of the installation, you need to click on the control panel and start the unit in test mode. You should listen to how the motors in the blocks work. If there are extraneous sounds, rattling or vibration, the unit must be turned off and the cause of the malfunction must be looked for.
Conclusions and useful video on the topic
The experience of installing the indoor unit "cassette" in these two videos:
Second part of the tutorial:
How to connect pipelines and power supply to a cassette air conditioner, you will learn from this video material:
Installation of cassette air conditioners, as a rule, is carried out by masters from the service department. This is explained both by the complexity of fastening, the organization of air communications, and the need for adjustment work. The latter require some experience, since there are many units in the equipment design, incl. electronics and automation.
Tell us about how you installed a cassette air conditioner in your office or country house. It is possible that your recommendations will be very useful to site visitors. Please write your comments in the form below, ask questions and post a photo on the topic of the article.
