Many townspeople love trips to the country for the opportunity to take a break from the hustle and bustle of the big city and breathe in the fresh air. Unless, of course, it is spoiled by poor-quality ventilation in a country toilet with a cesspool, but there is nothing to be done about it, these are the disadvantages of a country vacation.
Or is it still possible to do without the fetid amber that has settled in the latrine?
We will tell you in detail how to correctly arrange air exchange and enjoy a fresh vacation without such small, but still unpleasant nuances.
The content of the article:
- The need to arrange ventilation
- Natural ventilation of the toilet
- Freestanding cesspool in the toilet
-
Natural supply and exhaust ventilation
- What to prepare for natural ventilation?
- Installation of natural exhaust ventilation
-
Forced ventilation of the country bathroom
- Materials and tools for work
- Installation of forced ventilation
-
Other options for dealing with odors
- Option 1 - chemicals
- Option 2 - toilet bioactivators
- Option 3 - peat fillers
- Conclusions and useful video on the topic
The need to arrange ventilation
A country or rural street toilet is usually the simplest building, most often wooden or brick. The place for collecting sewage is a cesspool with or without a container installed in it.
As human waste accumulates, an eerie smell appears - the result of the decomposition of organic matter with the participation of bacteria in it.
The smell is terrible and long-lasting, it is extremely annoying to others, but if you can still somehow not tolerate it impressionable, then the released methane is toxic to humans, it causes dizziness even with short contact and nausea
In addition, fat flies crawl through the sewage and spread the infection with parasites in such a toilet.
Fortunately, the design of the cesspool, and this is how street latrines are most often equipped, allows through the hole in building in a timely manner to remove the accumulated feces, and in addition, in the building it is really possible to equip a functioning ventilation.
Theoretically, it can be included in the already built toilet, but still, it is best to provide for it even at the design stage of the closet.
We will tell you what types of ventilation for country latrines exist and you can choose the most optimal option for you.
Natural ventilation of the toilet
When they say "natural", in most cases they mean the installation of the simplest supply and exhaust structure. But in fact, it is most relevant to talk about the design features of the structure itself.
With this type of ventilation, if you can call it that, odors are removed naturally, thanks to the standard air circulation in the booth. For this, the structure is most often built with gaps - in the lower part between the floor and the walls and in the upper part - between the walls and the roof.
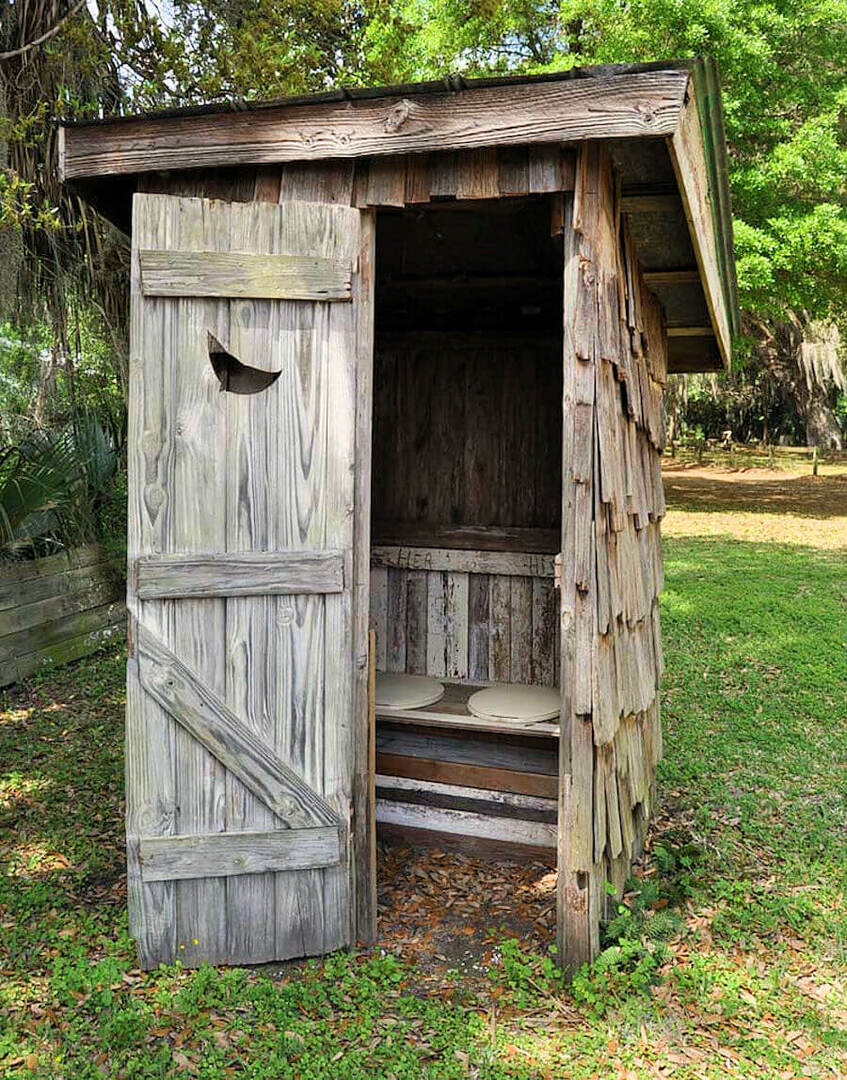
Many outdoor toilets are either equipped with the simplest natural ventilation, or they do not have it at all, as evidenced by the unpleasant amber and rapidly decaying structures even from afar.
And of course, we must not forget about the window, which, however, must be present in any ventilation scheme. The window is not glazed in any case, the exception is constructions where there are 2-3 of them and only one of the existing ones is left open, covering it with a sheet of plywood for the winter, and with a mosquito net in summer. It serves as a natural source of fresh air and lighting.
In villages, such toilets are found quite often and, most likely, that is why the notorious "plowing" is found about latrines in such an area.
Why is such ventilation not effective, although it certainly has advantages in the form of complete absence of costs?
Ventilation conditions are not constant and odor removal is ineffective. In standing weather, air exchange is completely reduced to minimum values.
Freestanding cesspool in the toilet
Some latrines are similar to home ones. In them toilet installed, there are absolutely no natural smells inside. At first glance, perfect. But on the other hand, this design is very complex.
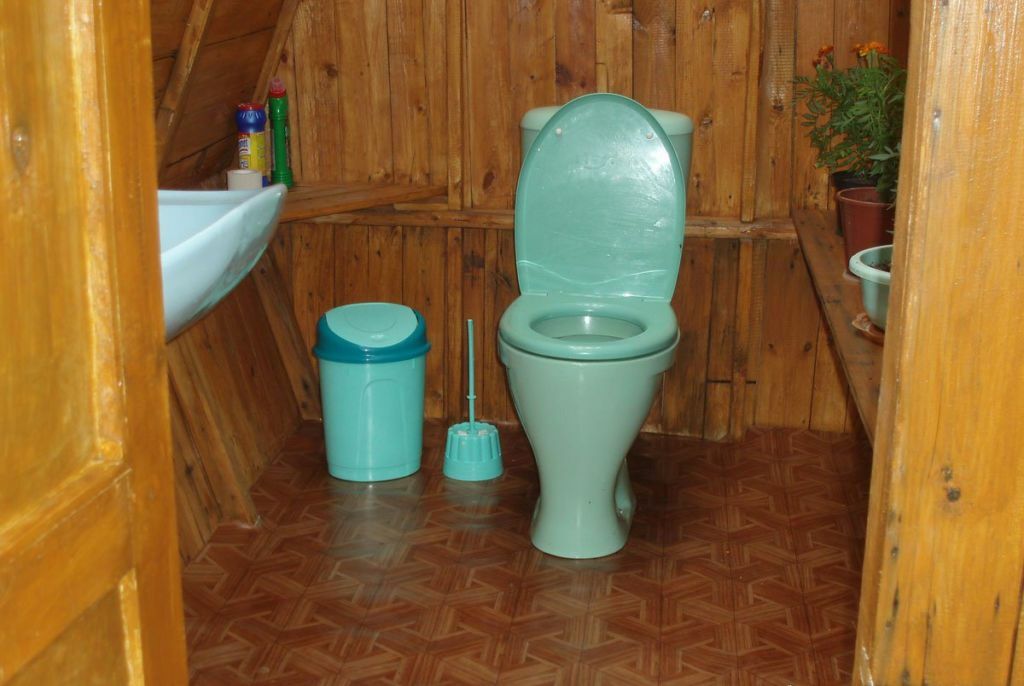
One of the most effective ways to get rid of odors is to install a flush toilet and a free-standing sump. However, this is an expensive construction and takes up a lot of space on the site.
This is a freestanding toilet house with a remote cesspool. On the plus side, there is no need to fight stenchs and flies, everything is clean and comfortable.
Cons:
- the whole structure takes up a lot of space on the site;
- the pit will smell anyway;
- water supply is required for flushing;
- faster filling, just because of the flush;
- it is necessary to arrange a pipeline through which the fecal mass sent to the pit will move.
Due to the large number of disadvantages and the high cost of arranging such a toilet, we will not consider this option, but move on to more rational ones.
We also recommend reading our other articles, where we examined in detail the most popular projects of country toilets:
- Toilet with shower.
- Popular schemes for country closets.
- The toilet is a hut.
Natural supply and exhaust ventilation
This method is one of the most popular. This is due to the minimum costs, both labor during the arrangement, and financial in the process of manufacturing and operation.
All the same house, a cesspool under it, a window for natural ventilation. However, several elements are added to the structure at once.
Airing takes place on a double principle. The cesspool and the booth itself are ventilated. The principle is supply and exhaust.
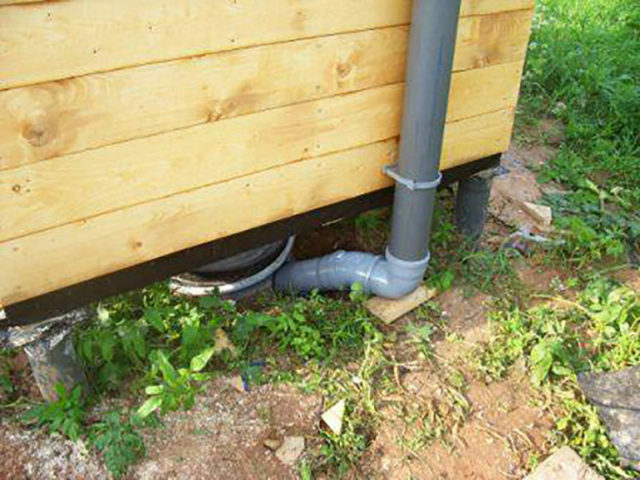
During the design of natural ventilation, you should take care of its arrangement both in the booth itself and in the cesspool.
The downside of the design is less effective ventilation than with a forced system, which we will consider a little later.
Pros:
- minimum costs both during construction and during operation;
- no need for complex care;
- simple arrangement that does not require skills.
In addition, this type of ventilation can be easily arranged even with a standard type toilet already in use.
What to prepare for natural ventilation?
First of all, you need to clean it up in the booth so that it is convenient to carry out installation work in it.
Prepare the following tools:
- drill for wooden structures, perforator for brick walls;
- crowns;
- tape measure, level;
- scissors-pipe cutter for plastic pipes or a hacksaw;
- electrical tape, pliers;
- bayonet shovel.
In principle, every summer resident has such a set, but if you are missing something, ask a neighbor or rent the same power tools from a hardware store that provides such services.
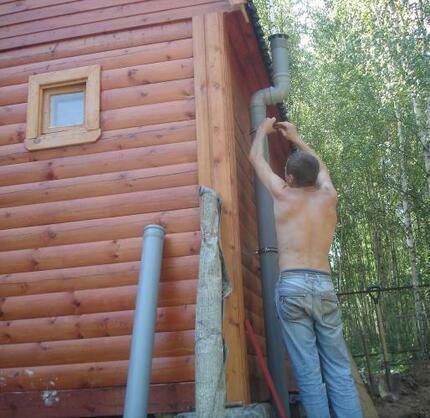
Ventilation materials must be selected for their good quality. They are more convenient to mount, and besides, only in this case they will be able to guarantee the durability of the structure you have built.
In addition, the necessary consumables should be purchased in advance. They are sold in almost any hardware store. They can also be ordered via the Internet, but in principle, there should be no problems with their purchase.
Required materials:
- PVC pipe with a size of 110 mm, the length is determined individually.
- PVC pipe with a diameter of 110 mm.
- Corner PVC pipe for pits that do not protrude beyond the booth.
- Fasteners - clamps with dowels, self-tapping screws for wood or concrete for arranging ventilation grilles.
- Ventilation grilles - 4 pieces.
- Deflector.
- Protective steel sheath made of steel with an inner diameter of 110 mm. It will help protect pipes from deformation during natural wall shrinkage.
Once you have everything ready, it's time to start editing.
Installation of natural exhaust ventilation
To begin with, we will equip the ventilation of the booth. An exhaust duct should be built. The ideal installation height is 15 cm from the ceiling. In general, it should be as close to it as possible, but not closer than the sounded 150 mm.
The second channel is the supply channel. It is placed on the opposite wall - to achieve the maximum distance between the hood and the supply air, as close to the floor as possible, but with a minimum distance of the same 15 cm.
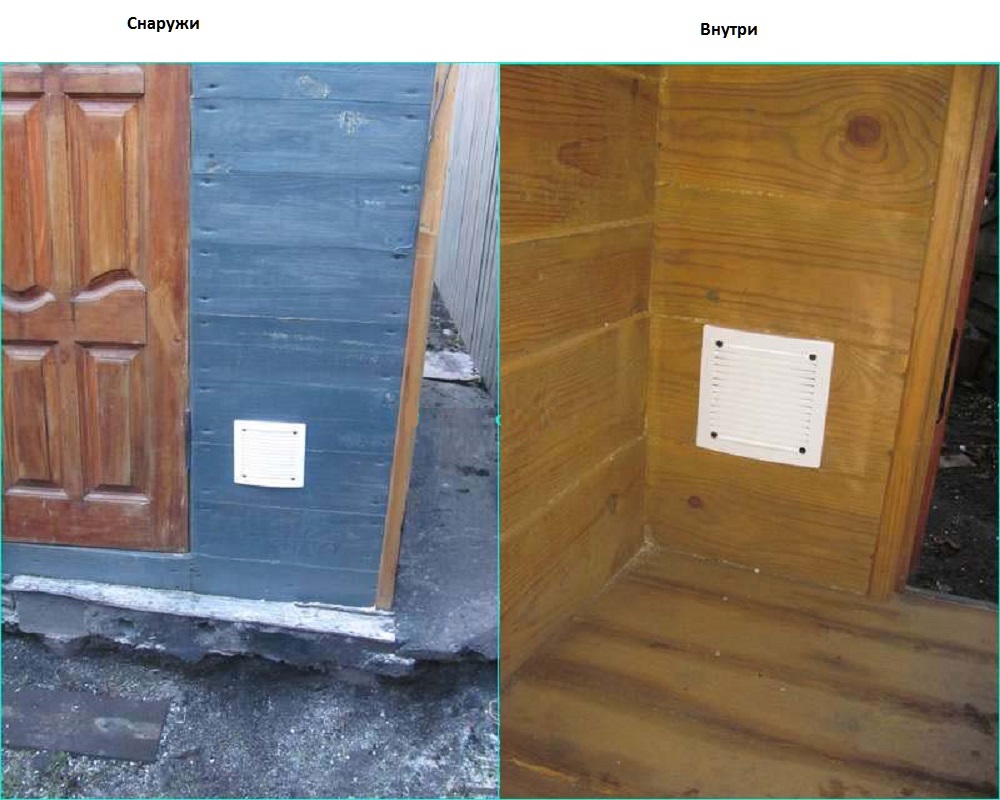
A pipe is inserted into the hole, and the cracks around are blown out with polyurethane foam. It is also necessary to provide a ventilation grill, which you put on the cuts of the pipe in the booth, so that debris does not get into it.
Holes for both canals are made using a drill or perforator, as well as crowns. It is best to pre-outline the location of the holes and their size in the absence of crowns.
Plastic pipes are inserted into the drilled holes, which are cut flush with the walls and their edges are sanded so that they are not sharp. If the holes turned out to be very large, around the pipes you can foam it with polyurethane foam or cover it up with a sealant.
The ends of the pipes on both sides - from the booth and from the street, are covered with prepared ventilation grilles. This is necessary so that debris does not fall into them, midges do not fly in and so that they do not siphon strongly.
Thus, we have provided an extractor hood in the toilet into the ducted duct pipes inside the toilet stall. After that, you can start arranging the cesspool.
The pipe for the cesspool is installed in such a way that one end of it is as close as possible to the area of the waste container, but located in its "dry" area. Calculate the length in such a way that the upper part of the pipe protrudes at least 7 cm above the roof. This will create a draft of sufficient power so that methane can be removed from the pit without any problems.
To arrange a hole, you need to dig a hole with a shovel, into which you need to place a ventilation pipe of the calculated length. If the pit is located directly under the booth, use a corner piece and then dock it to the vertical section.
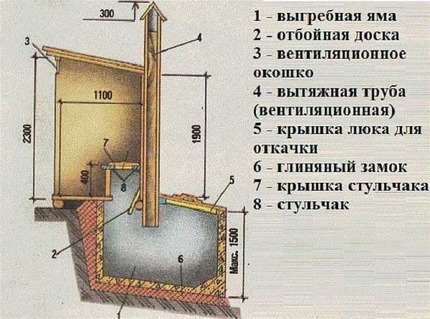
The classic cesspool ventilation scheme looks something like this. If your toilet is still at the design stage, you can download a ready-made scheme of a street toilet with marked drain holes and build a toilet on its basis.
Fix the pipe to the outside wall of the booth with clamps to prevent it from tilting or falling.
Put a deflector on the head, it is best to take a model with a weather vane function, it increases the air flow rate. The main function of the deflector is to prevent debris and precipitation from entering the structure.
Image gallery
Photo from
The pit of the country toilet can be ventilated both from the back and from the side. In this case, it does not matter whether there is a removal of the pit or not.
If you so desire or do not have any other technical possibility of accessing the pit, you can provide the exit of the ventilation pipe through the corner elements directly from the booth. Such arrangement is especially convenient for those who install the structure already during the operation of the toilet without removing the cesspool
Most often, the drainage of the toilet pit is carried out with a removal from the back. But sometimes, for example, due to the limited size of the site, the toilet is built more compact
Side ventilation of the pit without removing the cesspool can be brought out both from the booth and from the side street side
Country toilet with side ventilation
Side ventilation outlet
Toilet cesspool
Sump extraction hood
This way you get efficient air exchange quickly and inexpensively.
Forced ventilation of the country bathroom
The successful combination of natural traction and auxiliary means make forced ventilation the leader in terms of the quality of toilet scent extraction. In addition, it is not so difficult to equip it. The only drawback is that it requires energy, but it's better to talk about this in more detail.
In addition to the above-mentioned method of supply and exhaust natural circulation, the design includes exhaust fan. Of course, it runs on electricity, which means that you will have to pull a cable to the toilet (if you do not have it as an element for organizing artificial lighting).
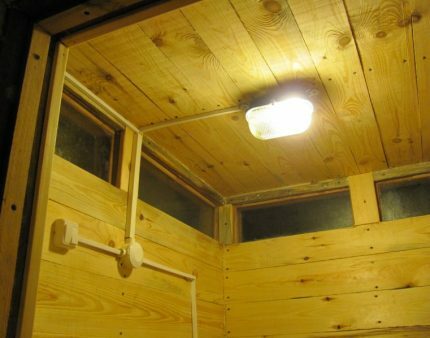
Since you are still equipping an electrically dependent installation in the toilet, you can also take care of the artificial lighting of the toilet with the help of the supplied wiring
These are electricity costs, however, very insignificant. The fan is also inexpensive, but you will have to spend money on a high-quality cable and its insulation.
Materials and tools for work
The list of materials for forced ventilation is almost the same as in the previous version. The only exception is the fan and wires.
You need to prepare:
- PVC pipe with a size of 110 mm, the length is determined individually.
- PVC pipe with a diameter of 110 mm.
- Corner PVC pipe for pits that do not protrude beyond the booth.
- Fasteners - clamps with dowels, self-tapping screws for wood or concrete for arranging ventilation grilles.
- Ventilation grilles - 5 pieces.
- Deflector.
- Fan.
- Protective jacket for pipes with a diameter of 110 mm inside for shrinkage protection.
- Electrical wiring, switch.
Please note that it is not always advisable to buy the cheapest fan. Check with your local store for advice on which device is suitable for most outdoor use.
And if you plan to install it in a window frame, but at the same time you no longer have windows in the toilet, it is better to take care of artificial lighting or additional windows.
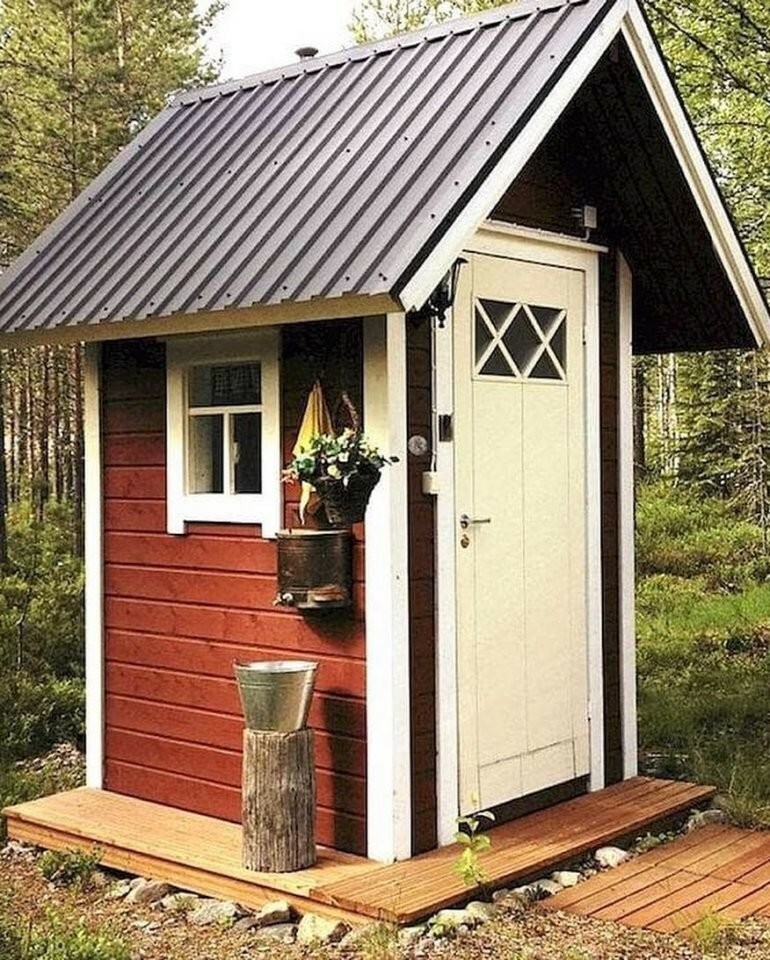
If the toilet has an integrated ventilation system, the windows can be glazed. However, to improve air exchange, it is advisable to leave one uncovered.
In addition, to work, you will need the same set of tools as in the previous version.
Installation of forced ventilation
The installation scheme is also similar, initially they equip the ventilation holes by analogy with the previous version, and then proceed to install the fan.
Electrical wiring is usually lead from the house in the attic. Remember safety - the insulation must be of high quality.
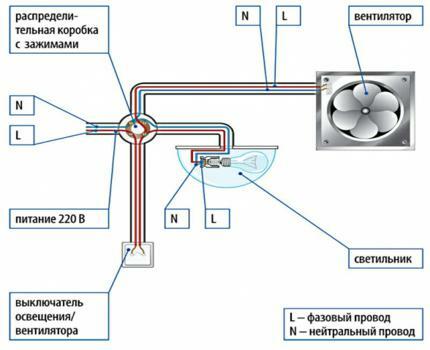
N - zero, L - phase. When choosing a fan, you should not rely on powerful models. Usually, for a room area of no more than 2 sq. m, a 30 W device is enough
The fan is usually installed in a window; when choosing a device, they are guided by the dimensions of the frame. After installation, it must be connected to the switch, put on a ventilation grill over it.
Other options for dealing with odors
We examined everything about the arrangement of the hood in the country toilet and how to make it correctly. Well-installed ventilation is a guarantee of comfortable use of the closet. Do not forget to clean the ventilation grilles in time with warm water and soap, check the draft. And then you no longer have to suffer with toilet amber.
But there are other ways to destroy or mask unpleasant odors. We do not recommend giving up the arrangement of specialized systems, but as an aid, we can offer you several options.
And by the way, most of them also help to reduce the amount of impurities.
Option 1 - chemicals
The first option is chemicals. They work very quickly and can be used at any time of the year.
There are drugs:
- nitrate;
- ammonium;
- bleaching powder.
Nitrates are the safest environmentally friendly. They contain surfactants, help get rid of odors, and even have some detergent effect.
Ammonia preparations are also effective, but note that if you are pouring soap solutions into the cesspool, they should not be used.

Please note that when using this option, waste from the sump must be disposed of. It is strictly forbidden to use composting agents.
And finally, bleach, an extremely toxic substance, but a budget to purchase.
All of these products fight unpleasant odors and can be great helpers for your ventilation. However, remember to be careful and follow the instructions for use.
Option 2 - toilet bioactivators
More and more summer residents are using bioactivators - concentrated products containing bacterial strains. They "work" at temperatures from 0 degrees and above.
Bacteria are actively involved in the disposal of sewage, which also contributes to the elimination of odors.

Please note that despite the environmental friendliness of the choice of bioactivators, it is recommended to use them exclusively according to the instructions on the packaging and keep them out of the reach of children.
The drug is sold in the form of tablets, liquids or powder.
The disadvantages of using include:
- Non-viability at sub-zero temperatures.
- The death of bacteria in contact with a chemical environment.
- Accurate calculation of the amount of the drug, since if there is a lack of it, bacteria will die or simply cannot cope with the volume of sewage.
- Slow result - about a week from the start of use.
As with chemicals, when using a bioactivator, it is very important to strictly follow the instructions on the package.
Option 3 - peat fillers
Peat fillers contain high calcareous peat and are mainly used for dry closets, but they can also be used for cesspools.
They actively absorb moisture, negatively affect the formation of insects, quickly and efficiently recycle waste, and besides, they fight against unpleasant odors.
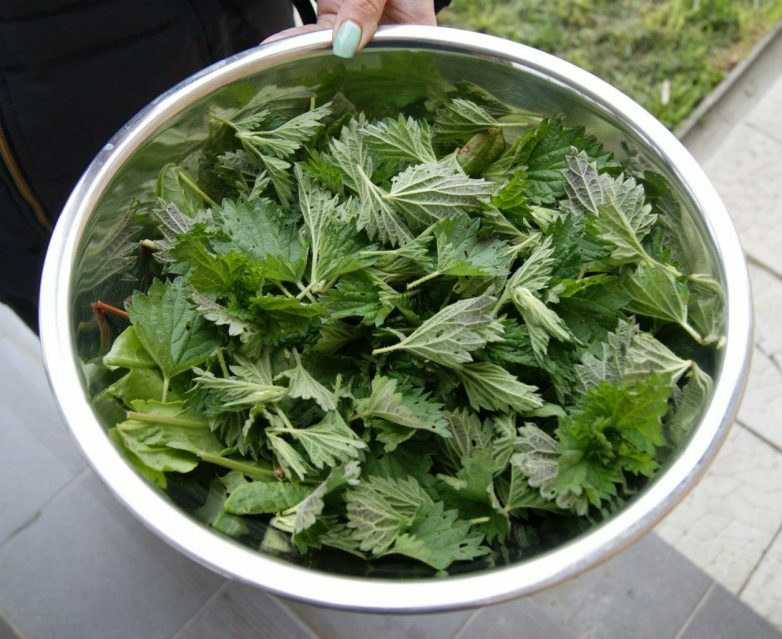
The owners of summer cottages resort to various methods of eliminating unpleasant odors from the latrine. Unfortunately, these methods cannot be more effective than installing real ventilation. But how additional funds will fit and enhance the effect of fresh air
In addition to peat, such means as are also used:
- Sawdust and ash - 1 cup is enough after each trip to the toilet.
- Freshly cut grass.
- Tomato tops and nettles - actively absorb ammonia, which causes an unpleasant odor.
By the way, if you do not use detergents and other chemicals, the cesspools can then be used to create compost.
Conclusions and useful video on the topic
Arrangement of the simplest ventilation in the country toilet:
So, we looked at how to make a high-quality hood in an outdoor toilet and made sure that everything is not as complicated as it seems at first glance. Almost any owner will cope with its installation. You just have to choose the option that suits you and proceed with the installation.
And after that, your closet will certainly not leave unpleasant impressions from visiting its owners.
Have you equipped yourself with ventilation in your country toilet? What difficulties did you face? Share your experience in the comments and ask questions about the topic.


