Your Lemax gas boiler, which worked properly last season or even yesterday, does not turn on? Perhaps there were some problems before, and now he completely refuses to work? Agree, staying in the cold without heating in the house is not a bright prospect.
Most of Lemax gas heating boilers have fairly simple, fully mechanical automation. This means that you can fix most of the problems yourself. This article will help you find and eliminate the reason why the boiler does not ignite.
Consider both external factors that interfere with the operation of the unit and its internal breakdowns. We will give instructions for actions in different situations, and also describe the features of boilers with electronic control.
The content of the article:
-
The non-volatile boiler does not ignite
- Reason # 1 - poor cravings
- Reason # 2 - the gas supply is not adjusted
-
Possible breakdowns and their repair
- Breakage # 1 - Thermocouple is out of order
- Breakage # 2 - traction sensor does not work correctly
- Breakage # 3 - nozzle clogged
- Breakdown # 4 - problems with piezo ignition
- Breakage # 5 - defective gas valve
- Electronic boiler
- Conclusions and useful video on the topic
The non-volatile boiler does not ignite
Most owners of a Lemax gas boiler choose a mechanically controlled device that does not depend on electricity. This choice is justified, since it not only allows you to keep heating when the lights are turned off, but also significantly reduces the number of potential breakdowns and the cost of components.
Perhaps the only weak point of such boilers is the ignition system, which is responsible for the correct and safe start of the apparatus.
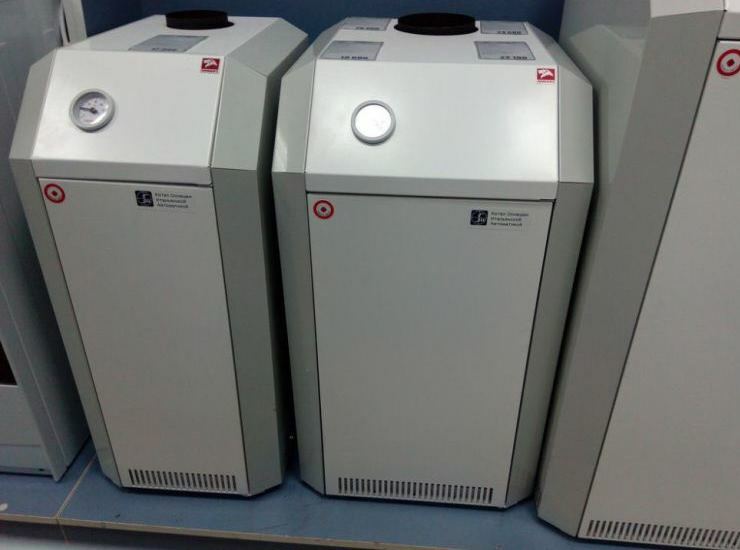
Non-volatile boilers do not issue an error code indicating the reason for the shutdown or the inability to start - you will have to look for the problem yourself
Among the reasons for the failure to start the boiler are both external - the lack of draft in the chimney, insufficient supply ventilation, gas supply problems, and internal boiler failures. We will analyze each option in more detail below.
Reason # 1 - poor cravings
In non-volatile boilers, combustion products rise through the chimney in a natural way, due to the difference in temperature and pressure. These devices are demanding in terms of quality, cleanliness and correct chimney design.
There are several ways to check for thrust:
- if the air is drawn from the room, place a sheet of paper under the boiler. If he pressed against the bottom of the combustion chamber, everything is fine, there is a draft;
- if there is a through window in front of the burner, bring a lighted match into it with the boiler turned off. The flame should stretch out and deflect forward, deep into the furnace;
- boilers with coaxial chimney or two separate pipes take in air from the street - do the test with paper or a match there.
If the draft is normal, you should look for the cause of the malfunction further, for example, in the connection of the draft sensor.
The lack of traction can be caused by various reasons, on which methods of solving this problem depend.
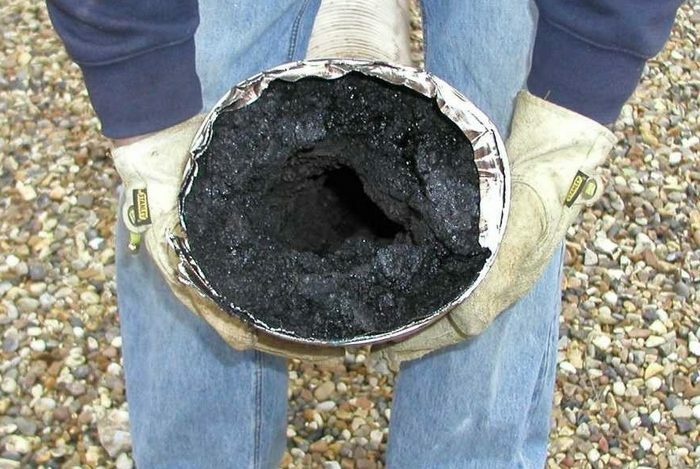
The accumulation of soot in the chimney can reach astonishing proportions, depending on the quality of the gas and the correct setting of the boiler.
Firstly, the chimney becomes clogged over time - with soot, debris, etc. You need it clean regularly, best of all - in the fall, before turning on the Lemax gas boiler after a downtime, do not forget that not only the vertical part of the pipe needs cleaning, but also its elbow leaving the boiler.
Secondly, the pipe for exhausting gases must meet the requirements of the boiler in terms of diameter and height. Also, at the top there should be deflector, which protects against blowing out, and partly also from blockages.
Thirdly, if part of the chimney outside the heated room is not sufficiently insulated, a cold airlock forms in it, which prevents the removal of combustion products.
Finally, draft can be impeded by soot clogging of the burner and heat exchanger inside the boiler. However, their own cleaning can be done only superficially, with a brush. For complete cleaning, with disconnection and washing of these units with soapy water, we recommend using our instruction.
Reason # 2 - the gas supply is not adjusted
Quite often, owners complain that when they try to start, the Lemax boiler flares up, but immediately turns off completely. Most often, the problem is precisely in setting the gas supply to the igniter.
If it is minimal, then when turned on, the pilot burner first flares up, and then its flame goes out, blown out by the turned on main burner. The protection is triggered and the boiler completely shuts off the gas supply.
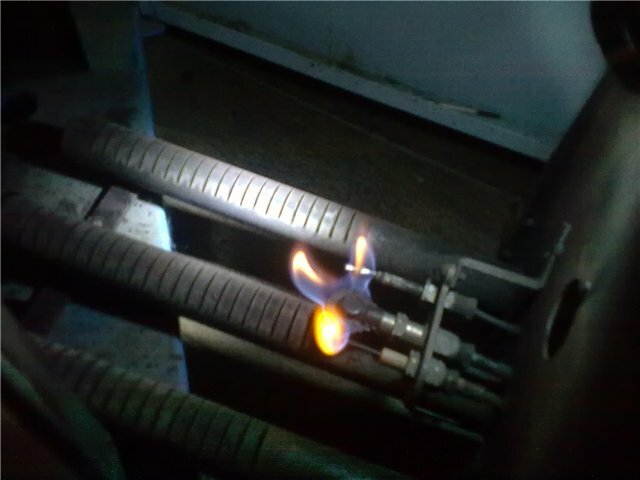
If the igniter burns well, the flame covers both the piezo ignition plug and the thermocouple sensor, but does not come off the burner and does not form scarlet tongues, only blue
Another option is possible when the flame on both the pilot and the main burner is set to minimum. In this case, the wick ignites, but does not reach the gas flow from the main burner, cannot ignite it. If you take a chance and wait, the boiler can ignite with a delay and pop, when the gas accumulates a little in the furnace, or the automation will turn off everything earlier, in order to avoid an explosion.
With too active combustion of the igniter or excessive draft, the flame from it can come off, not hitting the thermocouple sensor and the main burner, which also makes it impossible to start the boiler.
Lemax boilers are equipped mainly with Italian automation 630 Euro SIT or 710 MiniSIT, less often - 820 NOVA SIT. On all these units, the gas supply to the burners is regulated in the same way. Do not rush to turn the screws on the left side of the machine, which are not covered with a cover. Despite their availability, they are intended only for professionals - these are gas pressure measurement taps.
First, remove the block cover by unscrewing one screw on its upper edge. Under it you will see only 2 screws that can be turned with an ordinary flat screwdriver, larger and smaller - they are responsible for adjusting the flame of the burners.
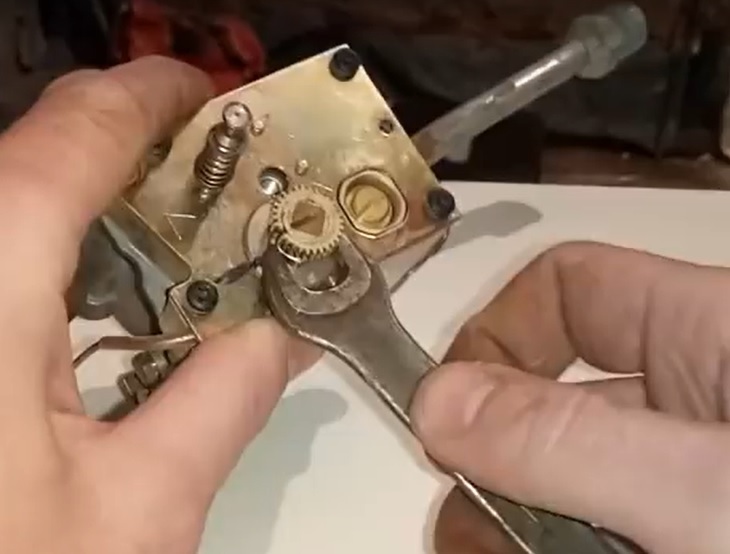
The black screws are needed for disassembling the automation case and have a TORX thread, in the form of an asterisk. This is a kind of protection against unprofessional interference, which can be dangerous.
A smaller screw, located at the far left of the top panel, controls the gas flow to the igniter. By twisting it, you reduce the flame, up to the shutdown of the gas. To make the pilot more active, smoothly turn this screw counterclockwise to the desired result, but no more than 2 turns from the fully tightened position.
The larger screw is responsible for adjusting the minimum flame of the main burner, reducing it will help to increase the efficiency of the boiler. However, do not overdo it: when firing up, the entire burner should turn on at once, and not gradually, and without cotton - otherwise it is unsafe.
On the side panel, near the gas hose connection, there is a screw for adjusting the maximum gas flow, but it is better not to touch it yourself, if necessary, ask to set up a specialist at the nearest maintenance.
Possible breakdowns and their repair
The failure of the boiler to start is not always associated with inaccurate settings or external reasons, but almost always the malfunction can be eliminated independently.
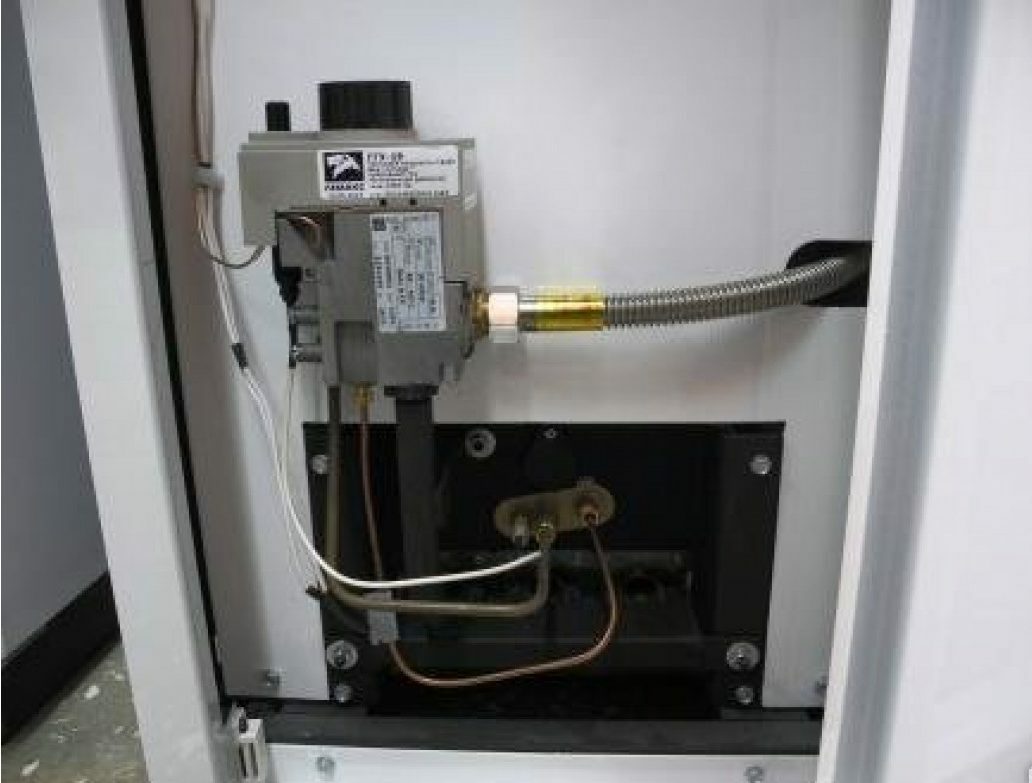
All boilers with SIT automation have a similar structure, it is reliable and easy to configure, almost all units are available to the common user
Before any repairs, turn off the boiler, allow it to cool completely and shut off the gas supply to the riser. Even if you have only the igniter on fire, the risk of getting burned is very high.
Breakage # 1 - Thermocouple is out of order
According to the instructions, if the boiler with SIT automation does not turn on, the problem should be looked for in the thermocouple and only in it. The thermocouple is a flame detector that provides a gas shut-off when the burner goes out.
When firing up, you need to hold down the knob or a special button for 10 - 60 seconds just to so that the thermocouple has time to warm up from the flame and fix the solenoid valve in the open position.
However, there are a number of situations when this protection system is triggered by mistake:
- fire does not hit the thermocouple sensor;
- the sensor is smoked, oxidized, dirty;
- the copper tube of the thermocouple is burnt out or no longer conducts electrical impulses;
- the thermocouple is not screwed well enough into the adapter to gas valve.
It is not difficult to find this part in the boiler: it is a red, copper tube, one end of which is screwed into the control unit from below, and the other into a socket near the igniter and piezo ignition.
First of all, try to slightly tighten the fastening nut to the automation. Poor contact can be the reason for refusal to work. Carefully unscrew the bottom end of the thermocouple, which is heated by the flame.
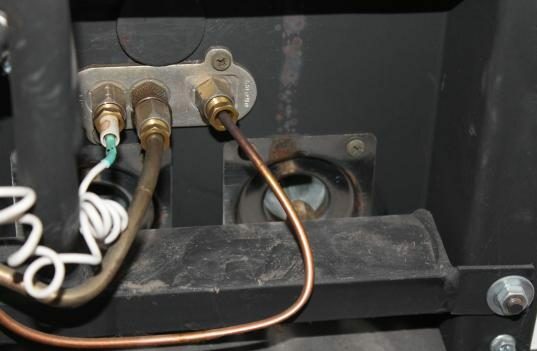
As a rule, all nuts on the panel with the pilot burner are unscrewed with a 10 wrench, and the panel itself - with a Phillips screwdriver
Inspect the sensor and clean it with a heavy duty cloth or finest emery paper. Screw in place and try to start the boiler.
Did not help? Look through the window to see if the pilot flame hits the tip of the thermocouple. If not, bend it by unscrewing the socket on 2 bolts, or adjust the pilot burner flame, as described above.
If you have a multimeter, you can independently check the functionality of the thermocouple. To do this, unscrew both ends of it and pull the part out of the boiler. At the end, which is screwed into the automation box, you will see a lead tip that transfers the charge to the gas valve. Clean it to a shine.
Position the thermocouple sensor so that it is exposed to fire from a gas stove burner or a dry alcohol tablet. Connect the multimeter sensors to the lead tip and to the thermocouple copper tube and measure the voltage. If everything is in order, look for the malfunction further, and if the problem is in the thermocouple, you will have to purchase a new part.
Breakage # 2 - traction sensor does not work correctly
The draft sensor is installed at the base of the chimney and is designed to shut off the gas supply, turning off the boiler if the combustion products cease to be removed.
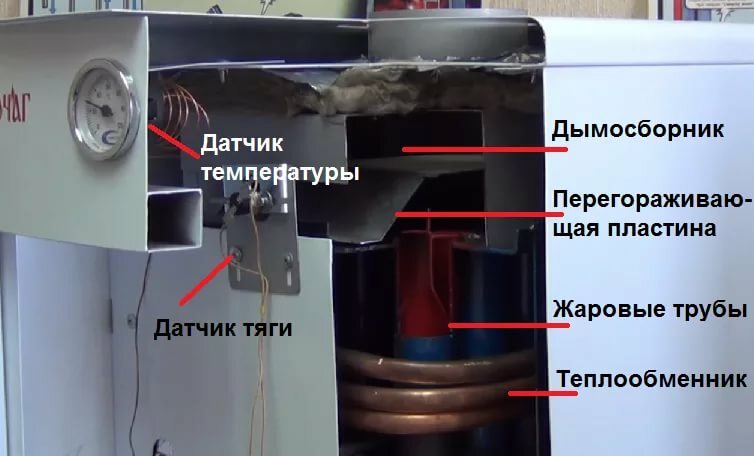
The draft sensor is located under the top cover of the boiler - in the part where the combustion products are most concentrated before being removed to the chimney
Otherwise, carbon monoxide poisoning of the residents of the house is possible, therefore this protection system is mandatory in all gas boilers.
In non-volatile boilers of the Lemax brand, the sensor is connected to an adapter that attaches the thermocouple to the gas valve. If its circuit is opened, the solenoid valve shuts off the fuel supply and the boiler shuts down.
If the design includes an overheating sensor, it is also included in this circuit. Accordingly, with an inoperative sensor, the boiler cannot be started: gas will be supplied only when the handle or a special button is pressed.
The sensor itself rarely fails, usually problems are caused by poor contacts and wires. First, unplug the contacts and clean them with a thick cloth, solvent or alcohol. Inspect the integrity of the wire and their insulation, if possible - ring with a multimeter, if the conductivity is broken - replace it.
Dry the cleaned contacts, insert them into place as tightly as possible, the wires can be soldered to the sensor itself. Try to start the boiler.
If the situation has not changed, try shorting the contacts on the adapter to the gas valve by wrapping them with wire.
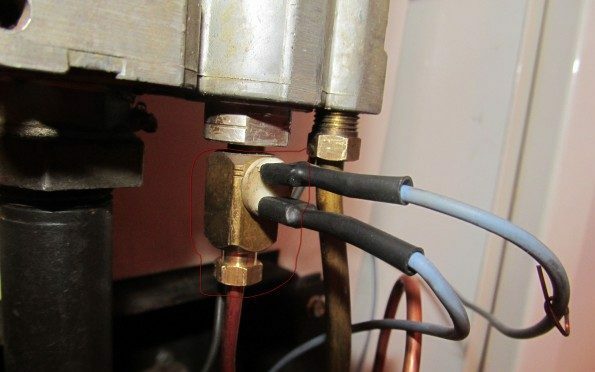
The draft sensor in Lemax boilers is connected to the adapter between the thermocouple and the gas valve, at the bottom of the automation
If this helped, and the boiler started working, then the problem is still in the draft sensor. Do not leave the contact closed for a long time - this threatens your safety! Replace sensor or call a professional.
Breakage # 3 - nozzle clogged
It happens that when you try to turn it on, even the wick does not light up and the gas hiss is not heard, that is, nothing happens. This behavior of the boiler probably indicates that the jet or injector of the pilot burner is clogged.
To figure out how to ignite the pilot burner of the Lemax gas boiler, disconnect the tube that goes to it from the automation unit. On the panel near the burner, the gas supply tube is the middle of 3 connections; for convenience, you can first unscrew the thermocouple.
The nozzle that delivers gas in a thin stream can be the end of this tube or a separate part. Use a toothpick to clean the orifice of the jet and blow through the tube, making sure that air is flowing through.
Remove the panel on which the tube was fixed by unscrewing the 2 screws on the sides. You will see a mesh on the gas supply tube - air is taken through it to mix with the gas.
Considering that the air supply is from below, along the floor, and pets like to bask near the boiler, this mesh can become clogged with dust and wool, which does not always fade. Blow this mesh - only without fanaticism.
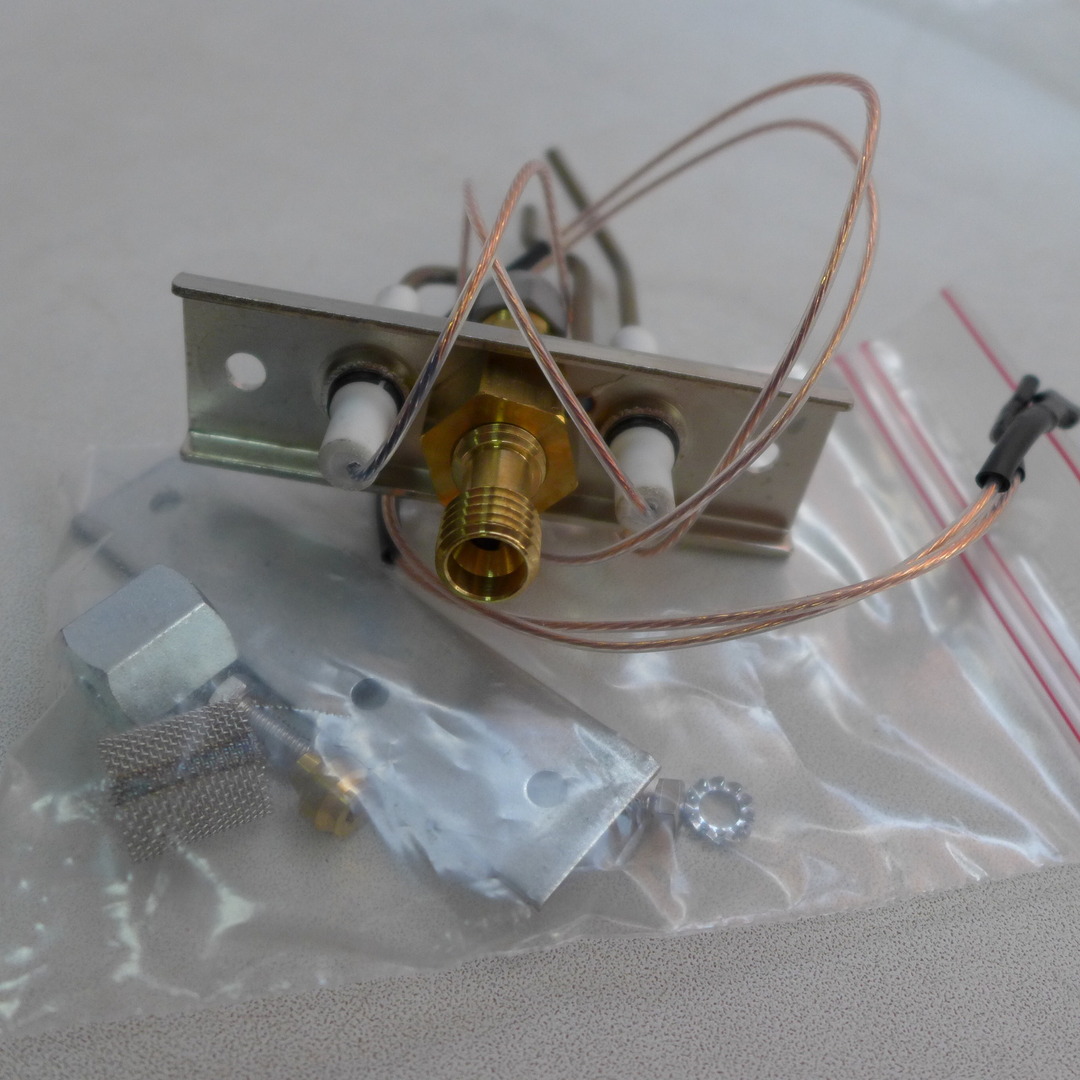
If necessary, the pilot burner can be replaced together with the panel - but it is better to entrust this to a specialist who will correctly set up and adjust the equipment.
Reassemble everything in reverse order and try to start the boiler. A positive result should be heard immediately - this is the hiss of gas supplied to the igniter.
Breakdown # 4 - problems with piezo ignition
Piezo ignition allows you to light the boiler without matches by pressing a button. The block under the button generates an electrical impulse, which is transmitted through the wire to the candle and forms a spark at its end.
The automatic ignition of Lemax boilers breaks down quite rarely, but if this happens, you need to accurately determine the location of the breakdown. To do this, disconnect the wires from the spark plug located near the igniter and try pressing the button. If you hear a characteristic click, then the electrode is faulty, but if there are no clicks - the block under the button.
You can try to remove carbon deposits from the candle by unscrewing the panel with the burner and thermocouple. Buy a new part and replace if necessary. To remove and replace the unit with the button, it is enough to remove the cover of the automation unit.
Breakage # 5 - defective gas valve
The gas valve is responsible for supplying fuel to both burners and also shuts off the gas in emergency situations. At the bottom, the solenoid valve is controlled by a thermocouple and a draft sensor, and at the top, the pressure is controlled by a balloon-bellows thermostat.
The system is multicomponent, and the part is perhaps the most important in the boiler, therefore it is not recommended to interfere with its operation on its own.
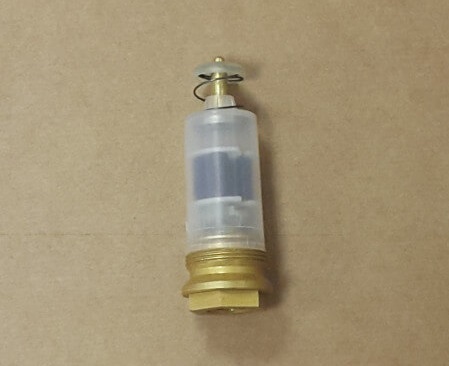
The solenoid gas valve is opened either when the thermocouple is heated, or mechanically - by pressing a knob or a button, depending on the boiler automation model
Having heard from a specialist about possible problems with the gas valve, do not rush to be upset: it may not be necessary to replace it. With prolonged use of the boiler, lubrication may develop and adjustments may be required.
You can get to the valve yourself by unscrewing the adapter into which the thermocouple is attached and turning the valve itself out. This is not easy to do - the valve is tightened very tightly to avoid leaks.
From above, the SIT control unit can only be disassembled using a special screwdriver or a key with a head TORX T-20. Before disassembling the control box, be sure to mark the position of all knobs and adjusting screws.
Electronic boiler
The line of Lemax boilers, which are connected to a 220V network, is actively expanding and now includes wall-mounted double-circuit modelsPrimeas well as floor Clever and Wise.
Unlike imported competitors, whose control boards often burn out due to changes in the power grid, these devices are designed to work in the conditions of Russian networks.
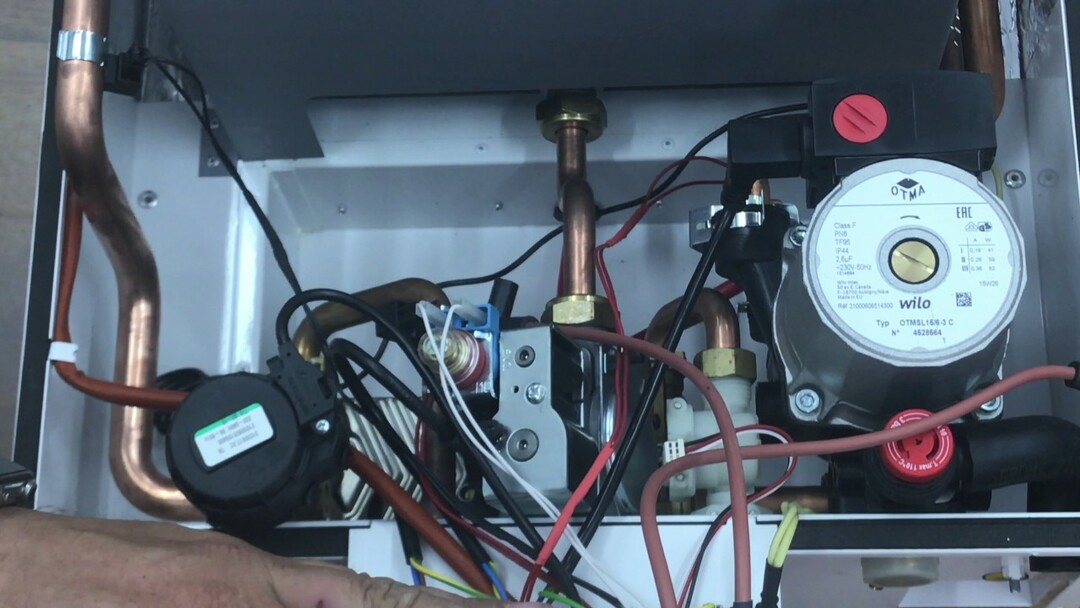
Wall-hung boilers usually have a built-in circulation pump, an expansion tank and much more control and protection systems.
However, such models can sometimes fail.
To ensure safety, the main protection systems are still mechanical:
- the thermocouple controls combustion and shuts off the gas if the burner goes out - error E1;
- the draft sensor gives a shutdown signal if the combustion products are not discharged - error E3;
- the diaphragm gas valve will cut off the fuel supply if its pressure drops below the critical one, or the gas is turned off in the network - error E1;
- the overheating thermostat controls the temperature of the heating circuit; in case of overheating, it turns off the boiler with error E2.
All these systems are arranged in the same way as in mechanically controlled boilers, and their location depends on the model. Therefore, we will not re-describe the check and repair of each unit, but the instructions for it will help you find them in your boiler.
In addition, the electronically controlled boiler does not start if it detects a malfunction of any of its boards or sensor, or their unsatisfactory readings - for example, low water pressure or supply voltage less 170V.
In order not to have to go through the entire boiler, the error code and its decoding in the instructions will indicate the location of the malfunction.
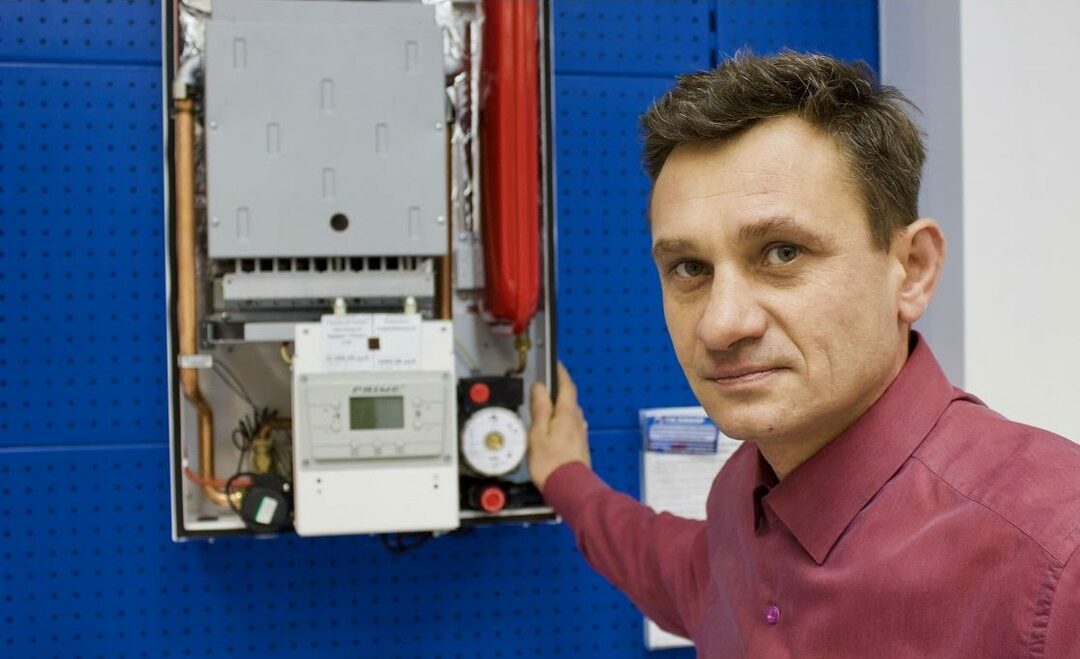
For setting up and repairing electronic controls, it is better to contact a specialist, he can rewire, reflash or replace the board
If the boiler does not react at all to an attempt to turn on, even the screen does not light up, most likely there is a problem with the power supply. As trivial as it may seem, check if the plug is plugged into the outlet, if the machine is raised, and if there is any light in the house at all.
A child could have pulled out the plug from the outlet, and the machine could be disconnected from a voltage drop, so do not neglect this advice.
If everything is normal with the power supply, and the boiler display does not light up, call the service department for diagnostics and repair or replacement of electronic control elements.
Conclusions and useful video on the topic
It is described in detail and clearly why the wick on the boiler with EuroSIT 630 automation, which many Lemax models are equipped with, does not light up, described in this video:
You can get acquainted with the Lemax electronically controlled boiler in the following overview:
Now you know what to do if one day your gas boiler does not start. Keep calm and check everything step by step - and you will surely be able to restore the heating in the house.
And what model of Lemax gas boiler is installed in you? Were there any problems with launching it and how did you manage to solve the problem? Tell other visitors of our site about it - join the discussion in the comments.


