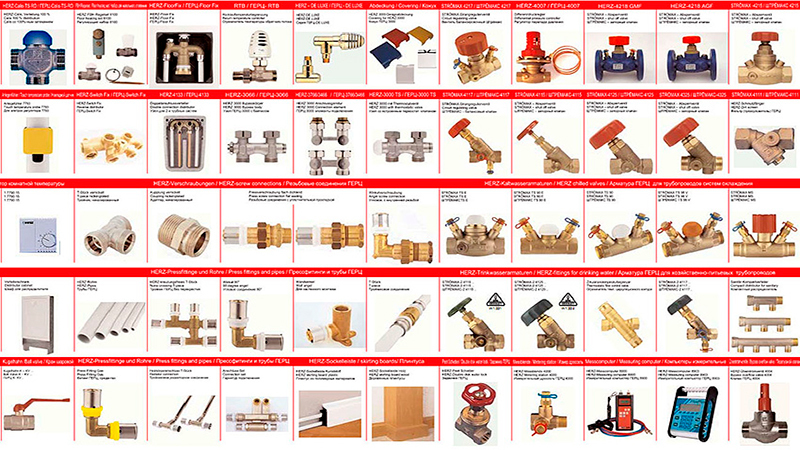
- What you need to repair
- We are making a single-lever ball-type mixer
- Repairing a two-valve crane - the main tips
- Some advice on prevention
The kitchen faucet provides us with water dozens of times a day. Not surprisingly, it breaks down more often than in the bathroom. Before you call a plumber or buy a new mixer, it's worth trying to repair it yourself.
If you are reading this article, it means that some of these failures happened to your mixer:
- The tap is leaking, water is dripping from under the handle;
- Water drips from the spout, even when the valves are closed;
- When the mixer is opened, a droning sound appears in the pipes;
- The jet of water is too thin;
- Single-lever mixer works "jerks
- Water flows out from under the union nut on the spout;
- The lever of the crane is not fixed in the required position;
- Leak in the flywheel area (valve constructions).
What you need to repair
Before you start repairing the kitchen faucet yourself, you need to prepare all the tools and necessary components of the crane.
You will need:
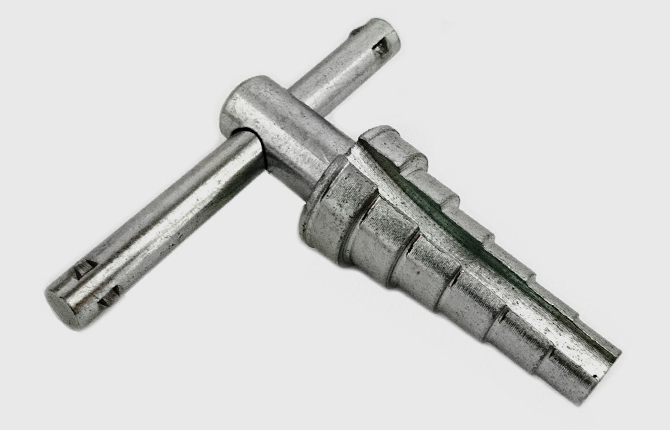
- The key for hexahedrons;
- The key for adjustment;
- Knife-cutter;
- Screwdriver and hammer.
Also, repair requires additional materials - dry rags, grease. And if the tap is leaking, you will have to buy spare parts: a new cartridge or its parts (for a single-lever mixer), seal rings, crane-bushbox (for a two-piece design).
.We are making a single-lever ball-type mixer
The reasons for which you want to repair the crane, there are four:
- Cracks, chips, caused by mechanical damage to the body;
- Litter in the cartridge between the seats and the ball;
- Wear wear;
- Blockage or rust of the aerator.
What if there was a defect on the case? You can try to repair it by cold welding - sealant (putty). But it, nevertheless, is a temporary measure, and soon it will be necessary to replace the mixer.
If the problem lies in the low water pressure, then, most likely, the reason is a clogged aerator. Then you need to get it, clean the mesh, for example, with a toothbrush, and then install it back.
Let's deal with the faults more seriously.
When the tap is flowing without visible damage, it is most likely a violation of the integrity of the gasket or the failure of the cartridge. In this case, a complete disassembly of the kitchen single lever mixer is required.
How to disassemble the tap? First, shut off the water and empty the remains of the tap. Then study the device of the single-lever kitchen faucet in the photo.
Now start the repair step by step:
- The screw is unscrewed on the main body. It is usually hidden behind a decorative cover, which must be removed with a screwdriver, as shown in the photo.
Advice! You can disassemble and repair the device, even if you do not have an allen key at hand. For this, the fastening nut is gently taped with a hammer on the screwdriver.
- The lever and cap are removed, and now we need to get the cartridge and inspect the whole device for defects. To do this, the washer-cam is unscrewed by the adjustable wrench.
- The dismounted crane is inspected for defects: the gasket, the surface of the ball and the springs supporting the rubber seals in the holes are inspected. Sprung springs and a worn-out faucet, if necessary, are replaced. At this stage, you need to clean all the parts from the accumulated water deposits.
- Most often, the flow from the tap arises from the resulting clog between the ball and valve seats in the cartridge. In this case, you just need to change it. The whole complexity of this task consists in the proper choice of the cartridge, and the repair of the mixer by its own hands is quite simple.
Advice! Going to the plumbing shop for a new cartridge, take with you an old one, so as not to lose with size, because cartridges are not standardized - they are produced in a variety of diameters and materials.
The new cartridge is installed in such a way that its holes are aligned with the holes inside the mixer body. Then screw back the washer (first with your hands, then tightly, but not too tightly with a key).
- We check the quality of our work by letting water out. If it does not leak, then proceed to the installation of the cap, and then the lever - we twist the screw in it and fasten the plug.
And how to change the gasket in the mixer? This is also quite easy. It is necessary to remove the old O-rings and change them to new ones, which we previously apply a little plumbing lubricant.
Advice! For all rubbing parts of the product, use non-toxic grease on a silicone base. This will increase the service life of the structural elements by half.
Repairing a two-valve crane - the main tips
How to fix this type of mixer? It is necessary to disassemble and replace worn out elements - a crane-axle and / or a gasket.
The sequence of work in this case will be as follows:
- The water completely closes, after which the flywheel of the valve is put into operation so that the overpressure does not act on the part.
- Next, you need to disassemble the design - for this, the decorative caps are removed and the screw securing the flywheel is turned out. This requires a screwdriver. Further, the old crane-box is replaced with a new suitable size, and the construction is assembled back.
- If the gasket is worn out, it is simply removed, and a new one is installed in its place, lubricated with sanitary lubrication.
Often, faucet mixers need to be repaired due to the fact that the oil seal has leaked. Then it must be disassembled according to the same algorithm and replace the worn packing.
And sometimes in order to adjust the valve valve, it is enough just to tighten the stuffing box, as shown in the video:
Advice! Replacement packing is only needed when the bushing is tightened tightly, and the leak is still present. As packing is used (for old mixers):
- Rubber tube of appropriate dimensions;
- Threads of sacking;
- Twine with impregnation from drying oil.
If you see that the carving has worn off on the details, it means that it's time to update the plumbing.
Some advice on prevention
The ability to repair a kitchen faucet yourself is a great way to save money. However, not always repair can completely restore the efficiency of the crane and it is often easier to simply change the mixer in the kitchen.
Keep in mind that:
- The most durable are the structures of heavy metals (brass);
- The most substandard - Chinese or Turkish products from silumin;
- Convenience of the single-arm device is obvious - it is opened with one free hand. Also it is easier to repair, because the design of a smaller number of parts.
- Repair of the mixer can be prevented. Most often, the main cause of malfunctions is pollution coming from the water main. Therefore, the installation of special filters for coarse water purification will help you keep the mixer intact longer.
. Loading...
Read also:
- . Choose a mixer for the kitchen.
- . 5 steps to install the mixer in the kitchen with your own hands.
- . Choose a kitchen sink in 5 simple steps.
- . Installation of kitchen sink - instructions, tips, video.
- . Corner kitchen sink - choice and installation.