Shelves for flowers - a functional and decorative element of the room. The variety of finished products is amazing. But you can save money and make them yourself. The main thing is to choose the design you like, get acquainted with the method of its manufacture, then purchase the necessary materials and, strictly adhering to the sequence of operations, make it.
The content of the article:
- Design Options
-
Step-by-step instructions for different options for flower shelves
- Wooden shelf for flowers "ladder"
- Corner wooden flower shelf
- Wall shelf for flowers "vine"
- Wrought iron flower shelves
- simple flower shelf designs
Design Options
The classification of flower shelves is huge. First, let's take the installation method as a basis:
- floor;
- wall;
- suspended in the form of a swing.
By configuration:
- straight;
- corner;
- rounded;
- multilevel;
- in the form of an arch, etc.
Floor are divided into:
- whatnots;
- racks;
- stairs;
- A-shaped design, etc.
All of the above options can be extended. There are modular designs, stationary or mobile, they are also mobile.
According to the material of manufacture:
- wooden;
- metal;
- plastic;
- glass;
- combined.
In the first group, not only wood, bars and boards are used, but also wooden products - plywood, OSB, chipboard, etc. In the second - a pipe, a corner, fittings, wire rod and other metal profiles.
If you have a desire to make flower shelves with your own hands, then choosing a model, design and material is not difficult. This is especially true of the latter, because some materials are easy to work with, others are more difficult. Sometimes skills in working with welding machines and electric tools are required.
Read also - how to make a wooden floor hanger with your own hands.
Step-by-step instructions for different options for flower shelves
Here you need to consider one point - what material the shelf will be made of. Accordingly, tools and fasteners will be selected. Assembly technology will also be different.
Wooden shelf for flowers "ladder"
In fact, this is an ordinary ladder with steps that will act as a flower stand. It is only better to make these steps long, through the entire structure. This increases the space, which makes it possible to install more flower pots on the shelves.
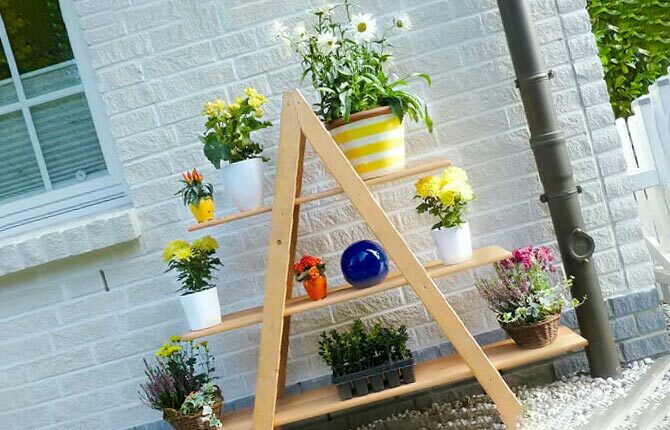
First of all, you need to decide on the height of the ladder shelf. The higher it is, the more flower stands you can install. But there is one negative point - the higher, the more difficult it is to care for the plants located on the upper shelves. Therefore, the optimal size is 1.5-1.8 m.
For the manufacture will require 4 bars 30x50 mm. The length of each is 1.7 m. They need to be folded in pairs to form the letter “L”. The top edges are overlapped. You can do everything professionally: apply markings, make precise cutting diagonally, taking into account the angle of joining of two bars. But it can be easier, because a homemade flower shelf made of wood will look good in any case.
Therefore, the upper edges of the bars, stacked on top of each other, are fastened with two or three self-tapping screws. You can’t do it alone, you get a movable joint like a hinge. The length of the self-tapping screws is selected taking into account the width of 2 bars - in our case, the length should be 60 mm. One is screwed on one side, the other or 2 immediately on the opposite side.
Two L-shaped elements are ready. Now they need to be connected to each other. To do this, you need the same bars 30x50 mm long, equal to the distance between the L-shaped racks. This parameter is limited by the possibilities of the location of the shelf for flowers. A large design is the ability to install a large number of flower pots on it. But a massive shelf takes up a lot of space and is more difficult to move. The optimal size is 50 cm.
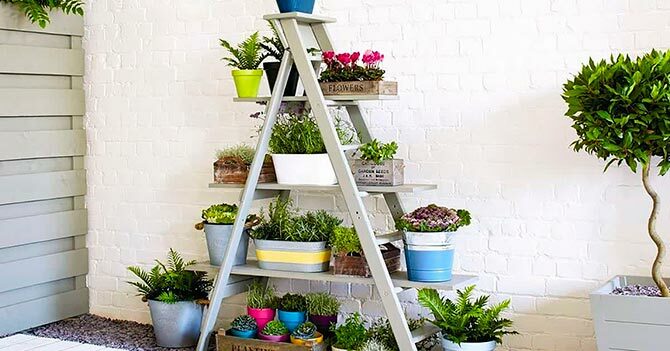
To connect the L-shaped elements, you need 2 times more crossbars than the crossbars on which the flowers will be installed. If there are 3 of them, as in the photo, then 6 pieces are needed.
Here it is not necessary to precisely adjust them to the required parameter (join the crossbars with the uprights along the internal planes of the latter). You can lay them on top of the ends, which will make it possible to cut the crossbar if it was cut incorrectly. The main thing in the whole structure is the strength and rigidity of the connection between the elements.
The photo shows 2 options for connecting crossbars with risers. The outer part of the ladder for flowers is a connection along the inner surfaces of the L-shaped elements. The second distant, it is also left, is the connection of the crossbars at the ends.
The next step in the instructions is the preparation of the shelves. They can be made from boards, plywood and other wooden elements. The width of 50 cm is the distance between the L-shaped racks. The length is selected taking into account the area protruding beyond the racks of the shelf, on which 1-2 flower pots can be placed.
These shelves can simply be laid on top of the crossbars, but it is better to fix them with self-tapping screws - 2 on each side is enough. Sometimes you need to lift the last pot, for example, to replace it with another. In this case, a flower that stands on the opposite edge can create a load. Under its action, the principle of the yoke will play, causing the shelf to turn over.
Crossbars can be installed not between the L-shaped elements, but inside them. The letter "A" will be formed with several crossbars. The shelves laid on them must be fixed with self-tapping screws so that the product does not crumble into pieces.
The distance between the shelves is determined by the height of the flowers that will be installed on them.
Shelves for flowers in the form of a ladder - this is a huge variety of designs. For example, a classic ladder, in which one part is a ladder with steps, the other is a support that supports the first one from falling back. Flower pots will be placed on the steps.
Another model is the classic staircase. Only she has steps - not ordinary crossbars made of boards mounted on an edge, but boards or pieces of cut plywood laid almost in a horizontal plane. The angle of inclination is equal to the angle at which the ladder will be applied to the wall.

It is easier to make than previous models. Two long slats are fastened together by crossbars, they are also in the classic version of the step. Shelves cut out of plywood, OSB or chipboard are installed on them, which are attached to both the steps and the racks. At the same time, a slope is formed so that the shelves, after installing the ladder, are in a horizontal plane.
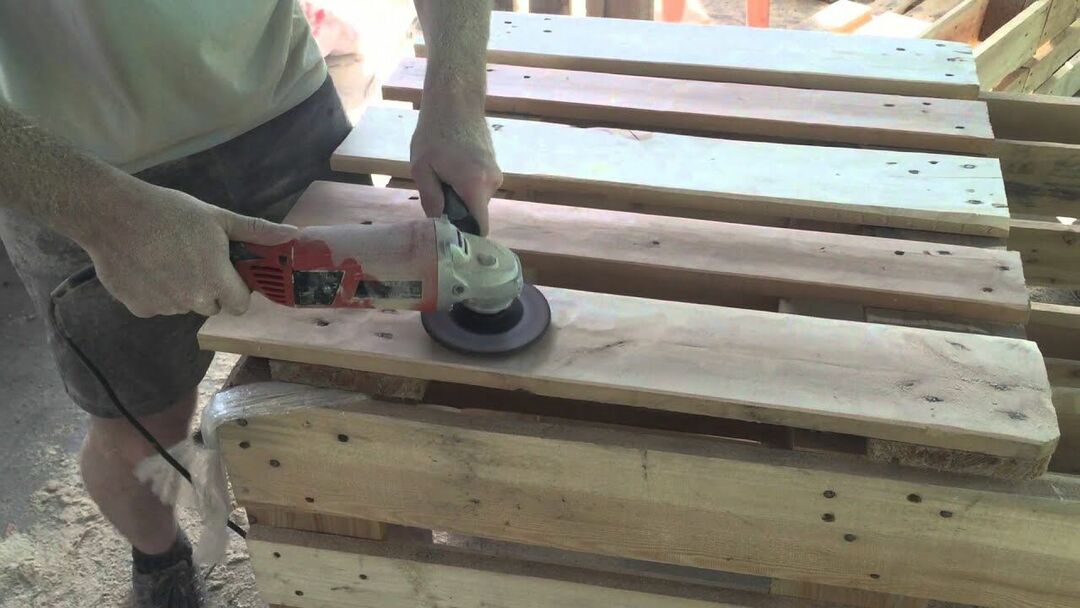
In order for a wooden flower shelf to have a presentable appearance and last for a long time, you need to process all the elements of its design:
- All surfaces are cleaned with fine sandpaper.
- Treatment is carried out with an antiseptic composition. It will become a protection against mold, which can appear when water is spilled on a wooden shelf during the process of watering flowers.
- The whole product is covered with paint or varnish. The latter is widely represented on the market - it is not only colorless. There are multi-colored varnishes that will help fit the ladder into the interior of the room.
Such a flower shelf can be made mobile. To do this, furniture wheels must be attached to the racks of the L-shaped elements.
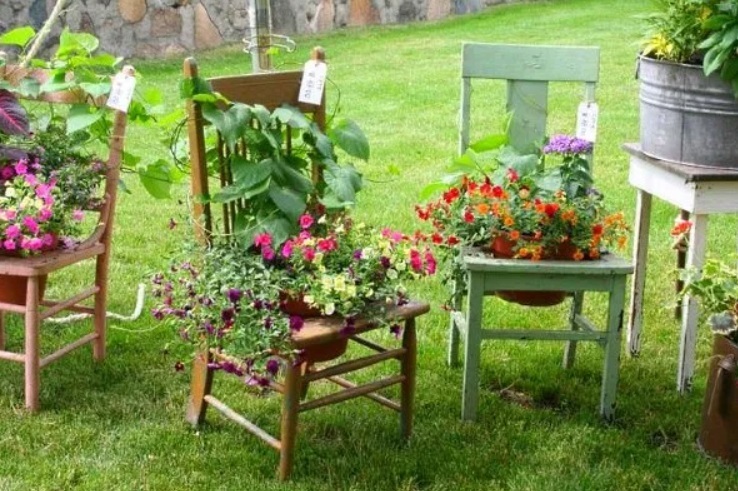
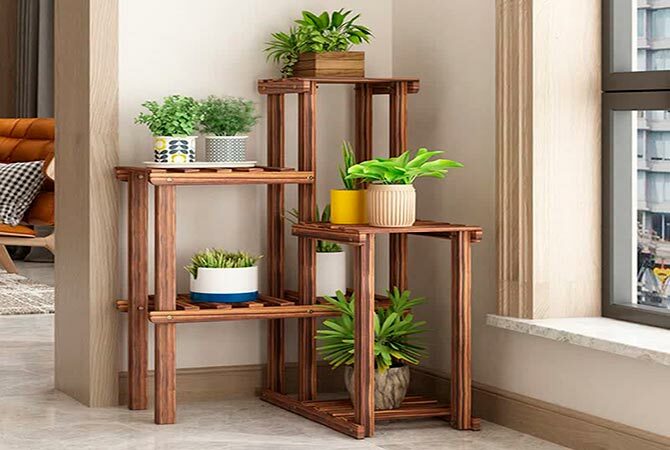
There is another interesting option, which can be called not a ladder, but a ladder. Its shape is exactly like a ladder, which is used to move from floor to floor. Structurally, these are 2 side bearing bases on which steps are laid. There are difficulties in the construction here. Therefore, for making your own hands, it is better to take a different design as a basis. It is clearly visible in the picture below.
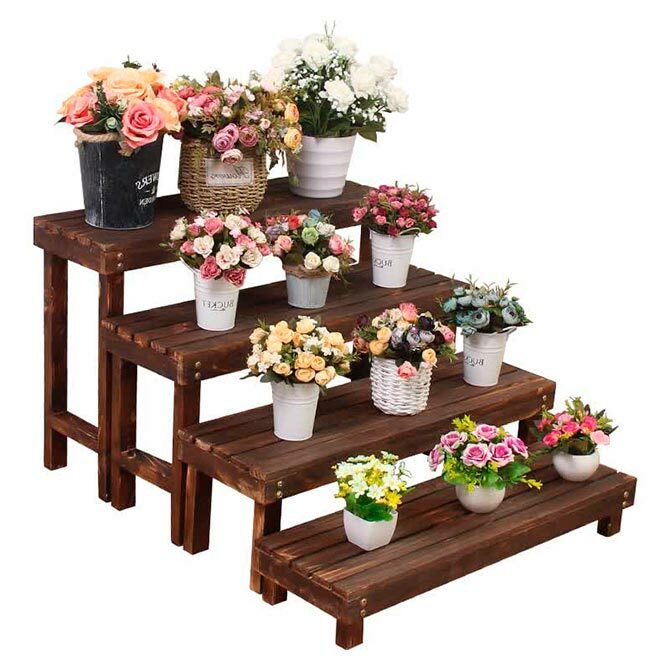
In fact, these are 4 benches, drawn and attached to each other. It is necessary to make these same benches of different heights. The shelf option is also interesting in that the installation sequence of the benches can be changed at your discretion, transferred individually, which is also a big plus.
Preparation method:
- From a bar with a section of 50x50 mm, 4 racks of the same length are cut out.
- They are tied with bars of the same section around the perimeter (2 long slats and 2 short ones are used).
- A flooring of 25x50 mm bars, boards 20-25 mm thick or plywood 12-16 mm thick is laid on top.
- Fastening - self-tapping screws. You can use nuts and bolts.
Corner wooden flower shelf
This type of flower shelves is considered an economy option. It can be used to fill areas that are rarely used.
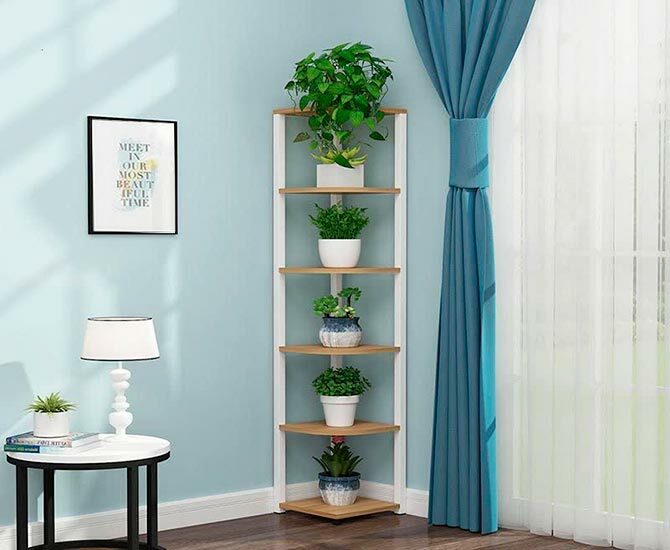
In fact, this is a bookcase that is placed in the corner of the room. The height and width of the shelf is chosen at your discretion. The picture clearly shows the design of the device. These are 3 racks, between which shelves for flower pots are distributed in height. The latter can be square or rectangular (the lowest) or with a rounded outer corner (all the rest).
What you need:
- 3 rails with a section of 50x50 mm.
- Shelf material - any flat wooden product: plywood, OSB or laminated chipboard. You can use wide boards.
Here it is important to decide on the method of attachment. The best option is on metal perforated corners. To do this, it is necessary to make seats under them in the racks, because the junction of the stand with the rack runs along the corner (edge) of the latter. Therefore, the height of the shelf of the metal corner is measured.
The size is transferred to the rack, where a cutout (recess) is made for the fastener. Here it is important to ensure that the mounting holes hit the rack to which the shelf will be attached.
In this way, the entire structure is assembled, starting from the extreme crossbar for flowers to the opposite. There is another option - 3 racks are interconnected by crossbars made of bars of a smaller section, for example, 30x30 mm. They are mounted inside the structure so that the shelves themselves could be laid on them. In this case, the latter are not attached to the racks. This option can be floor and wall.
Corner shelves for flowers - this is also a huge variety of designs. Here you can use the same benches, placing them along adjacent walls. Or assemble a single non-separable whatnot, where the levels are located on different sides at different heights.
Despite the apparent simplicity of the flower shelf in the photo, it is actually not so simple. But you can do it yourself. The main thing is to choose the right dimensions and clearly think over the assembly sequence.
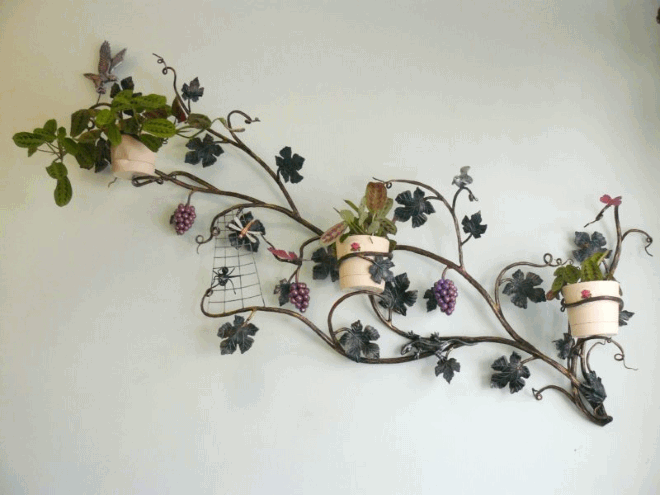
Wall shelf for flowers "vine"
This version of the flower shelf is the most difficult. It is made from metal. Twisted and curved elements require special equipment and fixtures in the manufacture. All elements are interconnected by electric welding, which requires a welding machine, tools for it, and the ability to handle it.
If you don’t have tools, equipment, or the ability to work on them, then you won’t be able to make a flower shelf in the form of a vine with your own hands. Today, hardware stores have almost everything related to construction and interior design. Elements of the "vine" in the stores are present. You can buy them and try to combine them into a single design with your own hands. But for this you still need a welding machine and consumables for it.
If the desire to make such a flower shelf is huge, then you need to decide on its shape and size. Next, make a sketch on paper to see if it worked out as intended. Usually attention should be paid to the bends of the vine, the number and location of grapes, leaves. The same goes for flower pots.
Under the flowers, you can build rings or buy large metal vine petals in the form of separate shelves. Be sure to take into account the number of fasteners and the place where they will be welded. And after that, you can buy elements of the "vine" shelf.
Now the assembly process, which must be carried out strictly according to the sketch, because all parts of the shelf were purchased to the required dimensions. Deviations are possible, but small:
- Parts of the vine or several of them are connected by electric welding. Do spot welding. After exposure, the joints are welded with a continuous seam. Scales and sagging are knocked down with a hammer.
- Petals, bunches of grapes and other decorative elements are welded to the vines: insects, flowers, etc.
- Fasteners are welded. Usually these are steel ears. 2-3 is enough. Here it is important that they are durable and can withstand a sufficiently large weight of the shelf for flowers, flower pots.
- Structure painting.
A few words about painting. To do this, you can use paint in cans. They are inexpensive, the consumption is minimal. So a few pieces with different colors will be enough for more than one shelf.
Before applying paint, the structure must be treated with a solvent or degreaser, cleaned of dirt.
In terms of paint application - no restrictions. The color scheme is at the discretion of the owner of the house. Someone wants to exactly repeat the design of the shelf, like natural grapes. Someone abstractly refers to this moment, applying completely extraordinary solutions.
Wrought iron flower shelves
The manufacturing process is the same as in the previous paragraph. All elements, forged and not forged, are interconnected by electric welding. Forging can be done using cold forging technology, for which a bending machine is used. It must be borne in mind that not all types of metal profiles are used to create shelves for flowers.
Basically the following apply:
- Thick wire, also known as wire rod, with a diameter of 6-8 mm. Usually wall forms are made from it, which are light and elegant. In addition, wire is easy to work with. It can also be used in structures made of other metal profiles or other materials.
- Bars of round section, it is also smooth fittings.
- Square bars. Of these, they mainly make supports and racks, although, as can be seen in the photo below, original shelves for flowers are obtained.
- Sheet metal decorative elements: leaves, insects, balls, bows and more.
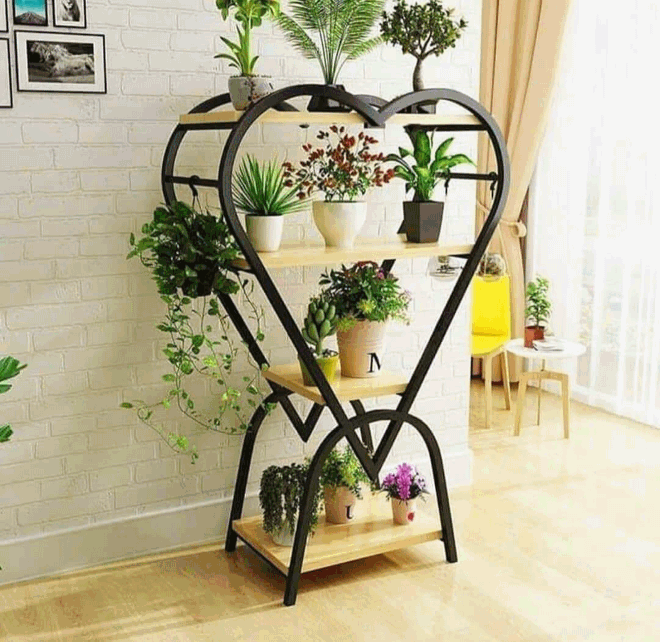
The picture shows the shelf of the original form. But at the same time, it is simple, does not require complex manufacturing. In fact, these are 2 pairs of different elements that differ from each other in shape. The shapes are mostly rounded, which simplifies the forging process. Square bars must be passed through the rolls of the bending machine, accurately adhering to the size and configuration of the bends. Since these are 2 pairs of bases, they can be bent in pairs, which speeds up and simplifies the manufacturing process.
You can learn to forge in a cold way. But you should not spend time on training if the flower shelf is made in a single version and one-time. It is better to order the manufacture of elements in the workshop. You can also buy materials there. The main thing is to provide the master with a drawing or sketch of the future shelf.
Here, in the workshop, you can cut the crossbars from the same square bar, with which it will be necessary to connect the structural elements together. But you can do the cutting with your own hands, using a grinder and a cutting diamond wheel.
If all parts of the shelf are ready, you can proceed to the assembly:
- Connect on the floor or workbench (on a flat surface) 2 parts of the heart. Spot welding is carried out. The same with the other same part.
- The lower part is welded to each of them - rounded legs. You can attach from the inside of the structure or from the outside.
- It turned out 2 identical parts, which must now be combined into one design. For this, crossbars are used.
- One part of the shelf is placed on the table. All connecting rods are vertically welded to it. A building corner is used to set the vertical.
- The second part is on the table. An inverted first one with welded crossbars is installed on it so that the latter with their free ends rest against the second part lying on the table.
- Both parts are aligned relative to each other so that one is not lower or higher than the other. Or one part protruded beyond the other.
- Welding of bars to the second elements of the shelf for flowers is carried out.
Here it is necessary to first designate the installation sites of the transverse bars, some of which will become supports for the shelves where flower pots will be installed.
The finished product needs to be improved:
- the welding places are cleaned of sagging, scale and drops of metal;
- if some joint seemed unreliable in terms of strength, then it is better to weld it right now;
- the entire shelf is treated with a solvent, cleaned and degreased;
- paint is applied.
It remains only to install the finished shelf at its destination. Place flower stands. And put the latest on them.
simple flower shelf designs
There are a huge number of simple flower shelf designs made from materials that are likely to be in the house. For example, a shelf made of organic glass or a plywood stand.
To do this, you need 2 fasteners in the form of corners that are attached to the wall. They can be made independently from a steel tape 2-3 mm thick and 30 mm wide.
For example, you need a tape 20 cm long, which must be bent in half at a right angle. On 2 shelves of the resulting corner, 2 through holes are made.
A flower stand is being prepared. In the photo below, it is made of plexiglass. But you can use any flat material: plywood, boards, sheet metal, plastic panels, and so on.
Now you need to install the corners, they are now brackets, on the wall. Mounting method - on self-tapping screws:
- Install one bracket, make notes with a pencil through the holes.
- Set him aside.
- Make holes according to the marks, where plastic dowels are immediately driven.
- The corner is installed in place and attached to the wall with self-tapping screws.
- The second bracket is installed to the wall at the place of its attachment.
- A flower stand is placed on both corners and the shelf is horizontally aligned using a building level.
- The stand is removed to the side.
- Through the holes of the second bracket, marks are made on the walls - it is attached to it in the same way as the first.
- The pot stand is laid on top of the mounting brackets and attached to them with self-tapping screws or bolts.
You can do the same with another method. First, assemble the shelf, then install it at the installation site, align it horizontally with a level. Then immediately make marks in two brackets along the wall, drill holes, insert dowels and attach the structure to the wall with self-tapping screws.
Metal holders can be replaced with wooden ones made of rails. On sale there are ready-made plastic brackets. At the same time, the essence of the design remains unchanged - simple, concise and functional.
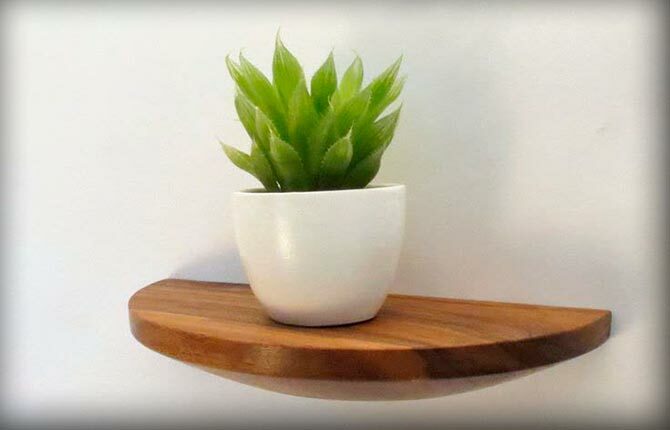
There is a very simple flower shelf design designed for one pot. By hanging several of these shelves all over the wall or along the walls, you can solve the issue of complete dispersion of vegetation around the room.
For example, such as in the photo below. In fact, this is a board from which a semicircle was cut. You can use a log cut across, the pancake of which is sawn in diameter. It is important to decide here whether to leave the shelf in its original form, without modifying it, or modify it to the furniture look shown in the picture.
The manufacturing process itself includes almost one operation, not counting the cutting of a semicircle. It is necessary to make 2 holes for the studs at the end of the wooden pancake, on which the flower stand will be planted. This is best done on a drilling machine using a drill bit. The diameter of the hole is slightly larger than the diameter of the stud. The last parameter is usually 8-12 mm.
The distance between the holes is transferred to the plane of the wall. The marks should be on a horizontal line. Holes are made in them, where a dowel is driven under a hairpin (plastic or metal), and she herself is immediately screwed into it. So 2 hairpins are installed, on which a wooden flower stand is put on.
The variety of flower shelves is huge - it is not difficult to choose something for a house or apartment. You can make some designs with your own hands, given the skills in working with tools and the availability of these tools.
But not all shelves can be made independently. This is especially true for those where machine tools or sophisticated equipment are required for manufacturing. But there are simple models, it is not difficult to cope with their manufacture.
Someone has already made flower shelves with their own hands - respond. We are all interested in your experience. What materials were used? What shape did you choose? Was it a wall model or a floor model? Or did your choice stop on the windowsill? Write in the comments.