Buying door closer, it is necessary to take into account its maintainability. The first few years, the finishing system will work like clockwork, then more and more often it will be necessary to adjust the course of the door leaf. And, finally, the device will have to be changed or look for a way to repair the door closer with your own hands. The last option looks more attractive. The repair of the door closer itself is not a particular problem, and you can always buy a new one.
The content of the article:
- Door closer device
-
Troubleshooting depending on the cause
- Oil leakage
- Breakage of the lever
- Fastener replacement
- Rod deformation
- Closer adjustment
- Door closer replacement
- Breakdown prevention
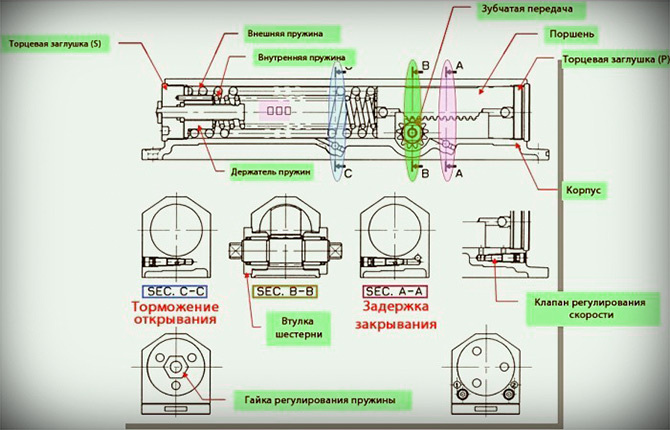
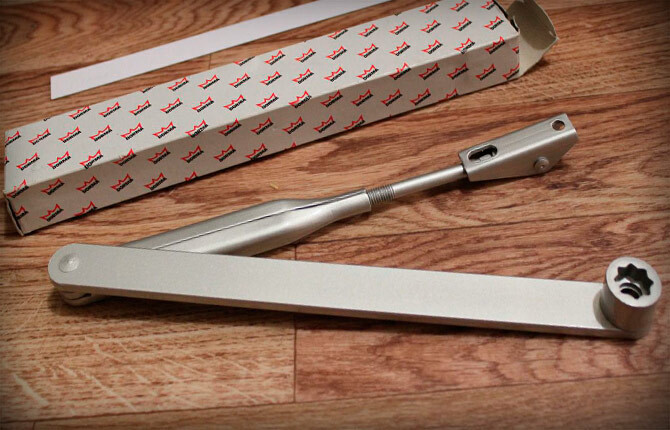
Door closer device
Most of the breakdowns occur on the lever and on the braking mechanism hidden in the body. The lever is always attached to the swivel shaft, no matter if it is an articulated or sliding bearing design. It is on the shaft that a braking moment occurs, which ensures smooth operation of the door closer.
Inside the machine tool case:
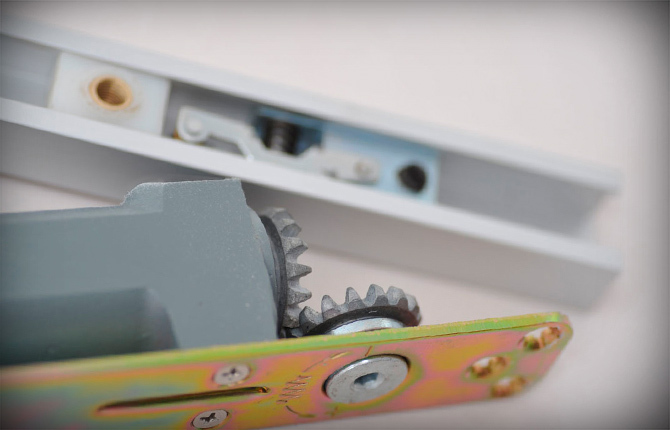
- Spring and gear rack. This part of the mechanism accumulates the energy that a person applies to overcome resistance and open doors. The gear rack is engaged with a gear mounted on the drive shaft.
- A cylinder with a piston filled with hydraulic fluid. As soon as a person releases the door, a spring inside the case straightens out, simultaneously pushing the liquid through the drainage channels into the adjacent chamber.
- There are a few more screws with which you can block the channel section, and thereby slow down the movement of the piston, spring and rack.
Of the entire set of parts, only the body of the device may not be able to be repaired. The cause of the failure is a crack or destruction of the thread for the adjusting screw. In this case, it is easier to buy a new device for the doors than to try to restore the old one. Therefore, dropping the mechanism on the concrete floor or hitting it with a hammer during installation do not do it.
Gear and rack tooth wear is considered to be one of the biggest problems of door closers. As a result of friction, metal dirt appears - a mixture of the smallest dust and grease. Over time, channels become clogged, seals and bearing surfaces wear out. The device on the door works with a strong delay and is poorly regulated. If not washed or repaired, then wear reaches a critical value. As a result, the closer works like a normal door spring.
Troubleshooting depending on the cause
The first sign of problems may be the inability to adjust the operation of the device. This is the case if a high-quality device of a well-known brand or brand was installed on the door. It can be repaired by flushing the cavity and replacing the adjusting screw.
Unstable operation, floating "force" of resistance on the door are also found in new mechanisms. Most often due to minor defects in the valve, screws or substandard hydraulic fluid, which was poured into the device at the manufacturing stage.
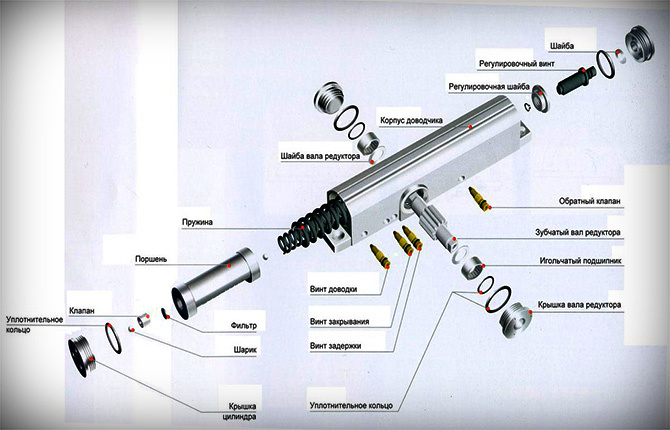
Oil leakage
Some manufacturing companies indicate the brand of hydraulic fluid or oil in the instructions. Therefore, branded models are easier to repair, since the seals on the rotary stem and screws practically do not wear out. And the "correct" oil does not corrode rubber.
Liquid can leak under heavy load, for example, if the closer is installed on the entrance door to an office or store. The sealing ring simply wears out ahead of time. In this case, the mechanism can be repaired by replacing the seals.
Sometimes a leak occurs if the adjusting screw is turned too far. In this case, you need to wrap it back in time. The loss of a few drops of liquid will not affect the operation of the device. The door will open normally.
It is possible for hydraulic fluid to leak through the stem shaft. In this case, the seal may look intact, but the oil flows out. The problem is due to severe wear on the shaft or bearing sleeve. It will be difficult to repair the shaft without turning equipment. As a temporary measure, you can press in the repair sleeve and go through the reamer. It makes sense to try to repair only for branded models. On budget models, repairing a malfunction will cost more than installing a new door closer.

If the fluid has been completely lost, then you will need to do the following:
- Unscrew both adjusting screws. You need to take the opportunity and check, you may need to replace the seal under the head or repair the thread itself.
- Allow hydraulic residue to drain. Then blow with air to squeeze out the mud plugs from the channels under the adjusting screws.
- Fill the cavity with a new portion of hydraulics. To do this, you can use a regular 50 ml medical syringe.
- Tighten the screws and check the operation of the mechanism.
Repairing the hydraulic part of the closer is easy. More problems may arise due to the wrong choice of oil grade. Its viscosity can be excessively high, so that after installation on the door, the braking system will work too hard. If you do not guess with oil, you will have to repair the mount or levers.
If the closer is expensive, of a well-known brand, then information about the hydraulic fluid should be sought in the instructions or on the websites of the manufacturer's company. For cheap models, you can use brake fluid or liquid paraffin oil.
Synthetics or engine oil cannot be directly filled into the closer. You need to do a test - mix the new fluid with the remnants of the old hydraulics. If it curls up due to contact with old hydraulics, then it will be difficult to repair the device.
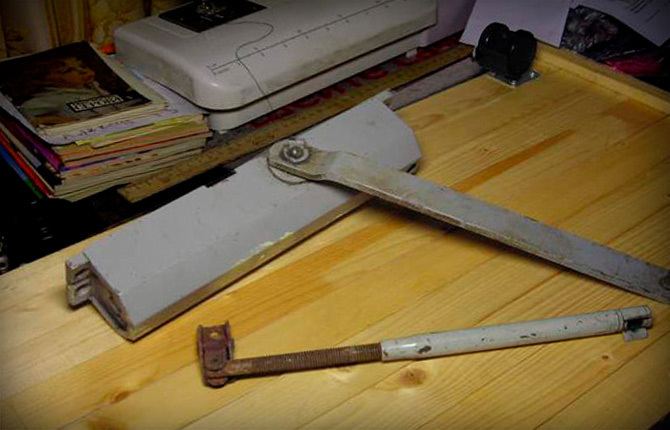
Breakage of the lever
The most vulnerable point in the lever system is a head with a round, square or hexagonal hole for landing on the shaft or the hinge itself. Breakage of the lever most often occurs due to strong blows to the door in the open position.
Usually the levers are made from one-piece soft low-carbon steel, thin sheet stamping. In closers for interior doors, you can find aluminum levers. In this case, the head is made either entirely of steel or with a metal insert.
A broken head can only be repaired by welding. Best of all with argon, a steel part with a carbon dioxide machine.
If the tip has fallen into 2 parts, then the part is tied with a clamp, mounted on a closer. The device is placed on the door and grabbed with dots. After the door closer is removed from the door, the clamp is removed and the cracks are welded with a continuous seam.
Fastener replacement
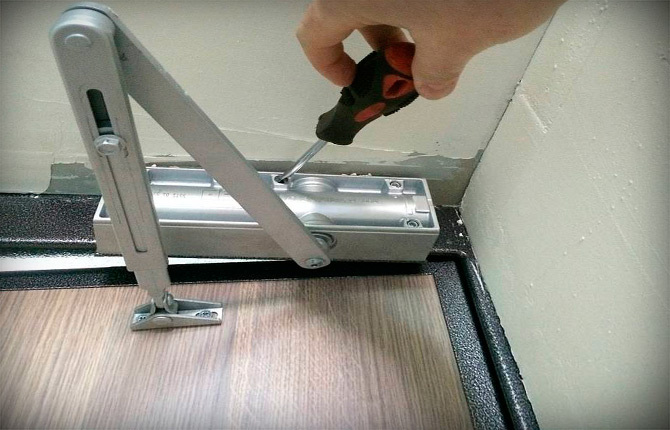
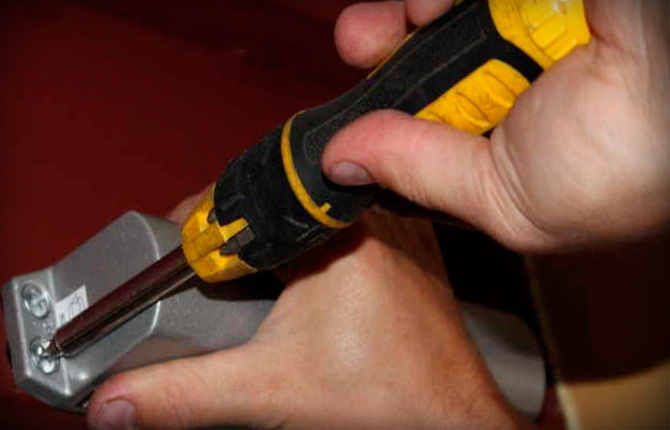
If the closer was installed on a metal-plastic door, then periodically the screws must be tightened with a screwdriver or screwdriver. Otherwise, after a year or two, the fasteners will loosen, the closer will have to be removed, and the landing site repaired. If we are talking about the front door to a store or office, then it will be necessary to repair the fasteners on the door earlier - after 8-10 months.
Before repairing with your own hands, landing on a metal-plastic door, you need to remove the door closer from the door. Next, inspect the holes into which the screws were screwed. Some of them will be almost intact, with the remains of a screw thread from a screw. But most will need to be refurbished.
For this:
- Using a screwdriver, we drill holes with a diameter of 0.5-1 mm more.
- We drill holes for fasteners on the closer body.
- We select screws of a larger diameter, but so that they pass through the holes in the eyes of the closer body.
It remains only to return the closer to the door, and then wrap the new screws.
Wooden doors have to be repaired less frequently. Wood holds fasteners better, even if they are paneled doors. It is better not to install a door closer on prefabricated door leaves, knocked down from a lining and sewn up with a fiberboard sheet. If there is no other way out, then an intermediate lining of 8-10 mm plywood is sewn under the body before installation.
Sometimes you need to repair a broken door closer mount on a wooden door. Loose fasteners are often caused by improper installation or screws that are too short. The mounting hole is often so broken that the fasteners fall off the door. In this case, repairing the door by installing longer self-tapping screws is possible, but inefficient. The door closer will fall off the door after a couple of months of work.
The easiest way to repair a place for self-tapping screws is with the help of an old carpentry technique:
- With a screwdriver, using a cylindrical drill (for wood), we cut a hole for installing the cork. Diameter - 25-35 mm, depth - at least 20 mm;
- We cut off four or five corks 18 mm thick from a round wooden blank (the same diameter);
- We adjust in size, put corks in the holes, after lubricating with wood glue.
This is the most reliable way. Attempts to repair the seat under the self-tapping screw by installing screw metal plugs significantly complicate the process of fastening the door closer to the door. If reliability is required, then the plugs must be glued, not screwed.
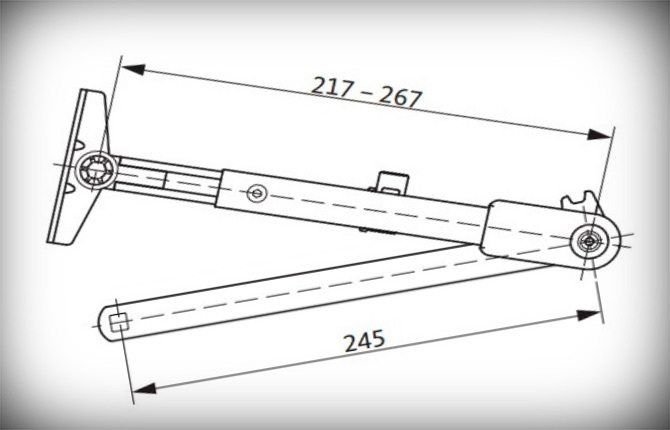
Rod deformation
The second lever of the hinged-lever drive is called the rack or bar. It is usually made by stamping from thin sheet steel. Inside there is a steel sleeve with an internal thread, into which a stem with a head at the end is screwed.
Most often, due to a blow to the door, the tubular body of the rod breaks (bends). The threaded rod is always stronger. But if necessary, it will not be difficult to repair the rod, while the rod must be replaced without any repair.
To restore the bar, it must be removed from the door closer and disconnected from the bracket on the door. Next, you will need to select a steel bar with a diameter approximately corresponding to the internal size of the rack.
The bar is clamped in a vise, put on top of the rod and the surface is straightened with gentle hammer blows. Usually, it takes no more than 20-30 minutes to repair the tubular body of the rod. At the end, you need to wrap the threaded rod inside the rod and slightly bend the rack to return it to a straight shape.
Closer adjustment
It is important to repair the appliance so that it continues to function properly, without any problems when opening or closing the door. First of all, you need to check the operation of the lever mechanism. The threaded rod must be securely fixed with a nut, without play, gaps and bounce of the rod.
Next, you need to check the operation of the closer mechanism. Sometimes it is not possible to repair the gear and gear rack by replacing it with new similar parts, you have to install used or refurbished ones. Therefore, before installing the closer on the door, you need to put the lever on the shaft and pump it several times. If there are no jams or extraneous sounds, then the device can be returned to the door.
Before installation, all adjustment points, namely the rod and the screw of the rebound, must be brought to the middle position. The screw for adjusting the door opening force must be unscrewed by half a turn. Usually, before repairing the closer, risks are applied to the body (lever mechanism), by which it is possible to restore the position of the adjustments before dismantling.
The setting of the door closer begins with the adjustment of the free play in the range from 180O up to 15O. To do this, you need to find in the instructions the location of the adjustment points and completely turn the head clockwise until it stops. The needle of the screw will block the hydraulic fluid bypass channel. At this point, the movement of the piston inside the closer is tightly blocked. Therefore, the door cannot be pulled, otherwise the closer bar will have to be repaired again.
If the repair of the device was without replacing the hydraulic fluid, then you need to unscrew the head half a turn counterclockwise, and then check the door movement. The sash should close quickly enough. If the device had to be repaired with an oil change, then you need to unscrew the screw by ¼ turn, each time checking the operation of the closer.
Next, you need to adjust the trigger function. The circuit is the same, but a different screw is used. It can be located next to the first, so when checking the operation of the closer, you need to be careful not to confuse and spoil both settings.
Sometimes, in the process of adjusting the operation of the closer, it turns out that even with the screw completely turned out, the closing speed of the door in the final section is very small. The door may simply not close completely. This means that the closer spring has sagged and partially lost its elasticity.
It can be repaired by replacing it with a new one, but for this you will have to drain the oil and unscrew the hex nut at the end of the device. Sometimes it is possible to repair by installing several washers under the spring, up to 3 mm thick. But it's easier, apparently, to buy a new closer for the door.
Reading: How to make a do-it-yourself door closer adjustment?
Door closer replacement
Usually the reason for replacing the device is an unsuccessful attempt to repair the closer, catastrophic wear of the oil capsule, or a broken spring. The lever mechanism, when properly configured, can last 15-20 years on the door. And even after that, it is possible to repair the hinges by pressing in new bushings and axles.
Most door closers of well-known brands have a resource of 400 thousand km. door opening and closing cycles. Some models of the same NORA-M can withstand up to 700 thousand hours. cycles.
In practice, the replacement of the door closer has to be done earlier - after 3-4 years of operation or after trying to repair the device with your own hands. Sometimes even new closers have to be repaired due to marriage or low-quality hydraulic fluid.
Usually, when replacing a door, they put the same model as before. On the one hand, this solution is convenient in everyday use. The back pressure of the closer remains the same, so there will be no discomfort. In addition, the old door closer can always be disassembled into parts and used when the time comes to repair a new device.
The use of a closer always negatively affects the operation of door hinges. Therefore, before changing the device, it is necessary to repair the upper canopy, which accounts for the maximum load.
In addition, often the installation of a closer on the door causes deformation of the door leaf. The door leaf flexes in the shape of a propeller and may not fit snugly against the door frame. In this case, it will be necessary to repair the hinges and, if possible, transfer the device from the upper edge of the door leaf to the middle part.
Breakdown prevention
Extending the life of the door closer can be quite simple. First, the device must be properly installed and configured. If, after one or two months of operation, the door stopped working, a slap or play appeared in the hinges, then you need to look for the cause of the violation of the adjustments. Repair door hinges as needed. Periodically, the work of mechanics will need to be checked, adjusted and eliminated the causes of deviations. It is believed that the operation of the closer in the configured state allows you to extend the life of the mechanism by almost 30%.
Secondly, you should not be too lazy to replace the hydraulic fluid after at least two years of service of the device. This is especially important for front doors. It is easier to change the oil in time than to look for a way to repair the cylinder mirror.
In most cases, repairing a door closer with your own hands is quite realistic even for a beginner. The only condition for a successful repair is accuracy in work. More complex cases, such as a broken spring or a jammed stem, will require more advanced skills, sometimes turning or locksmith equipment. Therefore, sometimes it is easier to buy a new door closer than to try to repair the old one.
Tell us about your repair experience - what cases have happened in your practice, how difficult is it to repair an ordinary door appliance with your own hands?