For residents of a country house or lovers of outdoor recreation, a small piece of seating furniture is an indispensable thing. A folding stool will become a faithful assistant in the household affairs. The stool does not take up much space, it can be stored in the hallway, garage, auxiliary room. If the owner often goes fishing or on vacation, such a foldable item can easily fit in a car trunk.
The content of the article:
- Stool chair drawing
- What materials and tools will be needed
-
Step by step instructions for creating
- We collect the base
- Tsarga
- Making a folding stool seat
- How to process or paint a stool
- original ideas
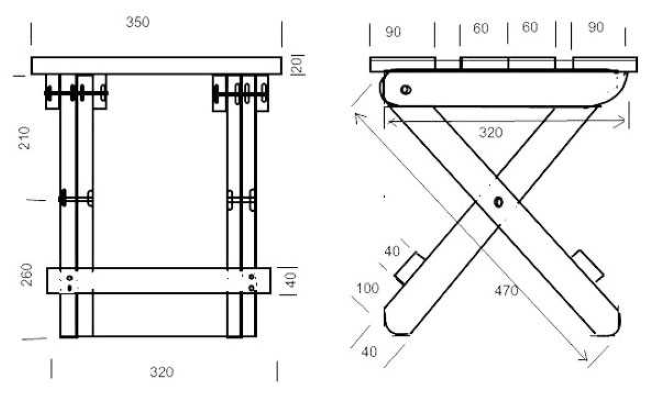
Stool chair drawing
For assembly, you will need a detailed diagram of a folding stool. Having carefully studied it, you should get a reliable, beautiful piece of furniture.

What materials and tools will be needed
Before proceeding with the manufacture of a stool, it is necessary to prepare materials and tools. To create a folding stool, you should cut or buy wooden blocks in the right amount.
The best material for the production of such folding furniture is wood. Recommended to use:
- beech;
- larch;
- birch;
- oak.
These tree species are massive, resistant to light and moisture. Painted folding products from them can be on the street for a long time, in the rain or in the sun, they will last more than one year. These characteristics are especially important for the manufacture of furniture that will be used outdoors.
To make a folding stool with your own hands, you can also use plywood. The choice depends on the preference of the master and the intended purpose of the invention. Experts do not advise using pine raw materials in the production of this type of furniture due to the characteristics of wood.
After the choice of wood type is made, it is necessary to prepare the tool:
- self-tapping screws;
- bolt - 4 pcs. 40x6 mm;
- electric tool for sawing;
- screw driver;
- drill;
- nails;
- hammer;
- screwdrivers corresponding to the screw heads;
- putty for working with wood;
- sanding skin;
- acrylic varnish.
Step by step instructions for creating
You should prepare the details of the future folding stool using wooden blocks of 40x20 mm. It is necessary to create blanks for the assembly of the product. To make it foldable DIY chair, need to cut (pcs.):
- crossbars under the seat - 4;
- legs - 4;
- rails for the seat - 6;
- tsarga transverse - 1;
- small supports under the legs - 2;
- large footrests - 2.
Step-by-step instruction:
- On all 4 crossbars, at a distance of 2 cm from the edge, drill a hole in each for the screwed bolts.
- On the alleged legs in the very center, it is worth making a mark with a pencil.
- Through 3 cm from the middle, drill through the rock.
- Give the bases of the blanks for the legs a rounded shape, working with a jigsaw.
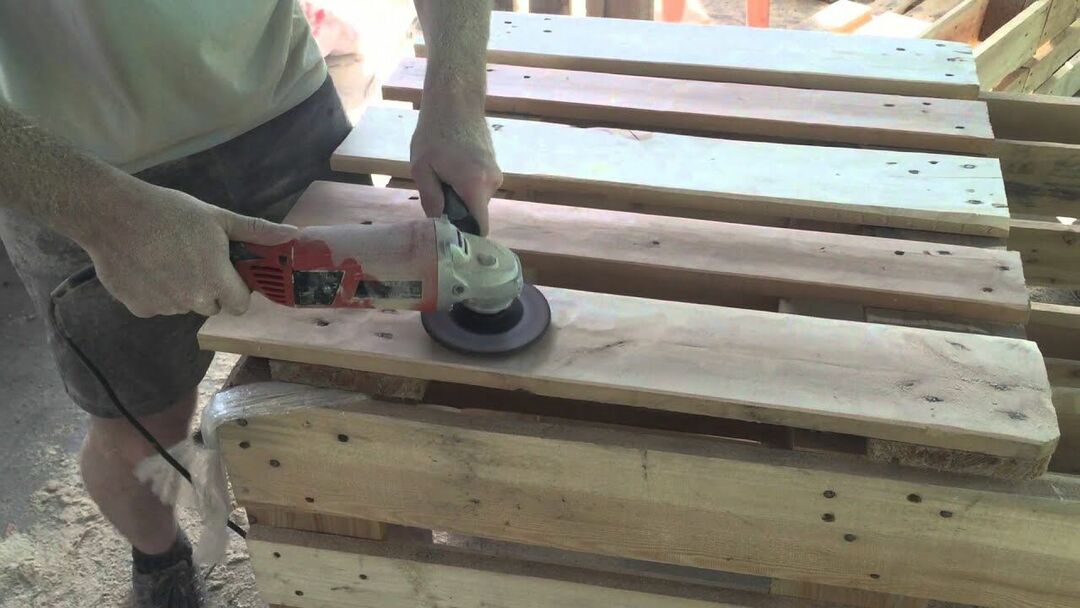
- Treat all prepared components with sandpaper (after puttying if necessary).
- Apply acrylic varnish.
- Leave for a while for all parts to dry.
We collect the base
Stool assembly is the main stage in the entire manufacturing process. Step by step instruction:
- Fold the legs crosswise and through the holes drilled through, connect them with axial bolts.
- In order to make the use of the folding stool more comfortable in the future, it is recommended to lay additional washers between all parts fixed with bolts.
- After that, bolt the upper end of the leg to the crossbar under the stool seat. It is best to do this as follows: attach one crossbar to the inside of the chair, the other to the outside. Attach each leg according to this scheme.

If during the manufacturing process you want the wooden stool to be taller than the originally conceived sample, you can take another beam-rail and place it in the center between the seat mount. So the stool visually changes its height.
Tsarga
This is the crossbar that connects the legs of folding chairs (and tables too). The strength and stability of the entire structure in the future depends on the correctness of its fastening. With self-tapping screws under the seat, between the internal crossbars, it is worth fixing the drawer. Next, proceed to fix the supports under the legs of the stool:
- Fold the chair.
- Retreat from the bottom of the leg 8-10 cm.
- From the inside, fix the supports with self-tapping screws.
Identical manipulations are performed from the outside, after turning the product over.
Making a folding stool seat
Step by step:
- Connect the first 3 rails with nails to fasten the future seat to the inner rails. Fastening is carried out, moving from the edge to the middle.
- Then take 3 more slats and attach to the crossbars from the outside. To prevent the details of the nails from being too visible on the seat, you can use wood putty.
- Deepen the caps of the material as deep as possible into the rock and rub with putty.
A self-made folding stool is almost ready - it is assembled and disassembled simply.
It is recommended that the place where the legs of the chair will be attached not be located in the very center, but slightly shifted upwards. This must be done so that the stool does not swing and stands firmly on any surface.
How to process or paint a stool
An ordinary wooden stool looks ugly and too simple. You can add visual appeal to it by changing the color, for example. As one of the design options for country furniture, it is recommended to apply one method. Wet and dry each part 2-3 times. Thus, the relief of the rock will change, it will become more open.
Dry elements should be passed with a fine-caliber sanding paper. The final chord will be the decorative and protective coating of the stool. Do not spare consumables, varnishing the chair 2-4 times. Each layer must dry thoroughly before applying the next.
original ideas
Some craftsmen wish to add comfort to the use of their product and cover the seat with a tapestry-like fabric. If there is some image on it, you can embroider the cover with a pattern or stick an applique.
A folding stool complete with a table made in the same technique will look original. To your chair, you can make country accessories for outdoor recreation or work in the country from the remnants of wood and accessories:
- box for carrying and storing tools;
- thermos stand;
- country lamp.
You need to "awaken" your imagination, and then you can create a whole collection of interior items made of wood.
Having previously studied the drawings of stools, you can create furniture that matches the taste of the summer resident. There is nothing complicated in manufacturing, especially since step-by-step instructions are attached to the drawings. A folding stool can be used for its intended purpose, for example, take it with you for a picnic. And you can find a more practical application and use the product as a step-stool.
What material did you make the stool from, what did you cover the final product with? Share the link on social networks and bookmark the article.


