To build a small gazebo made of metal according to your project is the best option for a suburban area. For a summer cottage, the main requirement is a convenient design and a reliable roof over your head.
The content of the article:
- What metal to choose for the implementation of the gazebo
-
Preparatory work
- Choice of material and quantity
- Tools
-
Step-by-step construction of a metal gazebo
- Foundation: yes or no
- gazebo project
- Installation of vertical supports
- Supports for benches
- Arbor installation
- Assembly of benches and tables
- Barbecue installation
- Arbor sheathing
- Results
What metal to choose for the implementation of the gazebo
There are no restrictions on the material, because this is a place for summer cottages, outdoor activities, and not an exhibition copy. But building a gazebo from scrap metal will not be very correct. Base metal for construction:
- corrugated pipe, square and rectangular section;
- round pipe (water supply) with a diameter of 50 mm;
- steel corners 50x50 mm;
- galvanized corrugated board or metal tile.
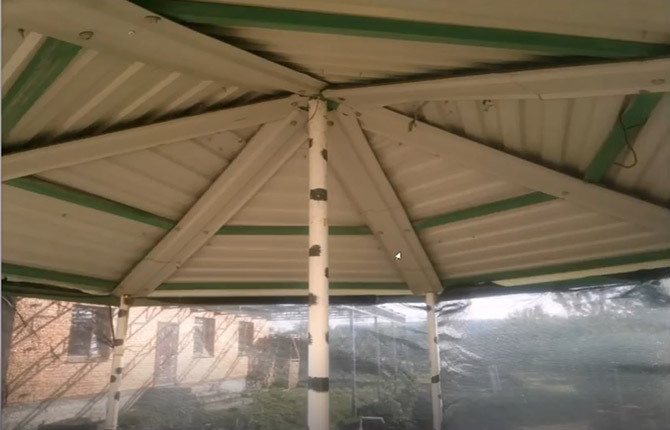
The last point concerns the fence of the gazebo and roofing. According to the project, the roof will consist of 6 sectors, the roofing will be made of metal. Therefore, you will additionally have to look for additional elements in order to close the joints between the sectors and the hexagonal nozzle on the "crown" of the gazebo.
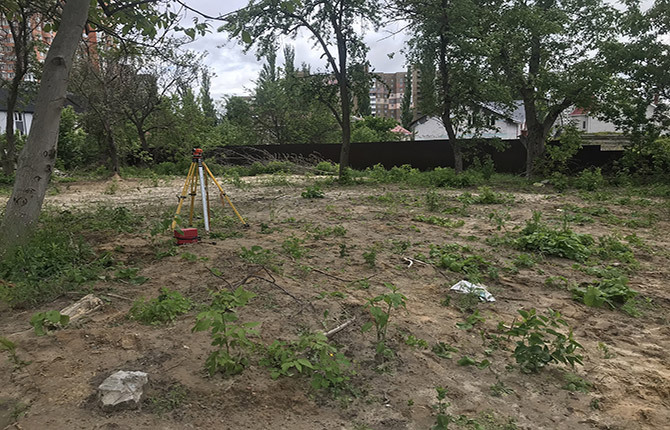
Preparatory work
The first step is to choose a place to build a gazebo. The site for the installation of the frame should be as dry as possible. It is best if the soil is dense, heavy, with a high content of crushed stone. The construction scheme allows you to install a gazebo made of metal both on the foundation and without it. But in any case, so that the metal does not rust, it is necessary to avoid any flooding of the base of the gazebo.
Choice of material and quantity
To build a metal gazebo with your own hands, you will need several types of pipes:
- A 2" round pipe can be used for the main uprights. The thickness of the metal walls is greater than that of a square profile, so the rigidity of the supports will be higher. It will take six blanks of 230 cm, one - 260 cm.
- Supports for benches are also made of metal, you will need 6 round blanks with a diameter of 50-52 mm, 70-72 mm long.
- In the gazebo there will be a table on the central support. It can be cut with your own hands from any round pipe with a diameter of more than 60 mm. The main thing is that the metal is rust-free. The length of the workpiece is 120 cm.
- The cross for fixing the tabletop can be made of metal or timber. A corner made of metal 30x30 mm is best suited. For the cross, you need 180 cm, for a metal edging for the tabletop - another 240 cm.
The fence of the gazebo is also made of metal, it is better to use a professional pipe 30x15 mm. Since the fence is welded in three rows, and the length of one section is 141 cm, 26 m of profile will be required. For facing the fence you will need to purchase 9 m2 sheet metal. Approximately 15 m will go to the roof2 metal. In addition, you will need 8 pieces (1.5 m each) of galvanized or painted metal ridge battens.
To fill the supports, you will need cement, sand, gravel, and a resin composition. For the arrangement of the tabletop with benches, a magpie board 150 mm wide is used, it will require at least 25 m.
Tools
This project does not require a lot of tools. The scope of work depends on whether a reinforced foundation will be used or not. To build a gazebo without a foundation, it will be enough:
- welding inverter with a set of electrodes 2-3 mm;
- grinder with cutting discs for metal;
- garden drill with auger diameter up to 200 mm;
- shovel, sledgehammer for 4 kg with a rubber spacer;
- construction plumb;
- metal hand rammer;
- screwdriver or drill with a set of drills;
- hacksaw and saw for wood;
- sheet metal cutting tool.
In addition, you will need a set of self-tapping screws, 4 cans of 1000 ml of paint. To mix concrete, you will need to rent a 40-liter container, a water tank, a metal can to heat the resin composition.

Also, for work, you will need to stock up on a bayonet shovel, a wheelbarrow or a bag for collecting cut soil. Everything cut from the surface of the soil must be taken out with your own hands outside the area allotted for the gazebo.
Step-by-step construction of a metal gazebo
The building process can be divided into three stages. At the first stage, work is carried out on the ground with the pouring of a cement-sand mortar. In order for the gazebo to turn out to be of the correct geometry, it is necessary to wait a couple of days for the poured concrete to set.
At the second stage, it will be necessary to weld, assemble all metal parts. Make a finished frame, process, paint the metal before laying the roof. The third stage is laying the roof, decorative trim.
Another nuance is to put a stationary barbecue inside the gazebo or make it portable. The easiest way is to assemble a small metal brazier, buy or weld from stainless steel.
Foundation: yes or no
Most metal gazebos are placed on a foundation base. This is the right decision, since any welded metal structure with a roof and a closed fence has a high windage. Strong gusts of wind, heaving of the soil, thermal stresses lead to the fact that cracks appear in the welds. Over time, the metal at the welding site “bounces” off the base.
The only way to prevent the destruction of the metal at the seams is to install the gazebo on the foundation or use additional reinforcement in the form of struts and iron struts. The first is more laborious and expensive. The second often spoils the appearance of the gazebo. He does not have step-by-step instructions, you have to invent everything on the go. Instead of a neat, openwork metal structure, a building is obtained that looks like scaffolding.
The foundation must be used for wooden gazebos, aluminum profile buildings, polypropylene pipes. In the first case, you just need to raise the wooden frame above the ground, otherwise the gazebo will rot from moisture. The second case - a concrete or brick base gives the structure greater rigidity, the ability to withstand strong gusts of wind.
For metal frames, it is not necessary to use a single foundation if the soil has a high density, there are no high or ground waters. Heaving of soil masses is practically zero.
But in any case, for racks, gazebo supports, it will be necessary to make an individual reinforcement of the base using local concreting. You can’t just put an iron gazebo on the ground.
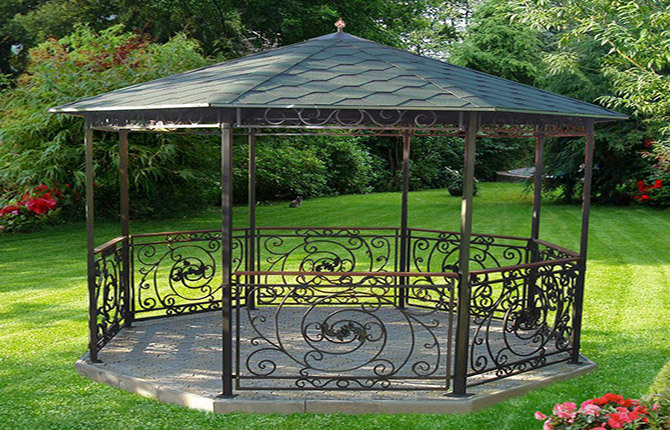
gazebo project
The building is a non-foundation covered metal structure with a base in the shape of a hexagon. The conditional diameter of the base is 280 cm, the height of the gazebo is 200-260 cm. As can be seen from the drawing diagram, the metal roof rests on 7 pillars. Six around the perimeter of the hexagon, one post in the center of the gazebo, it passes through the support and table top.

The fence of the gazebo is made of corrugated board, but any thin profiled sheet can be used. There are benches around the perimeter.
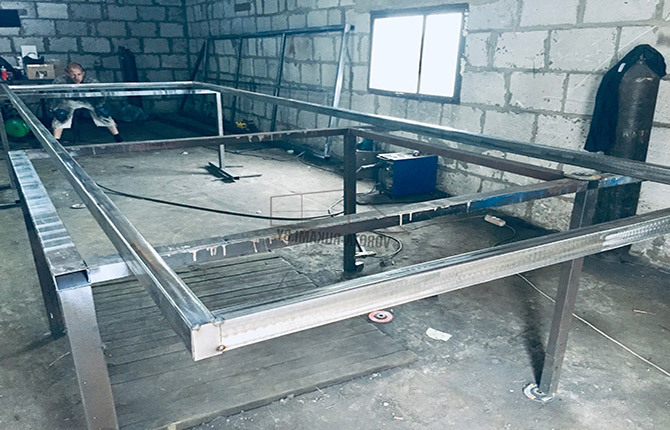
Installation of vertical supports
First of all, you need to mark the site. The upper part of the fertile layer is cut with a shovel to a depth of approximately 10 cm. The surface must be slightly moistened and carefully compacted with a hand rammer.
Next, with the help of a peg hammered into the center of the site and a cord, you need to draw a circle with a diameter of 280 cm. We immediately sprinkle the contours of the circle with dry sand so as not to wipe the markings with our feet. Points are marked for drilling holes for the main supports, and additional ones for installing racks for benches, as well as a large metal pipe for the table.
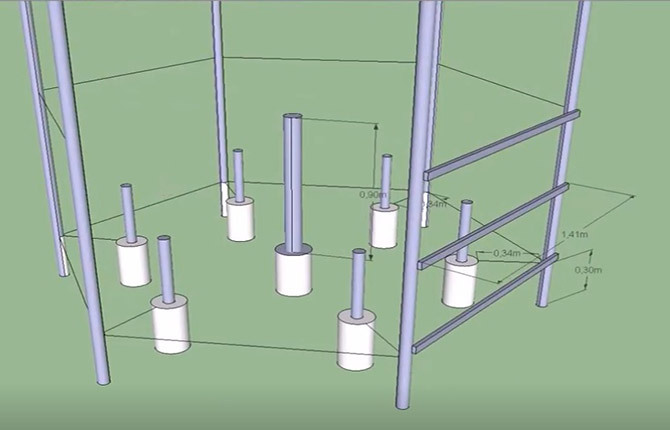
Holes are drilled with a garden drill to a depth of 50 cm. Excess soil must be removed from the site. Crushed stone falls asleep at the bottom. After filling, the depth of the holes should be the same, 30-32 cm. Before installing vertical metal supports, the lower end must be treated with a molten resin composition (machine oil + molten resin in equal parts). The protection must harden on the surface of the pipe.
The pipe is installed in the hole and fixed with two or three struts; wooden slats can be used. Each support is aligned vertically in two planes, after which the hole is covered with gravel.
After installing all the external supports of the gazebo, they need to be adjusted in height. To do this, several cords are pulled diagonally, then with the help of gentle blows with a sledgehammer on the end, the highest pillars are upset. After leveling, you need to make a liquid mixture of cement with sand, shed crushed stone under the pillars with a mixture. In this form, the structure should stand for at least two days.
Supports for benches
The next stage of construction is to make support racks for benches. First, we draw a line from the already concreted support to the center. Next, set aside 40 cm from the pipe and drill a hole to a depth of 40 cm with a garden drill.
At the bottom of the hole we pour a mixture of sand and gravel 10 cm thick, put the film inside and install a metal rack in it. The free space around the pipe is filled with concrete with fine gravel.
Important! Each bench stand must be treated with a resin composition, otherwise the metal parts will quickly rot.
Until the mixture has hardened, the pipes must be aligned vertically. In a similar way, a large support for the table and the central pillar is installed.
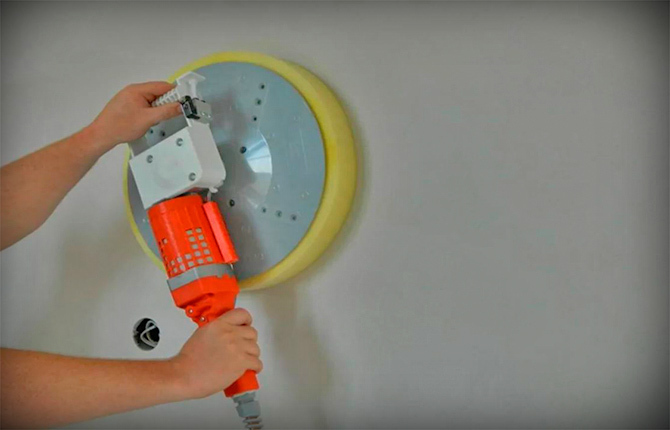
As soon as the concrete sets, all supports, main and additional, must be degreased and primed. You can paint the frame after the construction of the gazebo is completed.
Arbor installation
Before starting the assembly, it is necessary to draw up a drawing diagram and establish the sequence of assembly of individual structural elements.
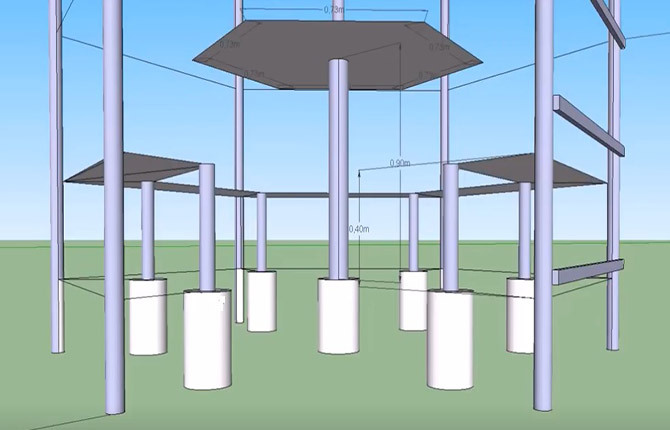
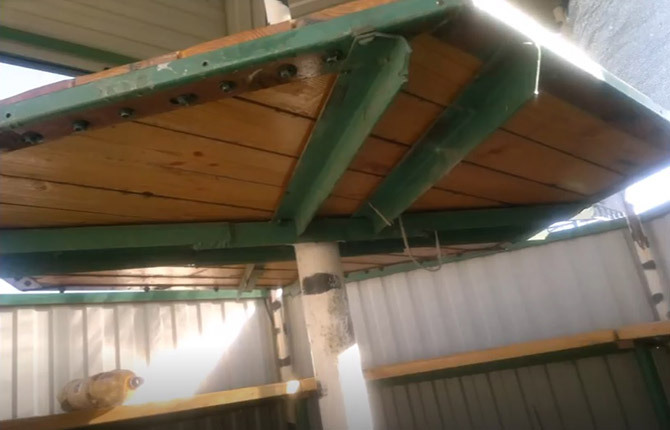
Installation begins with the installation of the upper trim of the frame. It is necessary to cut six blanks 141 cm long from a 40x20 mm pipe, and then weld them to the heads of the supports from the inside. The installation of additional metal crossbars added rigidity to the gazebo frame, so you can mount a roof with a fence.
Immediately after the top trim, rafters are installed. For this, you can use any metal, but a professional pipe or a corner of 30x30 mm is best suited. Six blanks are cut with a grinder, welded to the central support and alternately to the surface of the supports. The seams will need to be immediately cleaned, degreased, primed.
The next stage is the manufacture of the gazebo fencing. To do this, you will need to cut 15 blanks from a professional pipe and weld them to the main supports of the gazebo. The metal at the welding points is also cleaned and primed.
If the roofing is too thin, then an additional tier strapping will need to be welded onto the rafters. Otherwise, the roof of the gazebo will slam in strong winds.
In addition, the presence of an additional tier of horizontal strips makes it possible to lay OSB slabs on the roof and stick a coating of bituminous tiles. Such a roof is more difficult (more expensive) to install, but the appearance of the gazebo clearly wins. In addition, bituminous tiles dampen noise well.
A roof with metal roofing has one important plus - it is easy to build, it will cost much less than other options. But during rain, the noise from the impact of drops on the roof will be very strong.
Healthy: How to make a gazebo from a profile pipe with your own hands.
Assembly of benches and tables
For the tabletop, you will need to make an additional mount with which it will rest on the table stand. The design consists of several pieces of a corner 30x30 mm, welded in pairs between themselves and the metal of the support.
In addition, a hexagon with a side of 73 cm will need to be welded from the corner. It will serve as a base and edging when laying the tabletop boards. The entire structure will need to be primed, if the weather is dry, then the metal can be painted.
The width of the bench can be increased or decreased, or, if necessary, make the boards removable. Everything is determined by the size of the table, as well as the amount of additional "furnishing" of the gazebo.
In the simplest version, benches are made from a magpie board. For each segment, you need to cut two boards 20 cm wide, 140 (115) cm long. The blanks are pre-sanded to remove chips, splinters, roughness.
For installation, it will be necessary to weld one horizontal cross member to each rack. It can be made from any metal, for example, from scraps of a professional pipe. But it is best to make from a corner of 40x40 mm. Each cross member is welded to the surface of the outer post and to the head of the inner support.
But before the final assembly of the gazebo, all primed parts must be painted and dried thoroughly. Any enamel can be used. It is important to choose the right time for painting. It is recommended later in the morning when the morning dew has already left, but the details of the gazebo have not yet warmed up enough. Otherwise, the varnish film will dry too quickly, and frozen cavities will appear on the surface - bubbles of the evaporated solvent.
Also, you can not paint in rainy weather, with heavy fog or wind. In the first case, a thin film of water condensate falls on the metal, and the coating quickly peels off the pipe surface. When there is a lot of dust in the air, the painted surface will turn out to be rough.
Barbecue installation
To install a brazier or barbecue, you will need to make an additional platform in front of the entrance to the gazebo. It is usually laid out with tiles or simply covered with sand and paved with natural stone.
The use of the barbecue must be provided at the planning stage of the gazebo. It is necessary to choose the position in such a way that the wind blew mainly from the side of the building towards the barbecue. Then you can not be afraid that the smoke will interfere with the rest.
Arbor sheathing
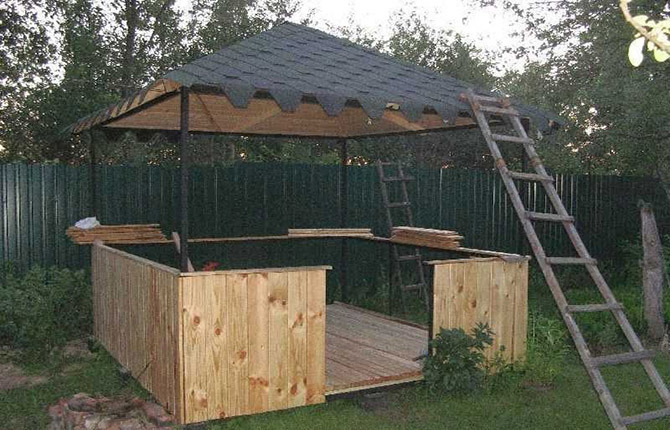
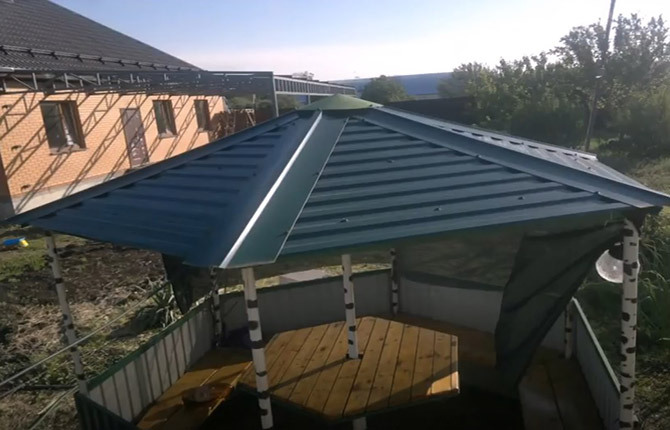
After painting all the metal parts, you need to wait a couple of days, and you can proceed with the installation of the roof. Blanks in the form of isosceles triangles are cut in advance. It remains only to raise them to the rafters and fix them with screws to the crossbars. The joints between the sheets and the crown are covered with decorative overlays.
On the inside, the details of the roof frame can be covered with overlays, but you can not do this. Usually this is done only if the roof leaks at the joints during rain. To avoid leakage, the side edges of the triangles are folded up before installation on the roof and sealed with a seal for the entrance doors.
But sometimes it is better to immediately choose a metal tile or polycarbonate instead of corrugated board. A thin profiled sheet of metal is suitable for sheathing a gazebo fence. The cladding is cut to size and fixed on horizontal crossbars.
It remains only to wrap the screws with a screwdriver. To install the cladding, it is recommended to use a special model of a self-tapping screw with a drill tip. You just need to remember to install plastic compensator washers under the head.
Interesting: Arbors with their own hands made of wood.
Results
The easiest way is to build a gazebo from metal of different types and varieties. Racks from an old but still strong water supply system, a corrugated board fence, a frame from a corner and a professional pipe. The result is a secure, comfortable place to stay with a solid roof over your head.
Tell us about your experience building gazebos. How successful was he? Also save the article to bookmarks and share it on social networks.