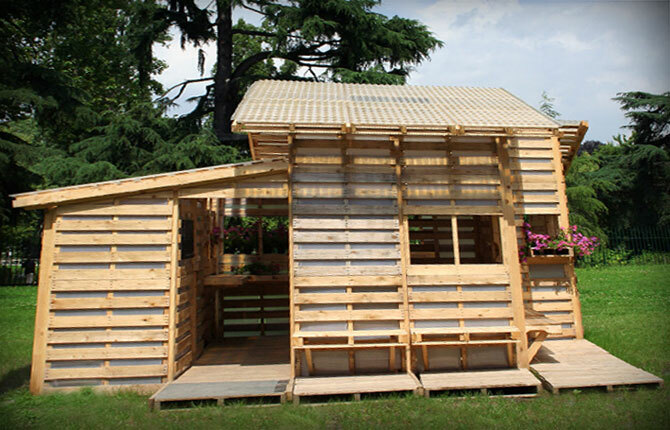
There are many options for using old pallets. From them you can build a lot of interesting things. But the most successful idea is to make a country gazebo out of pallets. A small building measuring 2x3 m will be enough to take a break from garden worries and caring for the beds.
The content of the article:
-
Pros and cons of pallets as a building material
- Disadvantages of using euro pallets
- Benefits of using pallets
-
Preparation for construction
- Where to get material
- Project
- Drawing
- How to properly disassemble the pallet
- Installation of a column foundation
- frame and floor
- Roof and wall cladding
- decorative trim
- Results
Pros and cons of pallets as a building material
Before starting construction, you need to evaluate the possibilities and the real effect of using pallets. There are three options for building a gazebo from wooden pallets:
- Use whole but used Euro pallets. Usually, old pallets with a certain service life are discarded and thrown into firewood.
- Build from new europallets. They are inexpensive, but it is unlikely that they can be begged in sufficient quantities from a construction or forwarding organization.
- Stock up on any pallets, the main thing is that their number is sufficient for the construction of a gazebo. In this case, the pallets are disassembled into a board and a beam.
From used ear pallets, you can build a small gazebo for a garden or country beds. You can't count on anything more. It is almost impossible to make a beautiful and modern building from old "firewood", and the service life of such a structure will be short.
You can build a gazebo from new pallets. This is possible, but only if you can buy the material at a low price, preferably below cost. Otherwise, it will be more profitable to buy an ordinary beam, board, rail and build a gazebo in a classic style. At the same time, its appearance will be much more attractive than the construction of pallets.
The third option is to disassemble the existing stock of euro pallets (old and new) into boards and bars. The new material goes to the front sections of the gazebo, the old beams and boards are used in places where it is hidden from view. Such a scheme also exists, it is used to build small arbors.
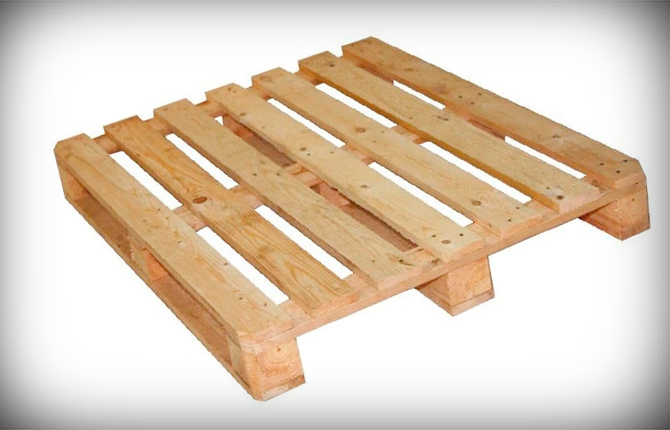
Pallet
Disadvantages of using euro pallets
Wooden euro pallets have two important disadvantages. Firstly, the size of the board and timber is limited by the dimensions of the pallets. This means that when building a gazebo, you will have to splice individual pieces in order to get a sufficiently long workpiece. Moreover, the experience is not always successful. For example, racks for the roof of a large gazebo are best made from a single piece of timber.
In some projects, roof supports are knocked down from halves of pallets. It turns out quite bulky, but reliable design.
Secondly, the pallet tree is subjected to special processing. As a rule, these are salts of nickel, chromium, iron, and some organic materials. The treatment makes the wood resistant to bark beetles, fungus, water and machine oil. The design and scheme of using pallets in transport provide for the use of forklifts, that is, people's hands should not touch the pallet.
Therefore, during the construction of the gazebo, it is imperative to use gloves, and at the end it is necessary to open the tree with high-quality varnish.
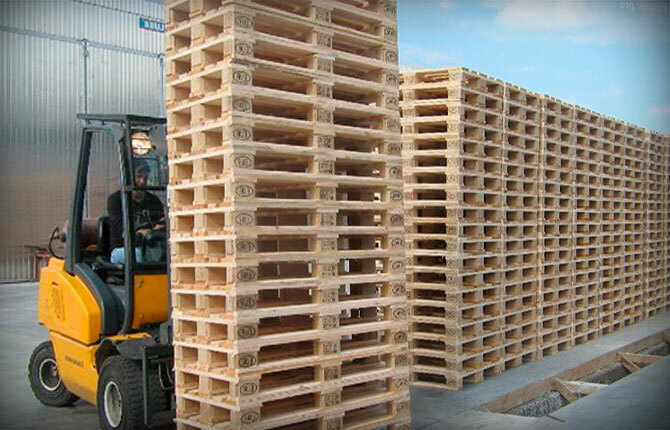
Euro pallets
Benefits of using pallets
The wood used in euro pallets is of high quality. Knots or damaged areas are almost never found. The material is of sufficient thickness, easy to cut, drill, well absorbs varnish and paint.
Therefore, if you choose the design of the gazebo correctly, lay the foundation with high quality, the building will stand for more than a dozen years, even if it is a place to relax somewhere in the summer cottages.
Another plus is that the dimensions and shape of a standard pallet are very convenient for forming a floor, podium or flat roof frame. All that is required is to knock the pallets together at the end, and you get a ready-made platform for relaxing. The gaps between the boards are easily sewn up with boards from other pallets disassembled into parts.
From the new euro pallets, you can make a full-fledged fencing of the site. To do this, pallets are installed on the end and spliced together with jumpers and wooden lining.
Pallets can be used as children's building blocks. If you arrange the details correctly, you can achieve a very attractive design.
But all the same, the roof, vertical racks, rafter elements will need to be made from solid timber and boards.
Preparation for construction
Before building a gazebo from pallets, you need to get at least a little experience in handling pallets. Despite the standard design of wooden containers, there are no uniform requirements for the manufacture of euro pallets. There is only an established maximum weight limit - 1500 kg for the Euro model and 2500 kg for Finnish pallets.

Pallet sizes:
- Euro version - 120x80 cm, height - 14.5 cm. Board - 22 mm, two types of timber - 145x100 mm, 78x78 mm.
- Finnish - 120x100 cm, height - 14.4 cm. Support beam - 100x100 mm, board - 22 mm.
You can also find Russian-made pallets. Some of them are made according to the Finnish model, but more according to the standard for euro pallets. In order not to be mistaken, you need to look at the stigma on the wood itself. Often there are repaired pallets, some of the broken boards can be replaced with substandard material.
Where to get material
Pallets can be bought directly from carriers. Many goods are unloaded from pallets right at the warehouse gate, and often even from the side of the truck. Therefore, many drivers take the container to a secluded place, from where the pallets are sold to everyone.
If you build a front gazebo with additional decorative trim, then you need to be patient. In about a month, you can collect the required number of pallets of good quality. In terms of money, it will be half the price of buying a batch of new ones. Moreover, for a simple gazebo, a lot of material is not required.
Often transport organizations simply throw away old pallets. According to the instructions, they are not allowed for transportation, even if one board is broken. On dismantling, they go either for nothing, or for a pittance for firewood. Here you can also choose pallets in a satisfactory condition.
Project
Now you need to decide on the appearance and arrangement of the gazebo. From pallets, even of the highest quality, it makes no sense to build full-sized gazebos 4x4 m or 4x5 m with a ceiling of 250-300 cm. The problem is that each pallet is a couple of dozen parts, knocked down with nails into one design.
The rigidity of the gazebo depends on the number of connections (hammered nails, joints, splices). The more, the more shaky the frame of the building will turn out. Therefore, all more or less successful projects are gazebos sized 2x3 m, 3x3 m, with rare exceptions 3x4 m.
Successful projects include low, compact structures assembled from euro pallets with additional reinforcement of the joints. Often, to increase the strength of the racks with the walls of the gazebo, pallets are sheathed with planks and timber.
- For example, a variant of a gazebo for children in the form of a house.
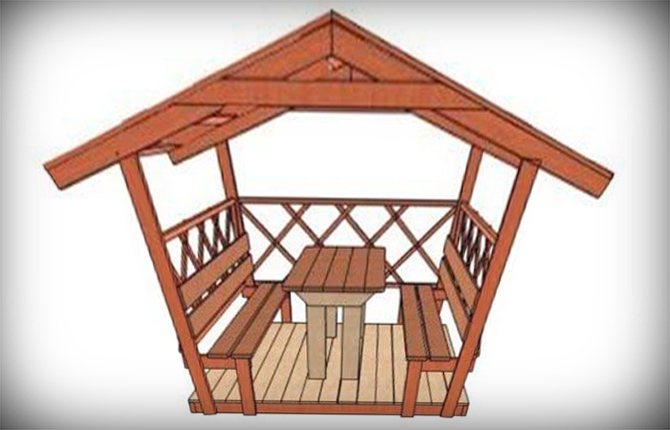
- Or a project of a small open-type gazebo.
- A variant of a gazebo of a closed type for evening gatherings in the country.
A selection of gazebos from other materials:
- Arbors with their own hands made of wood.
- We build a gazebo from polycarbonate with our own hands.
- How to build a comfortable metal gazebo with your own hands.
- We build a modern gazebo with a barbecue for a summer residence with our own hands.
- How to make a gazebo from a profile pipe with your own hands.
- Do-it-yourself gazebo with a pitched roof.
- We make a gazebo from improvised materials with our own hands.
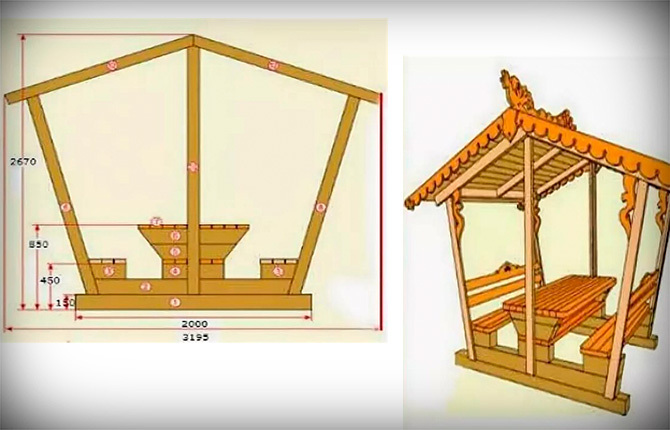
Drawing
For the first experience, it is best to build a gazebo for a summer residence from parts (boards, timber) from disassembled pallets. For the lower part of the building, you can use several whole pallets laid on the foundation.
Racks, fencing, furniture elements (benches) and finishes can be made from timber and planks. Therefore, part of the whole, strongest pallets will be used to build the base of the gazebo. The rest will have to be disassembled into a board and a beam.
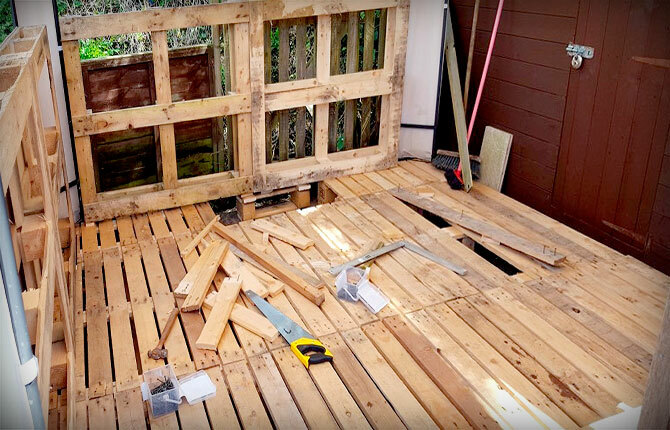
How to properly disassemble the pallet
Dismantling a whole pallet into parts takes from 10 to 20 minutes, depending on the condition of the fasteners. The longer the pallet has served, the more difficult it is to disassemble it without breaking the board.
For disassembly, you will need a special tool for the disposal of formwork, wood scaffolding, containers, including transport pallets. It is similar in shape to a classic carpenter's nail puller, but differs in large size, increased width of the antennae and a huge lever.
All that is required is to lay the pallet on a flat area, press it with your foot to the surface, pry the board in the center with a “nail puller” and slightly raise the nail. If the pallet is machine assembled, then the fasteners will come out quickly. In mechanized assembly, nails are coated with some kind of composition, such as soap or paraffin. The machine hammers nails into the board very quickly, but the wood does not split.

If the pallets are handmade, then the nail can “rest against”. In this case, a wedge is carefully hammered from the sides under the board (it is possible) and the procedure is repeated. As a rule, the second or third time the nail comes out without breaking the board.
The fasteners taken out of the pallet must be aligned and stored, it will come in handy when building a gazebo. The quality of the nails is better than those sold in building stores.
Boards and timber are sorted and discarded. Material with cracks is sent for firewood. The rest is dried and treated with drying oil or varnish.
Installation of a column foundation
The wooden frame of the gazebo requires protection from moisture. The roof, racks, fencing are usually well ventilated, so this part of the gazebo will not suffer even from rain or snow. In a more difficult position is the lower harness and the floor of the building. Even if the ground looks dry, prolonged contact of the soil with the pallets can cause the wood to swell and crack.
You can try to install the gazebo on waterproofing from a film or roofing felt. But this solution does not improve the ventilation of the lower trim, so water remains. So, it is necessary to put the gazebo on the foundation, for example, on a columnar one. It is the easiest to make.
For a wooden gazebo 2x2.5 m, you can install poles in an hour of work.
Foundation building:
- Initially, it is necessary to mark and plan the site. Remove the top layer of soil to a depth of 15 cm.
- Next, you need to fill the site with a mixture of wet clay and gravel. Layer 2-3 cm thick. Tamp the entire surface and backfill again, but with sand and gravel.
- Cinder blocks 20x25x45 cm, laid on their side, will be used as pillars. The foundation will require 9 blocks. In order not to be mistaken with the location of the pillars, you need to lay a couple of pallets on top. The corner of the post must match the edge of the pallet.
After installing the supports, it is necessary to fill the site with soil and compact it. It is enough if the supports protrude 50-70 mm above the soil.
frame and floor
This design of the gazebo does not have a lower and upper strapping. The lower base is formed from four pallets (necessarily new ones), turned over and laid on support pillars.
Next, you will need to check the position of all pallets. If some edge “hangs” in the air, then a small plank, adjusted to the thickness, is hammered into the gap. The gasket must be fastened with a self-tapping screw to the pallet.
After assembling the lower base, the pallets must be knocked together. In width, euro pallets are sewn together with the help of short planks stuffed on adjacent boards, 8 pieces will be enough.
One more long board (160 cm) is stuffed over the entire width of the pallet. These will need 3 boards. In addition, pallets are sewn together by stuffing boards on the front and side ends.
Important! All other assembly operations for the construction of the gazebo are performed using a screwdriver and black carpentry screws.
Next, you will need to assemble and install the gazebo frame. Unlike other projects, in this design, the walls and roof rafters are assembled in advance in the form of a finished part resembling the letter "P".
Each such detail consists of:
- Two vertical racks, each pre-assembled from three boards fastened with self-tapping screws. In the upper and lower parts of the rack, a plank overhang of 100 mm is left. With the help of a departure, the rack will be attached to a pair of rafters or to the base of the gazebo.
- Pairs of rafters, each of two boards 100 cm, the details are sewn together with a piece of plank.
To form the frame of the gazebo of such structures, you will need three pieces. Moreover, they must be completely identical in size and angles. Prior to installation on the base, the U-shaped frame is temporarily stuffed with spacers, after which it is transferred to the installation site with an assistant.
The frame must be aligned vertically and fixed at the bottom, for each rack you will need to fasten two struts.
Important! In the absence of assistants, the assembly can be done in parts. First, install each vertical rack separately, fix it with struts. Then lift and install alternately three pairs of rafters.
Once all three U-frames are installed and fixed, you will need to fill the horizontal boards 120x25 mm, 4 pieces of 2.5 m each. They will securely hold the frame while the roof is being assembled gazebos. Boards will have to be purchased separately.
Before moving on to the roof, you need to sew up the floor of the gazebo with the remaining plank. This and subsequent operations are performed with a hammer and nails.
Roof and wall cladding
Now you need to make a crate for the roof of the gazebo. To do this, you will need to “pull” the most even boards from the disassembled pallets, connect them together so that each one has a length of at least 220 cm. It will take 20-25 pieces. The width of the workpiece is not important, since the roof overhangs will be covered with planks.
As a roofing gazebo, you can use several types of material:
- Glass roofing material. It is enough to coat the outer surface of the crate with white spirit and roll up the cloth, heating the wood and resin with a blowtorch. If done quickly, the roof of the gazebo will not catch fire, and the roof will turn out to be quite durable.
- Metal sheet. A galvanized sheet of 0.5 mm is cut to size. At the edges, allowances of 150 mm are made, from which it will then be possible to bend the gutters. The roof is fixed on the roof of the gazebo with ordinary nails.
- Decking. It is enough to cut the workpiece, bend it at an angle and lay it on the gazebo. But under the sheet you need to lay a film.
All that's left is wall cladding and furniture. First of all, you need to make a bench. Horizontal boards-crossbars will be used as a back. It will only be necessary to stuff the “window sill” strips between the racks - 4 pieces.
The kosour supports for the shop are assembled from two scraps left over from dismantling the pallets. They are knocked down at an angle, screwed with screws to the vertical posts from the inside. The bench itself can be made from two boards 200x25 mm.
The last to perform the lining of the walls of the gazebo along the lower part of the frame. It is sewn up with a vertical plank. The opposite entrance can be clogged with plywood.
decorative trim
Now the stage that everyone forgets about. All wooden surfaces inside the gazebo, except for the floor, must be carefully sanded with sandpaper. You can do it by hand, but better with an electric grinder with a round nozzle. Since the impregnating solution used to treat the pallets penetrates to a depth of 1 mm, you need to work with gloves, work clothes, goggles and a respirator. You can't breathe this dust.
Upon completion of grinding, the wood is thoroughly washed with a clean, damp cloth. In summer, if the gazebo is well blown by the wind, the tree will dry out in 6-7 hours. After that, you can varnish or paint.
Sometimes the owners of gazebos paint over all surfaces of the gazebo with plain paint. It doesn't turn out very pretty. Where is the best place to varnish wood? Moreover, the wood from which pallets are made always has an even texture and pattern of fibers. If a stain comes across, it can be removed using "Whiteness". True, it will be necessary to process the entire board.
Results
Building a gazebo from pallets with your own hands is no more difficult than from any other material. It will be more difficult to make the design truly expressive, but this is not necessary for such buildings. You can limit yourself to a simple design in the style of a country "country".
Tell us about your experience in making gazebos, canopies from pallets. What features of the material should be considered when choosing a project? Write a comment, bookmark the article and share it on social networks.