The paving slab installation technology provides for filling the joints. Violation of the laying instructions will lead to a reduction in the life of the coating. Grouting paving slabs is a process that can be performed by a person who does not have experience in repair and construction work.
The content of the article:
- Why you need to close the seams
- Required materials and tools
- Execution of work
- Dry mix
- Sealing with cement mortar
- Filling with clean sand
- Helpful Hints
Why you need to close the seams
It is unacceptable to mount plates closely. A gap of 5-7 mm is left between the individual elements. It eliminates the deformation of the coating when the ambient temperature changes. When heated, the paving slab expands and the seam decreases.
If you do not grout the paving slabs between the panels, liquid will accumulate in them when precipitation occurs. When freezing, water expands and destroys the side parts of the plates.
During long-term operation, contaminants get into the gaps between the elements. This leads to rotting surfaces. Germination of plant seeds in the seams is possible, which in the future will cause the destruction of the canvas.
Grouting allows you to seal the joints of paving slabs. The composition that is used in the process prevents the penetration of moisture and the accumulation of contaminants. By following the installation technology, it will be possible to increase the service life of the finished coating.
Required materials and tools
The technology does not provide for the use of a specialized tool. The list is selected separately for each case. This takes into account the type of mixture used during operation.
For grouting you will need:
- Construction mixer. With small amounts of work, you can use the nozzle on the drill to mix the solution.
- Sieve. It is used for cleaning bulk materials from inclusions of a large fraction.
- A container to carry and knead the paving grout mix.
- Cement M400.
- Sand.
- Water. To facilitate the work, the liquid is supplied under pressure from a hose.
- Elastic spatula (when used as grout grout).
- Broom.
Materials and tools are placed at the workplace in a convenient manner. Sand and cement are located nearby with a concrete mixer. Proper organization of the workplace will speed up the process.
Execution of work
The voids are filled with a slurry, sand-cement mixture or clean sand. Grouting paving slabs with tile adhesive is unprofitable due to the high cost.
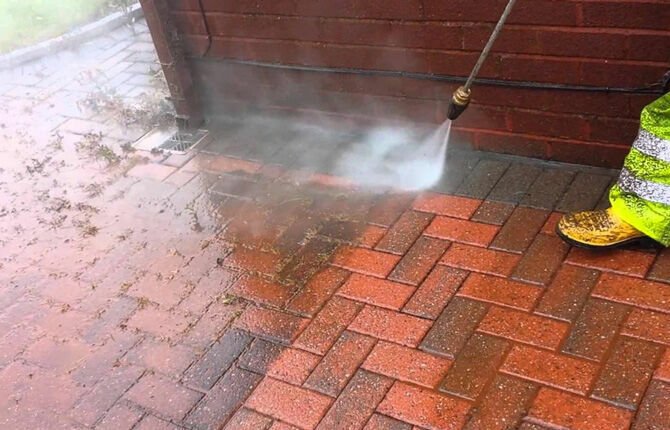
The technology for performing work for each method is different. At the initial stage, surface preparation is carried out. This is necessary to clean the gaps from contamination. If paving slabs just laidthen cleaning is not required.
Accumulated contaminants are wetted with pressurized water. Leave the cover on for a while. The gaps are cleaned with a thin object. Suitable for this purpose:
- flat screwdriver;
- chisel;
- thin metal rod.
When cleaning, accumulated dirt is removed as much as possible and the roots of plants are extracted. The remaining debris is washed out with water supplied from a hose under pressure.
Work is carried out in dry weather. The technology does not provide for a certain amount of liquid to enter the tile joints. To avoid damage to the finished web, do not work at sub-zero ambient temperatures. In cold weather, the water will turn into ice and dislodge the plates from the seat.
Dry mix
The technology involves filling the gaps with cement mixed with sand. When mixing, observe the proportions of 1:5. So it is possible to obtain a durable coating that is resistant to the negative effects of moisture.
Grouting paving slabs with a dry mixture is carried out in the following sequence:
- The sand is sifted. The ingress of stones of a large fraction will make it difficult to fill voids.
- Bulk materials are loaded into a concrete mixer or mixing tank.
- Mix sand with cement until a homogeneous mass is obtained.
- Pour the mixture in small quantities on the surface of the canvas.
- Broom sweep away cement with sand. At the same time, the inter-tile seams are filled.
- Fill the path with water. In this case, the mixture in the seams settles, voids form.
- Pour a second layer of cement and sand.
- Fill the gaps with it and moisten again with water.
When refilling, a jet of water is directed to the plates. This prevents the mixture from being washed out of the gaps. In places where the grout has sagged, you will need to add a third layer of grout.
After hardening, it is possible to obtain a durable layer that is resistant to mechanical stress and temperature extremes.
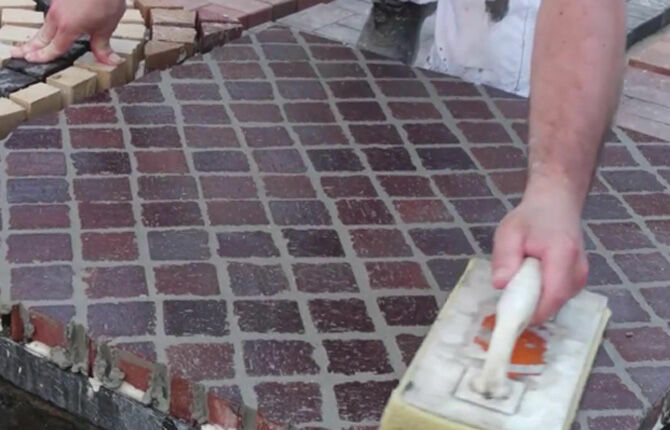
Sealing with cement mortar
The method is used when mounting plates on a concrete base. Using a cement mortar, it is possible to obtain an airtight canvas that prevents atmospheric precipitation from penetrating inside.
Grouting paving slabs with cement and water is unacceptable. After hardening, the composition will crack. To avoid the formation of cracks, a fine filler, sand, is added to the solution. Before kneading, it is sifted through a sieve.

Filling voids with a solution is carried out in the following sequence:
- Cement with sand is loaded into a concrete mixer or container. At the same time, the ratio is 1:5. If it is planned to grout the seams of colored paving slabs, a pigment is added to the composition.
- In small portions, the composition is introduced into the seams. For dense filling, an elastic spatula is used.
- Wash off the composition from the surface of the plates with water.
Work is carried out at positive temperature. In frost, moisture will quickly come out of the solution, which reduces its strength characteristics. If the filling of the gaps is carried out in hot weather, it will be necessary to additionally moisten the hardening composition with water. This is necessary to maintain a normal level of moisture in the solution.
Filling with clean sand
The method is applied if slabs laid on the sand. So moisture does not accumulate on the track, but goes through the seams into the drainage layer. Before embedding, the material is cleaned of coarse stones through a sieve.
The technology is no different from filling tile joints with a dry mix. The material is brought into the voids with a broom.
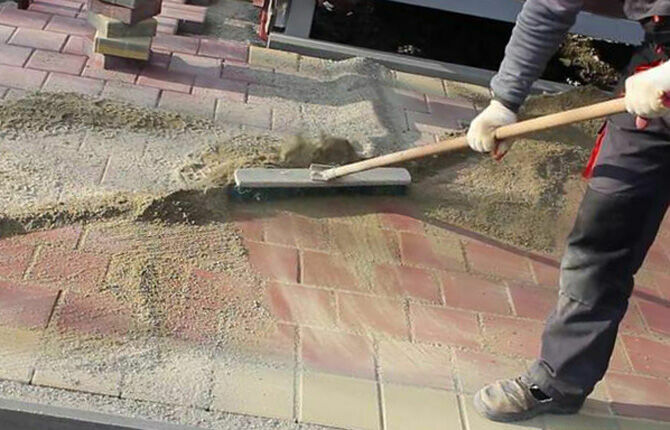
The sand is compacted with water. As it settles, the procedure is repeated.
Helpful Hints
To facilitate the sealing and increase the service life of paving slabs, several rules are taken into account:
- A plasticizing agent must be added to the solution. The dosage of products from different manufacturers is different. Before using a specific plasticizing agent, study the instructions.
- Prepare the liquid composition in small portions. The solution loses its properties during long storage.
- Do not use metal objects for grouting (trowel, spatula, etc.). Violation of this rule will damage the decorative surface of the plate.
- Use sand without foreign impurities. A large amount of clay impairs the characteristics of the composition.
- To improve the strength properties, a small amount of slaked lime can be added to the solution.
- It is important to keep the gutters clean.
Grouting of paving slabs is necessary to protect the coating from damage when the temperature changes. The way to fill the voids is different. It is selected separately for each case, taking into account the laying technology. You can do the work yourself.
Have you grouted the seams on the paving slabs? What materials and tools did you use? Write in the comments. Bookmark the article and share it on social networks with your friends.
Video on the topic of the article.
What and how to fill the seams of paving slabs.
Grouting paving slabs with cement and washing the joints.