Lighters allow you to safely get the flame of a gas stove, and unlike matches, they are more convenient. There are several types of such models - from classic silicon to modern battery-powered devices. An electronic lighter is also made by hand. How to do it is described in detail in the article.
The content of the article
- Types of lighters and their advantages
- How to choose the right model
- How to DIY
Types of lighters and their advantages
To figure out which lighters for gas stoves are better, you need to familiarize yourself with their types. Today they produce both classic and modern models with more convenient controls:
- Domestic gas - it runs on liquefied gas, which is located in the container of the can. The device is quite simple - you need to press the hook, as a result of which a flame will appear. The tool is safe, suitable for both home use and for ignition in the country, in nature. Such a lighter for a gas stove is also made by hand.
- Instrument with piezo elements - it is brought to the conformation and the button is pressed, after which a spark appears from the piezocrystal, which ignites the flame. The advantage is that there is no need to use a spray can, install a battery or silicon. Such a do-it-yourself gas lighter is made less often, it is easier to purchase it in a store. But there is also a drawback - the piezocrystal is disposable, when the time comes, you will need to buy a new element. Here's how a piezo lighter for a gas stove works.
- Electrical - these devices are powered by the network, they give an electric arc, which serves as a source of flame. The tool is durable and very easy to use. But there should be an outlet near the stove. In addition, you need to make sure that the wire does not burn from the gas.
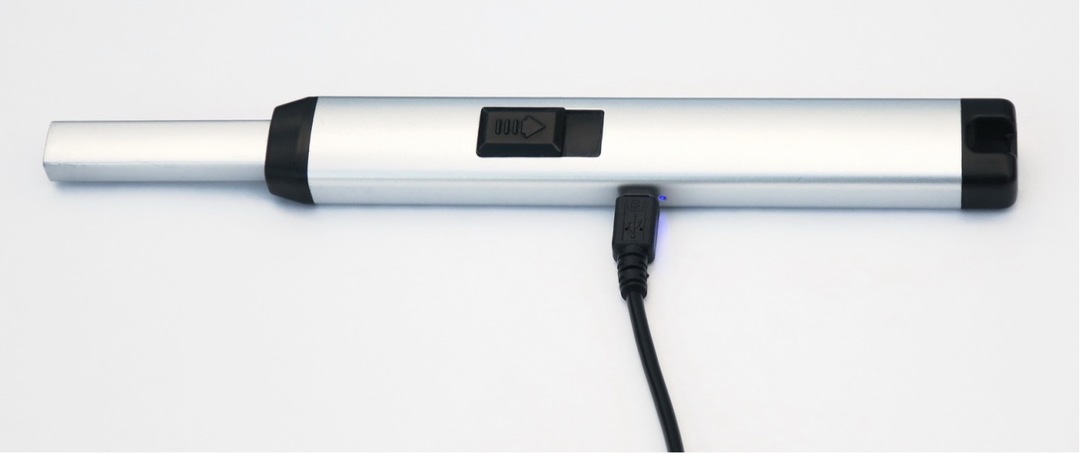
- Electronic - These are modern models, the current source is ordinary batteries. Therefore, they are mobile and more convenient. To turn on, just press the button, resulting in a spark. In this case, you need to change the battery periodically. If we talk about what a piezo lighter is and compare it with an electronic one, the first one is more durable. But the electronic one will be cheaper in the sense that when the resource is depleted, it is enough to change the batteries, and not buy a new lighter.
There are several advantages to each type of tool:
- Gas lighters have a simple design, they are durable and easy to use. But periodically refueling is required.
- The device of a piezo lighter for a gas stove is also quite simple, it is mobile and completely safe. However, after the resource has been exhausted, it will not be possible to replace the crystal - all that remains is to throw the device away.
- Electric models are more durable and perfectly kindle the stove. But they are "tied" to the outlet and in rare cases can provoke an electric shock.
- Electronic ones are autonomous because they run on batteries. In addition, they are completely safe, including for children. But it should be borne in mind that if fat or moisture gets on the work surface, the device will immediately fail without the possibility of repair. At the same time, an electric lighter for cigarettes is made with their own hands, as described below.
How to choose the right model
For the right choice, it is recommended to purchase durable electronic devices or models with a piezocrystal. They are mobile, completely safe and work long enough. Despite the fact that an electric lighter is made by hand, most often it is purchased at an affordable price.
Before buying, it is recommended to pay attention to a few points:
- Perfect appearance without chips, scratches and other defects.
- Whole body.
- Reliable assembly - both a home-made lighter for a gas stove and a factory-assembled model must meet this requirement.
- Optimal value for money.
- Trusted manufacturer with a well-known brand.

How to DIY
To make the device yourself, you need to stock up on the following elements:
- charging board for a lithium-ion battery with indicator LEDs;
- the battery itself (its capacity can be any);
- converter;
- core (can be from a halogen lamp).
Do-it-yourself electric lighter is made in just an hour. The sequence of actions is as follows:
- Solder the transformer, carefully disassemble and remove the stub winding. At the same time, the network winding is preserved.

- Separate the halves of the core. First, they are warmed up a little with a soldering iron to melt the glue, then they are carefully separated.

- Next, you need to wind and apply insulation in 10 layers. A secondary winding is made on top of it. To do this, use the wire from the coil going to the relay. You can take 24 or 12 V.
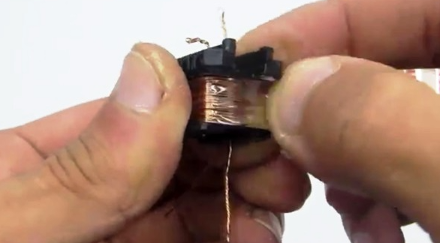
- Solder a piece of wire with several strands to the thin wires of the winding. In the process of winding, the wire is left intact, not cut off. The device of an electric lighter assumes the presence of a winding of several layers, each with up to 100 turns. The result will be approximately 800 revolutions. Moreover, after each layer, insulation is made with adhesive tape.

- Both parts of the core are connected to each other and a piece of wire with cores is soldered to the 2nd end of the secondary level winding. It is recommended to test the winding with a multimeter, making sure it is intact. The final insulation is made with electrical tape.

- The primary winding is phased - one arm is connected to the other (beginning and end, respectively). Get the middle point, connect the positive pole of the battery to it.
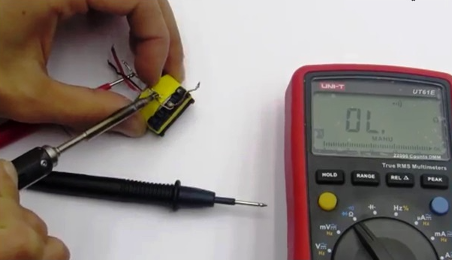
- Then it remains to assemble the oscillator circuit and test it. The arc with an electric discharge in length should be within 1 cm.

- Then the body is installed.

- The finished device looks like this.
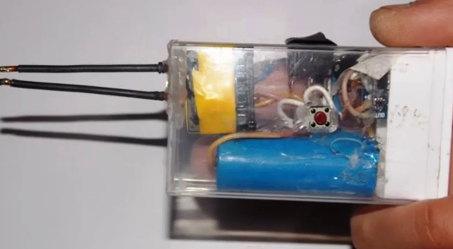
The device of a gas lighter for a gas stove is quite simple, so choosing a really good model is not difficult. At the same time, it is worth remembering that even the highest quality lighter will not last long enough if you use it carelessly. The device is used according to the instructions strictly for its intended purpose.
