There are 2 common ways to lay plywood on a wood floor. If the surface is of sufficient quality and does not have serious defects, you can simply prepare it and lay the material on the floor. But when there are irregularities with differences of more than 1 cm, it is better to put the logs first. Step-by-step instructions for both installation methods are presented below.
The content of the article
- Preparatory work
- Laying on the old base
- Laying on logs
Preparatory work
There are 2 main ways of laying - on the old base or on wooden logs. But before proceeding with the installation, you need to figure out how thick the plywood is to lay on the wooden floor. The range of values of this indicator is from 3 mm to 30 mm.
Since there is always a heavy load on the floor, it is necessary to choose sheets with a minimum thickness of 1.6 cm, that is, 16 mm. On the other hand, too thick material is also not needed - the upper limit is 25 mm.
Beforehand, it is necessary to carry out preparatory work, they consist of several stages:
- Replacing old boards.
- Surface leveling.
- Drying plywood sheets.
- Cutting a sheet into a square with a side of 60 cm.
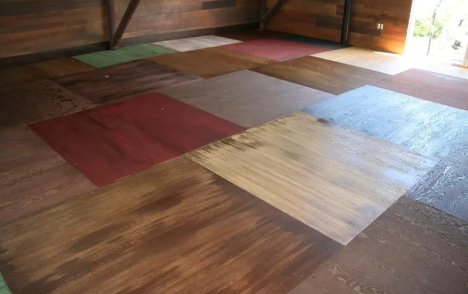
The last step is optional, but recommended. By sawing, it is possible to detect defects in plywood, for example, delamination in the central part. If you work with a solid sheet, you will not be able to determine its defects. At the same time, the presence of bundles also allows the use of material - it is suitable for subfloor flooring.
Laying on the old base
This method is used if the wooden floor is of sufficient quality and does not have defects. Or if they are, then they are not too noticeable (difference within 10 mm), so you can work almost immediately. The thickness of plywood to lay on the floor depends on the quality and type of base:
- If the surface is concrete, leveled, it is enough to take sheets with a thickness of 10-12 mm.
- If laying on logs, take at least 16 mm.
- But if the room is passable, for example, a corridor, and it is planned to install heavy furniture or equipment, the minimum requirement is 20 mm.
After carrying out the preparatory work, you should proceed with laying plywood on the old base:
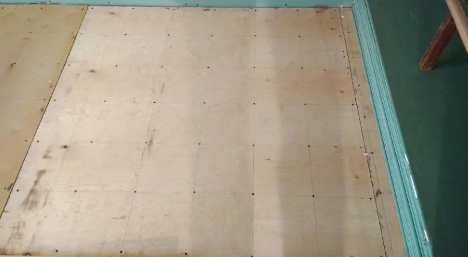
- The fragments are laid out in such an order that the sheets of the next row are shifted relative to the previous one by about a third or a quarter, as shown in the photo.

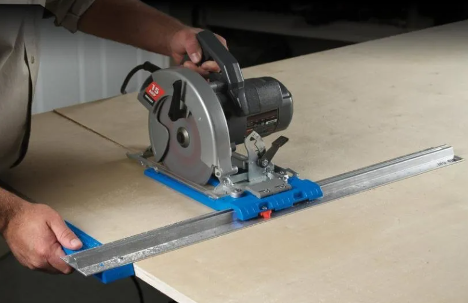
- Apply markings and cut grooves. This can be done with an electric jigsaw. The cut is made in such a way that there are as few seams as possible.
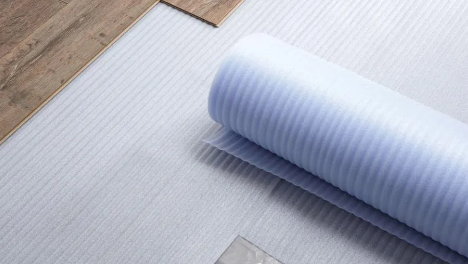
- The thickness of plywood on the floor along the boards can be small - in the range of 10-15 mm, if the differences in irregularities are not more than 10 mm. But in any case, small irregularities will remain, so a special material is used to eliminate them - polyisol. The substrate is laid on a wooden floor, and the seams are fixed with adhesive tape.
- Now you can start laying the sheets themselves. They are fixed, starting with the sheets that are at the ledges. Installation is carried out with self-tapping screws, observing the interval between hardware 15-20 cm. At the same time, self-tapping screws are first screwed on both sides, after which the central part is fixed diagonally. A distance of up to 5 mm is maintained between adjacent fragments of plywood, and up to 10 mm recede from the wall.
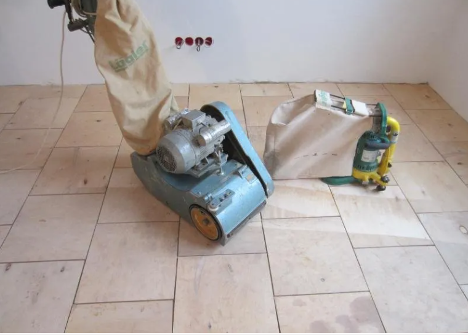
- Start finishing - grinding or scraping.
Laying on logs
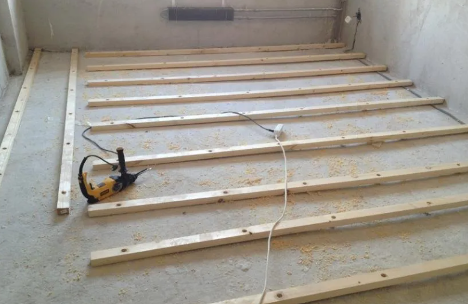
Old floors are characterized by rather large defects, here the height difference can significantly exceed 10 mm. Therefore, plywood has to be laid not on the surface, but after the preliminary installation of the lags. A wooden beam is taken as a basis, in a section of 40 * 40 mm or 50 * 50 mm, in length it can reach from 1.5 to 2 m.
The main steps are:
- Inspect the old floor, if necessary, change the dilapidated boards. Then the logs are laid parallel to each other with an interval of 30-40 cm.
- Markup is done in exactly the same way as described above. But along with ledges and niches, the places where the sheets are connected are also marked. This is necessary so that the lag stands exactly along the seam so that the material does not sag.
- Next, a cut is made, as in the case of laying the first method.
- Lags are installed, moving from the highest point of the floor (it is determined by the building level). The beam is laid in 2 rows perpendicular to each other to ensure maximum rigidity. Fasten with screws.
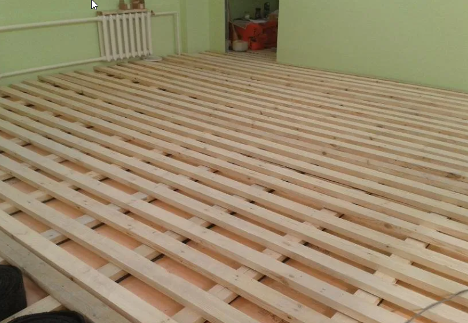
- Lay thermal insulation, if necessary - and soundproofing material. Then plywood sheets are mounted, leaving a distance of 15-20 cm between the screws. Their hats should be completely buried in the material.
The final step is exactly the same. Finishing is carried out by grinding equipment or scraping. The latter method is more laborious, since you have to manually scrape the surface. But for this you can use a mechanized installation. Thus, in a medium-sized room, it is quite possible to lay plywood with your own hands.