The inner and outer corners of the walls need puttying, which gives them smooth edges and allows you to perform a high-quality finish. Work must be carried out carefully, after making accurate measurements using a laser level. Instructions on how to putty corners, as well as useful tips from professionals, can be found in the material presented.
The content of the article
- Materials and tools
- Preparatory work
-
Step-by-step instruction
- Application of the mixture
- alignment
- Surface grouting
Materials and tools
Before you figure out how to putty the corners of the walls, you need to understand the basic nuances, as well as prepare the necessary tools and materials for the job. You need to understand right away that even high-quality processing does not give an ideal result. Very smooth corners can only be obtained by grinding.
In addition, it is important to understand how to putty the inner corners, which layer to apply. In this regard, it all depends on what fraction the composition will be - the larger the grains, the thicker the layer should be. When choosing a mixture, it is worth considering the maximum depth of the drop, which is determined in advance:
- if the defect is small, within 1 mm, you can use the finishing solution;
- if more than 1 mm, apply starting putties.
Measurements are best done with a laser level - the result will be more accurate, and therefore the quality of work will be excellent. Instructions on how to evenly putty a wall also involve the use of such materials and tools:
- spatula of medium size (no more than 15 cm);
- spatula wide (within 45 cm);
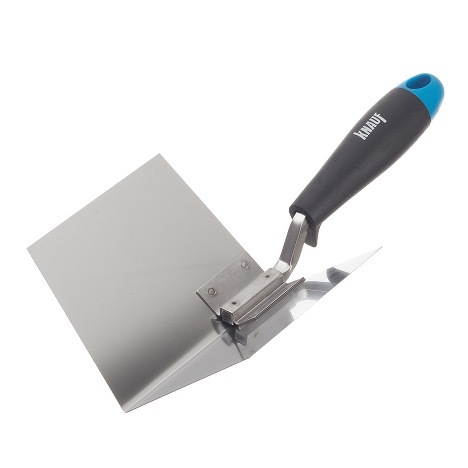
- angle spatula;
- small metal;
- drill with mixer nozzle;
- sandpaper P100-200;
- bucket;
- hammer;
- chisel;
- ruler;
- stationery sharp knife;
- construction pencil;
- mesh for reinforcement (serpyanka);
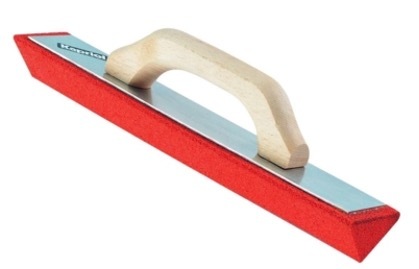
- grater angular for polishing.

Preparatory work
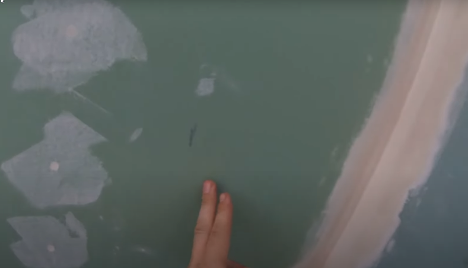
It is not always easy to assess how to correctly putty corners. To perform a professional finish, you need to evaluate the differences. To do this, you need a laser level, a construction pencil and a ruler. The main steps are:
- Turn on the laser level, switch to a mode that allows you to build a vertical plane.
- Install it as close to the wall as possible and place it so that the beam runs strictly parallel.
- Apply a ruler from the upper edge of the corner and move at 5 cm intervals.
- Focusing on the trace of the laser, determine the distance from the level to the wall.
- Make marks with a construction pencil after each step and record the depth of the unevenness.
Next, you need to understand how to putty the corners as evenly as possible. To do this, evaluate the difference:
- if it is more than 5 mm - the work is carried out using beacons;
- if from 1 to 5 mm, use the starting composition first, then the finishing one;
- if the difference is insignificant, within 1 mm, the puttying of the corners is immediately carried out with a finishing or universal composition.
After that, you can start preparing the mixture by pouring it into a small amount of water (but vice versa - you can’t pour water on the composition). Mixers are kneaded, and it is better to cook in small quantities in order to use the raw materials immediately. Previously, he needs to be allowed to stand for only a few minutes (3-5), then mix again, and you can immediately proceed to the finish.
Step-by-step instruction
Now it's time to figure out how to putty the corners of the walls with your own hands. The work is carried out in several stages - the actual application of the mixture, leveling and grouting the surface.
Application of the mixture
Instructions on how to align the corners with putty are as follows:
- The composition is taken with a painting spatula and transferred to the very edge of another (working) spatula.
- At an angle, apply it to the wall, moving from the inside.
- They press a little and sharply take the spatula towards you, in contact with the wall.
- Fill in all cracks.
- Similar steps are performed on the other side of the corner.
- Apply a spatula parallel to the wall and remove excess composition.
- Cut off the excess parts of the mixture and reuse them for work.
- After finishing the work, puttying the corners of the walls involves the use of a sickle. The grid is recessed in the thickness of the composition so that it partially penetrates through the cells to the outside.
- A finishing layer is placed on the reinforcing mesh until it is completely hidden - a flat surface should be obtained.

alignment
The next step in the instructions on how to properly putty the corners of the walls is related to leveling. Since the corners are being finished, there is no need to align too carefully. You can simply put a small layer up to 1 mm and level it. In this case, the spatula is placed at a slight angle, and then the mixture is distributed with vertical strokes, moving from the inner corner.
On the upper line, the composition is squeezed out with a metal trowel. To form right corners without using a plinth, masking tape is used or sickle again. It lags behind the surface, but does not deform under the weight of the mixture, which compares favorably with adhesive tape. This is the basic rule of how to putty the corner of the wall at the leveling stage.
Surface grouting
Even a high-quality laid mixture needs to be grouted in order for the surface to turn out to be truly even. To do this, use sandpaper P100-200, which is attached to the grater. The main steps of the instructions on how to evenly putty walls are as follows:
- Fix the sandpaper on the grater so that the edges protrude slightly around the entire perimeter (up to 2 cm).
- Apply a grater to the surface and begin to rub with quick movements.
- If resistance is felt, it is not necessary to forcefully pull - you need to work carefully.
- When obvious roughness is formed, they are removed with a regular clerical knife or spatula.
- If a lot of dust has formed, it is better to remove it, and then start work again.
- The recommendations on how to putty the inner corners of the walls for the outer corners look similar.
Thus, all work can be done independently. Their quality largely depends on how well the markup is done. A plumb line, a water level do not help much - it is optimal to use a laser level. It is he who will help to understand how to putty the inner corners of the walls, and what composition to choose (depending on the magnitude of the difference).