Methods for gluing fiberglass are reminiscent of working with wallpaper. In this case, the walls must first be prepared, then cut the material and dilute the adhesive composition. A detailed description of each step with a photo, as well as safety precautions are described in the material presented.
The content of the article
- Fiberglass and its advantages
- Materials, tools and preparatory work
- Step-by-step instruction
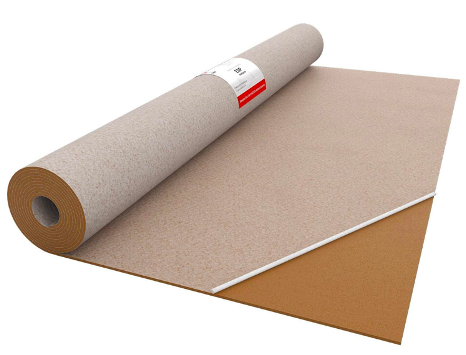
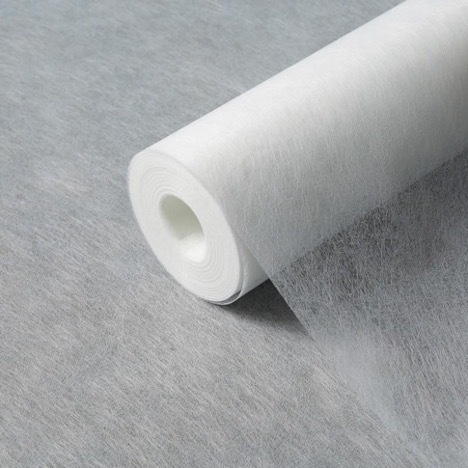
Fiberglass and its advantages
Fiberglass is a non-woven fabric, which is additionally treated with fiberglass. Thanks to this, an environmentally friendly material is obtained, which has many objective advantages:
- durability (serves up to 30 years);
- great strength;
- does not emit harmful substances into the air;
- resistant to moisture;
- does not rot;
- not flammable.
However, compared to conventional wallpaper, fiberglass is more expensive. But if you calculate the savings from its durability, the benefit is quite obvious. In addition, it should be borne in mind that when cutting, small solid particles can fly off the material, which can be accidentally inhaled. Therefore, the treatment must be carried out in a respirator and gloves. Goggles can also be used for added safety.
Materials, tools and preparatory work
Understanding how to properly glue fiberglass, first of all, you need to prepare materials and tools:
- pencil;
- construction roulette;
- sharp scissors;
- a bucket for diluting the adhesive composition;
- brush or roller;
- rag, rag;
- rubber spatula for wallpaper;
- respirator;
- gloves.
You will also need the actual fiberglass and glue. You can choose a special composition. But ordinary wallpaper glue is also suitable for work. In any case, the product should contain only PVA with water. Sometimes putty is also used for these purposes. But if you stick fiberglass on it to the ceiling for painting, “cobwebs” may appear, and then the surface will look less attractive.
Now it remains to understand how to glue fiberglass to the ceiling. But first of all, it is necessary to carry out preparatory work:
- Remove construction debris and furniture - they will interfere with processing.
- Remove old coating from drywall (if any).
- Treat each joint with a sickle.
- Level the surface with putty and sandpaper. This is an especially important step if drywall sheets were installed without a frame.
- Go through the primer on the ceiling and walls. It is better to use a deep penetration composition - then the fiberglass will lie very tightly on the surface and will not deform.
Step-by-step instruction
After completing the preparation, you need to find out which side to glue the fiberglass, and how to do it correctly. The step by step instructions are:
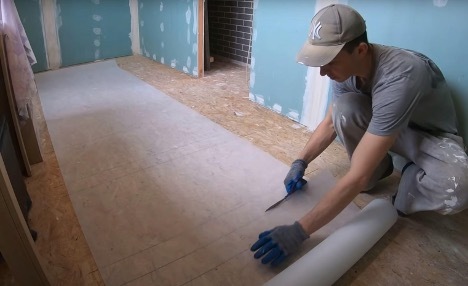
- While the primer dries (it takes from 4 to 8 hours), you can prepare the material. They take measurements, put marks on the plane - it is most convenient on the chipboard, as shown in the photo.

- In order for the gluing of fiberglass to the ceiling or walls to be successful, the material is laid on the surface with markings that are visible due to translucence. Cut with sharp scissors or a knife.
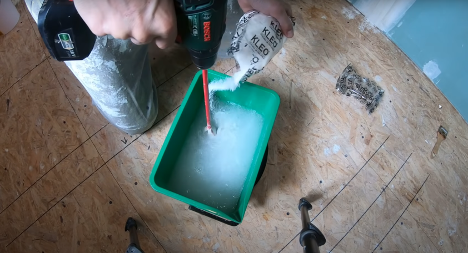
- Dilute the glue according to the instructions. You can use a construction mixer or a drill with an appropriate attachment. But if there are no tools, it is allowed to mix manually.
- Put marks on the walls indicating the width of the fiberglass.
- Apply glue with a roller over the entire surface (in the corners you can use a brush).
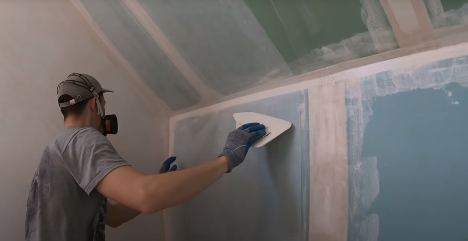
- Glue the sheet and smooth it out with a rubber wallpaper trowel. And you need to move from the middle to the edges. It should be noted that the sheets are glued to the surface only on the wrong side, that is, the one that is more fleecy to the touch.
- Glue the rest of the sheets in the same way.
In order for the wallpaper to last as long as possible, it is advisable to paint it after gluing and completely drying. In the future, it should be noted that it is possible to wash fiberglass, but only with conventional means, without "aggressive" chemistry. It is important to ensure that you do not scratch the canvas with sharp objects.