Plastering drywall for wallpaper is an obligatory stage of finishing work. It is carried out in several stages, starting with surface preparation and ending with the application of the finishing composition with further wallpapering. Step-by-step instructions and practical advice from professionals can be found in the material presented.
The content of the article
- Materials and tools
- Surface preparation and sealing of joints.
- Corner finishing
- Wall plastering instructions
Materials and tools
When studying the question of how to plaster drywall under wallpaper with your own hands, you need to prepare materials and tools, as well as choose the right mixture. The rules are quite simple - if the room has high humidity (kitchen, bath, bath), cement compositions should be used. If this is an ordinary room, for example, a living room or a bedroom, it is allowed to use gypsum plaster, which is more plastic and economical in consumption.
Before proceeding to study the instructions on how to seal drywall joints under wallpaper, you should prepare the tools and materials for work:
- soft spatula;
- a set of metal spatulas;
- bucket;
- a construction mixer or a drill with an appropriate nozzle;
- roller;
- sickle ribbon;
- brushes with wide bristles;
- primer;
- wallpaper glue;
- sandpaper.

You also need to figure out how to finish drywall. It is better to choose a quality composition based on gypsum or cement, depending on the microclimate in the room. Moreover, mixtures are classified according to their purpose. Starting lineups are used, spending 1-1.2 kg per 1 m2, and finishing lineups spend less - 0.5-1 kg for the same area.
When choosing how to treat drywall from moisture, you need to take into account not only the area, but also the nature of the surface. If there are quite a lot of defects, and they are deep (10 mm or more), choose the starting plaster. It is also important to know that a coarse-grained composition should be applied in a thick layer, and therefore the consumption will be higher. Finally, it is recommended to take the mixture with a margin of 10-15% in case of unexpected expenses.
Surface preparation and sealing of joints.
Before treating drywall from moisture, you must carefully examine the surface and prepare it:
- if there are self-tapping screws, tighten them so that the head remains flush with the surface, but does not sink too much into it;
- if there is peeling of drywall, tear it and glue it along the same contour;
- prepare a container in advance for throwing out the dried putty.
Next, do-it-yourself drywall putty is prepared under the wallpaper. The mixture is poured into a bucket and diluted with a small amount of water (but not vice versa). It is better to cook in small volumes in order to immediately use the raw materials, preventing it from drying out.
Now you can start finishing work, the first stage is sealing the joints:
- They take a sickle tape and glue it over the joints of the sheets.
- The putty is laid in a joint, after which the tape is glued and recessed directly into the mixture.
- The solution is taken with a medium-sized spatula, and then distributed with a wide spatula along the wall. Puttying drywall under the wallpaper with your own hands is carried out so that there are no lumps and protruding irregularities.
- When the layer is completely dry, start sanding the wall with sandpaper.
- Screws also need to be puttied with cruciform movements - across and along. To avoid lumps, it is important to ensure that there is no old mortar on the surface of the spatula.
Corner finishing
It is clear how to putty drywall under the wallpaper with your own hands - for this, cement or gypsum compounds are used. It is with such mixtures that the corners are also processed, having previously strengthened them with a serpentine tape. It can be fixed before finishing or after it - the procedure does not matter in principle.
The main stages of finishing plasterboard walls for wallpaper are as follows:
- Apply the composition on one side of the corner.
- When the mixture dries, putty the other side.
- The composition is applied in small quantities - at least 2 times less than during wall decoration.
- You can distribute on the corner of the spatula.
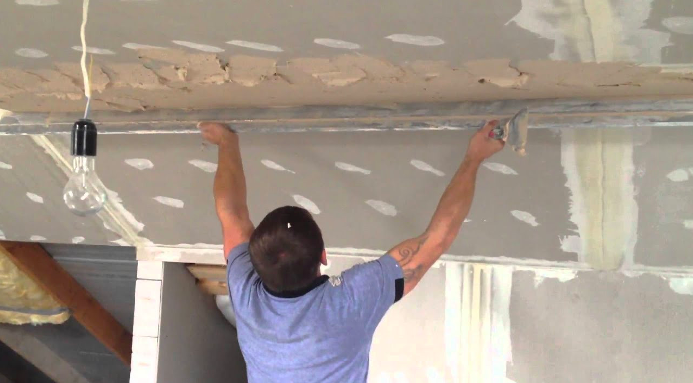
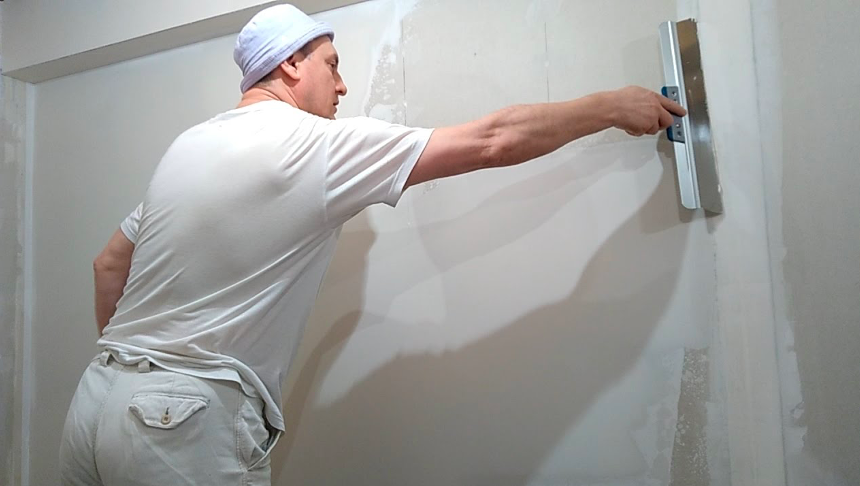
Wall plastering instructions
Now it's time to figure out how to properly plaster drywall under the wallpaper. The main stages of work are:
- First, the surface is finished with a deep penetration primer composition. It is applied with a roller or a wide brush. It is necessary to process the entire wall so that there are no dry places left.
- When the primer dries, the starting plaster of the plasterboard walls is kneaded under the wallpaper.
- The mixture is taken on a medium-sized spatula, after which it is distributed over the blade of a wide tool and applied to the wall, evenly distributing and making sure that no lumps form.
- As soon as the starting layer dries, it is again treated with a primer.
- You also need to plaster drywall under the wallpaper with a finishing composition. It is diluted according to the instructions and applied in a very thin layer with a spatula.
- After the last layer has dried, it is sanded until a smooth, monolithic surface is obtained. Then you can start wallpapering.
If the walls are sheathed with drywall, it is clear what to do next. It is important to plaster them to get the smoothest possible surface. This is a mandatory stage of finishing work, which you can do yourself. The quality depends on how the surface is prepared and what composition is selected.