For many owners, the problem of insulating the front wooden door often seems far-fetched. In the case of metal boxes and canvases, everything is clear, without insulation, steel will freeze the entire hallway, the outer doors begin to be intensively insulated only after the appearance of rot, condensation or a layer of frost. If you do not insulate in time, then the condition of the carrier box will deteriorate so much in a couple of seasons that you will have to change the entire input unit as a whole.

The content of the article:
- What causes heat loss through doors?
-
How to find the place of penetration of cold
- Checking the doorway
- Checking the box
- Checking the canvas
-
What heater to choose?
- Styrofoam
- Penoplex
- mineral wool
- Mounting foam
- We repair the opening
-
Insulation of a wooden door leaf - instructions
- What will be needed?
- Step by step instructions
- Insulation with outer lining
- Results
What causes heat loss through doors?
Door blocks can be conditionally divided into two categories: inexpensive purchased and professional, home-made. Size and shape doesn't matter. The main thing is how well the carrier box and canvas are made and fitted.
If the entrance doors are assembled and fitted correctly, at a professional level, then the first few years will not have to be insulated. And made of oak, larch or ash, properly processed, installed according to step-by-step instructions, door blocks may not require insulation for 10-15 years of service.
Reasons why you have to insulate the entrance door blocks:
- Sagging door leaf.
- The appearance of cracks between the canvas and the block-box.
- Mistakes made by craftsmen when installing a wooden block in a wall opening. For example, without waterproofing and insulation of the threshold.
- Low quality protective coating. After a set of moisture, the canvas of wooden doors bends with a propeller, as a result, cracks and cold bridges appear.
- Destruction of the insulation laid in the gap between the entrance block and the wall.
- Moisture regularly gets on the front doors. For example, condensate drips or rainwater flows in if the owners saved on a canopy for the porch entrance group.
Any moisture, dripping or in the form of water vapor, that comes into contact with an unprotected wood surface is absorbed by the wood. Because of this, the outer fabric "leads". Therefore, in any case, before laying the insulation, you need to figure out where the siphon is, why and how to eliminate drafts.
How to find the place of penetration of cold
To check the entrance doors for heat leakage, you can use your own hands, a remote thermometer, a flashlight and a building hair dryer. You will also need an assistant, at least one. It can be inconvenient and time-consuming to independently investigate problems with the insulation of the front wooden door.
Checking the doorway
Often, homeowners test the resistance of a wooden door to the penetration of cold with a wet palm. You just need to tightly close the outer sash and run your hand, previously moistened with water, along the alleged heat leakage. The sensitivity of the wet skin of the palm is so great that with a little training you can catch a chill in places where the insulation is damaged.
It is best to check in the evening or at night. The assistant will illuminate the opening with a flashlight from the inside of the room in all places where there may be gaps, and it will be necessary to carefully and slowly walk along the contour of the entire opening. Where the sash does not fit snugly against the door frame, barely noticeable rays of light will appear.
Checking the box
To check, you will need a hair dryer and a non-contact infrared thermometer. The scheme for checking the effectiveness of the insulation of the outer door is quite simple:
- one of the workers heats the joint with a hair dryer from inside the room;
- the second person observes the seam in an infrared device.
In places where there are heat leaks, a small draft lowers the temperature by several degrees at once. Moreover, a black spot on the outer surface of the sash is formed after a few seconds. This is clearly visible on the screen of the device.
The advantage of this method is that you can check the insulation of the input block without waiting for cold weather and frost. Moreover, the method only works on wooden entrance doors. In the case of armored, steel, metal-plastic models, heat dissipates naturally very quickly, since the thermal conductivity of metal is much higher than that of wood cladding.
Checking the canvas
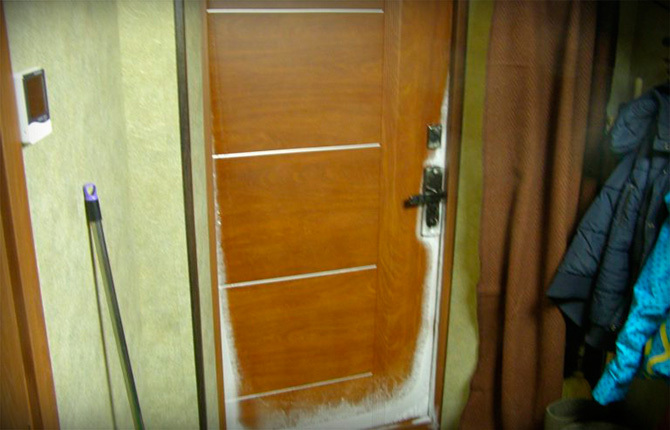
Checking the door leaf is much more difficult. You can judge the effectiveness of insulation by subjective sensations, for example, if you put your hand on the surface from the inside. The palm will immediately feel a freezing cold.
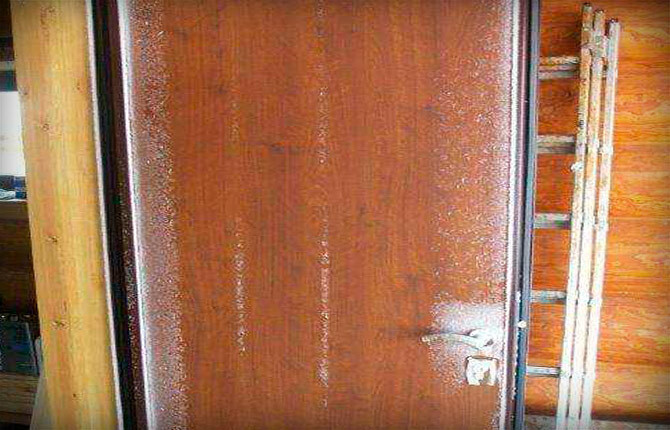
The second way is to try to see the cracks on the surface of the front door if the canvas is sewn from a tongue-and-groove board or lath. Sometimes, as a heater, thermal insulation such as mineral wool is laid inside the canvas, which easily absorbs condensate and sags so much that a void forms inside. In this case, frozen water vapor appears on the cracks - frost.
But it is best to remove the canvas from the hinges and disassemble the front door leaf, remove the wooden cladding and make sure that the thermal insulation of the leaf requires urgent replacement.
What heater to choose?
For insulation, you can use four options for thermal insulation:
- Styrofoam - expanded polystyrene 25-50 mm thick;
- penoplex any thickness;
- mineral wool in rolls or plates;
- mounting polyurethane foam.
To insulate wooden doors, you can also use felt, natural or synthetic, 4-6 mm thick, as well as roll insulation used for laminate flooring. All other options, for example, foam rubber, polyethylene foam, bamboo fiber mats, if they are used to insulate the front door, then only in apartments.
For the front door of a private house, such thermal insulation is not effective enough. The doorway is still losing heat. Most often, these materials are sewn over the outer cladding of the door to improve the sound insulation of the wooden sheet.
Styrofoam
From low-density polystyrene foam, quite effective insulation is obtained. Sheets of foam plastic P25 up to 25 mm thick can be laid directly inside the door leaf.
But there is one limitation - the mechanical strength of the foam is extremely low. Moreover, low-density polystyrene foam absorbs water vapor that enters the thickness of the front door, freezes inside and destroys the porous structure.

Therefore, if you use polystyrene foam to insulate a wooden door leaf, then only in conjunction with a vapor barrier of one-sided conductivity. The steam must be expelled from the door in the direction of the street. In this case, the outer lining of the door leaf is made of boards or wooden slats. Warm water vapor will freely leave the insulation of the front door.
In addition, to insulate the front door, it is better to use a package of several thin layers (10 mm) of foam. In this way, it is possible to eliminate cold bridges in case one of the sheets bursts, a crack appears.
Penoplex
Today it is one of the best materials for warming entrance wooden doors. Penoplex does not allow water vapor to pass through, has high strength, rigidity, does not break or crack under load, like polystyrene.
The only disadvantage of such insulation is low vapor permeability. That is, foam protection will trap water vapor inside the door leaf. This means that the wooden frame of the front door will absorb moisture, the wood will swell and deform. In severe and very severe frosts, this can lead to the destruction of the adhesive seam and the separation of the foam sheet from the wooden frame.
mineral wool
For ordinary entrance doors with a leaf thickness of up to 50 mm, it is better not to use mineral wool. Rolled mineral wool is not suitable for warming wooden entrance doors unambiguously.
The reason is that the roll material needs to be somehow fixed inside the door leaf. Otherwise, the cloth will go in waves, folds, and after swelling with water condensate, it will completely sag on a wooden frame.
Therefore, if there is a desire to make mineral wool insulation, then you need to use dense hard mats made of pressed fiber. But another problem appears.
The thickness (height) of the cavity inside the wooden door is not enough to fit a dense mineral wool mat into it. Molded fiber thermal insulation is usually made with a thickness of 50 mm or more.
Only then the mat acquires sufficient rigidity to stay on the wooden frame inside the canvas due to its own deformation. But in this case of insulation, the front door will become 30-40 mm thicker.
If increasing the thickness of the front door is not a fundamental problem, then it is better to choose mineral wool mats. This is the only correct decision if in winter the frosts on the street reach minus 30-40OWITH. Mineral fiber insulation is the only option that will withstand any thermal stress.
According to the same scheme, you can make insulation for a wooden door from the back entrance. In this case, it makes sense to additionally equip the door frame with a so-called bath seal, as in the video:
With such insulation of the front door, frosts and strong winds at minus 40 are not terrible.OWITH.
Mounting foam
Practically they are not used as independent insulation for wooden entrance doors. The box is blown with polyurethane foam, separate cavities of the door leaf only during restoration work.
In theory, the entrance wooden door can be insulated with foam, but only for models that do not have their own thermal insulation inside. Instead, a stiffening frame is assembled from paper or wooden slats. In this case, insulation with mounting foam will be a technically competent solution. Just do not forget to treat the surface with water and lay a vapor barrier lining.
We repair the opening
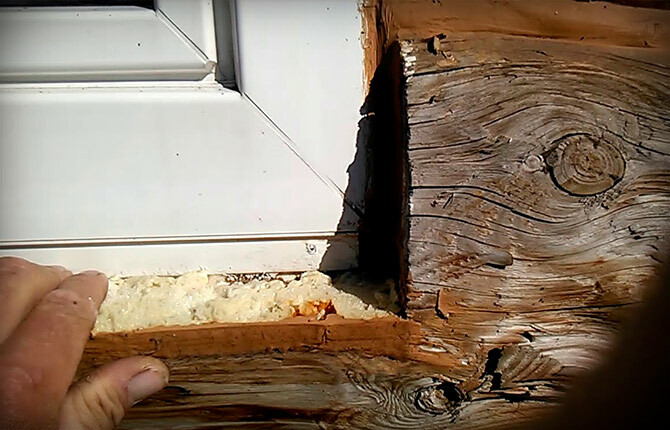
All that needs to be done is to remove the trim from the door frame, clean the old foam holding the block with the front door inside the wall opening. Usually, heat loss through the door block is due to the fact that when installing the front door, little foam was used or the PPU bottle was too hot, and the air temperature dropped below +2OWITH.
In this case, the foam expands poorly, cools quickly, collapses, leaving channels for the penetration of cold air. Therefore, the old foam must be removed, cleaned. The walls of the opening are moistened and sealed with polyurethane foam from a balloon. If the front door is double, the gap must be blown out simultaneously from the outside and inside. And so go along the contour.
You also need to pay attention to the condition of the nut. At wooden entrance doors, the base often rots, as the flowing condensate does not go anywhere. Therefore, under a wooden threshold, it is desirable to lay not a mounting foam, but a tile made of pressed foam glass, make waterproofing and be sure to protect against external moisture falling on the outer lining of the door canvases.
Insulation of a wooden door leaf - instructions
First of all, you need to correctly assess the thickness of the thermal insulation for the front door. There are two options for arranging an entrance with a wooden door:
- single wooden door with increased thermal insulation thickness;
- double door block - two wooden doors on one box.
The first option is used in cases where it is not possible to install a vestibule or a double block at the entrance to the house. This does not mean that a single door will be inconvenient. Just its thickness, taking into account the insulation, will be a little more than usual.
But even if you install a double entrance block, all the same, experts recommend insulating the outer sheet as much as possible and installing additional vapor barrier on the inner door leaf.
What will be needed?
For work, you will need a furniture stapler, polystyrene foam, mounting foam, a vapor barrier membrane used to insulate roofing.
In addition, some materials will be required in order to tidy up the door leaf and box. You will need to prepare a high-quality oil (polyurethane) varnish for outdoor use, you may need a propane burner.
Since the insulation will be carried out with foam, the outer lining will have to be replaced, made from boards or wooden slats. Therefore, to work with wooden blanks, you will need to prepare:
- jigsaw;
- manual grinder and electric planer;
- screwdriver;
- a pair of clamps;
- joinery fasteners - self-tapping screws 25-50 mm.
For insulation with your own hands, it is best to remove the front door and lay it on a table or workbench.
Step by step instructions
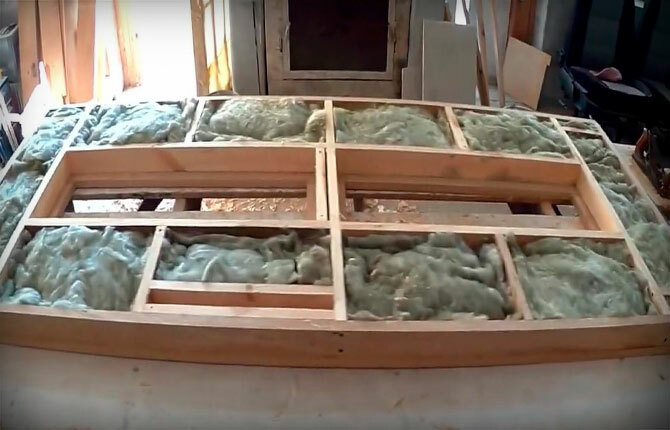
First of all, the door leaf must be disassembled, the top lining removed, and the old insulation removed. If there are glass inserts or windows, they will need to be removed. To obtain high thermal insulation characteristics, it is best to replace ordinary glass on the front door with a double-glazed window.
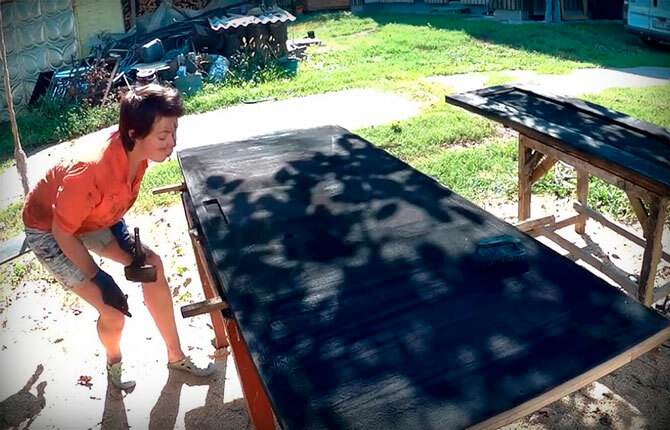
The old door block, canvas, platbands will first need to be burned from the old varnish and paint.
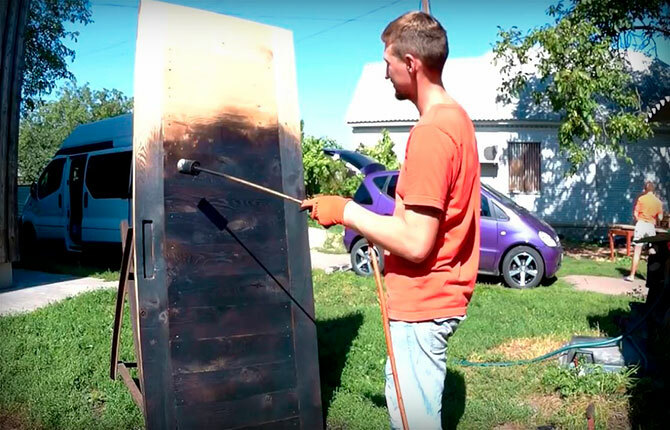
This will simplify the preparation for laying insulation, as well as dry the tree and at the same time destroy dry rot, pathogenic microflora.
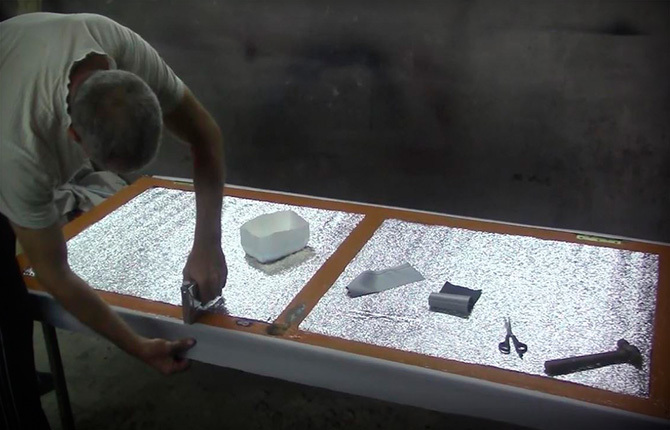
Next, you need to cut the foam into separate blocks. Each such element of insulation is cut individually in size and fits into its niche. It is important that the foam insulation "sit down" between the stiffeners tightly, without a gap.
The last step is to fill the door with a new wooden cladding. Since the vapor permeability of the foam plastic is quite low, comparable in level to dry pine, the boards must be laid on the frame of the front door as tightly as possible, without gaps.
If necessary, tighten with clamps before fastening.
Immediately, as soon as new insulation was laid inside the front door, the wooden lining was filled, the surface and the entire door leaf must be coated with polyurethane varnish at least twice, and carefully dry. This is done in order to fix the natural moisture content of the wood. Now you can insert a double-glazed window window, fasten the lock, handles and install on the hinges of the doorway.
Insulation with outer lining
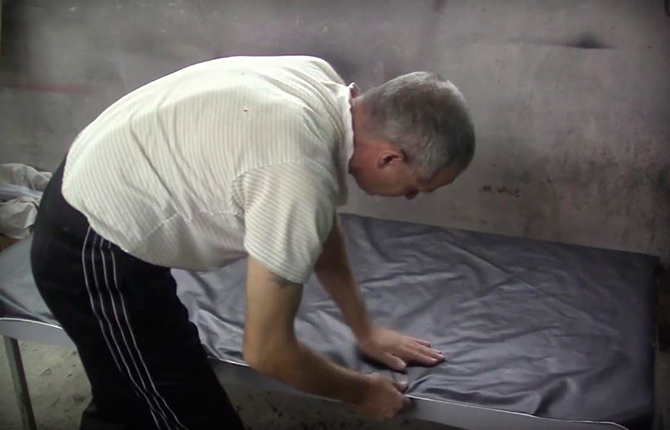
A fairly effective way to insulate a wooden door is to lay thermal insulation on the outer surface of the door leaf. It is not necessary to disassemble the wooden front door. It is enough to remove and lay the sash on a flat horizontal surface. The method is suitable for old apartments, country houses, where it makes no sense to put a new wooden door.
The base is insulated with lining polyethylene foam, and the top layer of insulation is sheathed with felt and sewing leatherette. You can use a ready-made door kit or buy materials separately.
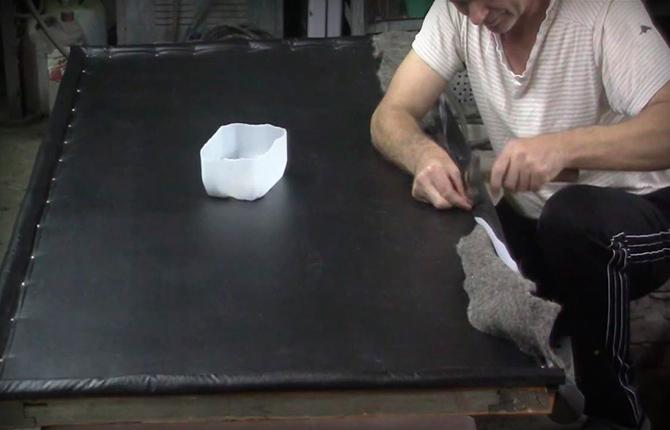
First of all, strips of leatherette are sewn around the perimeter of the door leaf, each 10 cm wide. The material is simply fastened around the perimeter, along the edge of the wooden sheet.
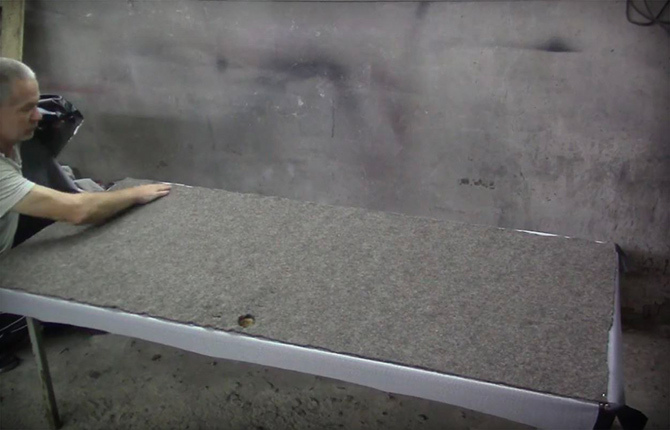
Next, you need to cut and lay the felt insulation on the outside.
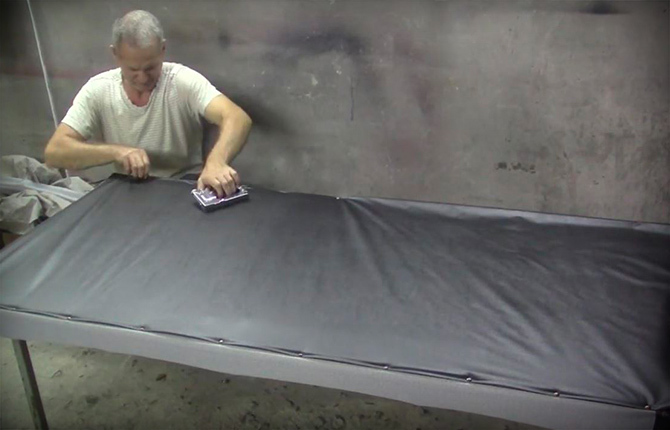
The next step is upholstery. A panel of dermantin is laid on top of the felt insulation, the edges are tucked inward, along corners can be hammered with wallpaper nails, the rest is sewn evenly to the wooden base with staples stapler.
The last stage of insulation - you need to make a side around the perimeter of the front door. To do this, a tourniquet is folded from scraps of insulation (felt), wrapped around with a previously sewn 10 cm flanging and nailed to the door with furniture carnations. The soft side performs decorative functions and at the same time, as a sealant, closes the gaps between the wooden frame and the front door leaf.
The platbands are necessarily sheathed with felt and dermantine. This is done not only for the sake of the appearance of the doorway. Insulation of the contour of the door block significantly reduces heat loss on old blocks, those that have stood in the house for at least 10-15 years.
Results
Making the insulation of the entrance wooden door is quite simple, if you do not save on the material and choose the right thickness of the insulation. For most door blocks, foam or foam is used. Mineral wool is recommended only for extremely cold climates.
Tell us about your experience with insulating front door blocks. What are the best options for an apartment? Also share the article on social networks and bookmark it.