Sheathing with siding is carried out with different materials - vinyl, metal, wood and even ceramic. The work is done manually - first they prepare and insulate the surface. Then they put the starting bar, after which they successively cover the wall with other bars. A step-by-step description of the process and recommendations for choosing a material can be found below.
The content of the article
- Which siding to choose
- What do you need to work
-
The main stages of pontage
- Warming and waterproofing
- Collection of crates
- Installation of the starting bar
- Corner mounting
- Installing slats
- Installing the main panels
Which siding to choose
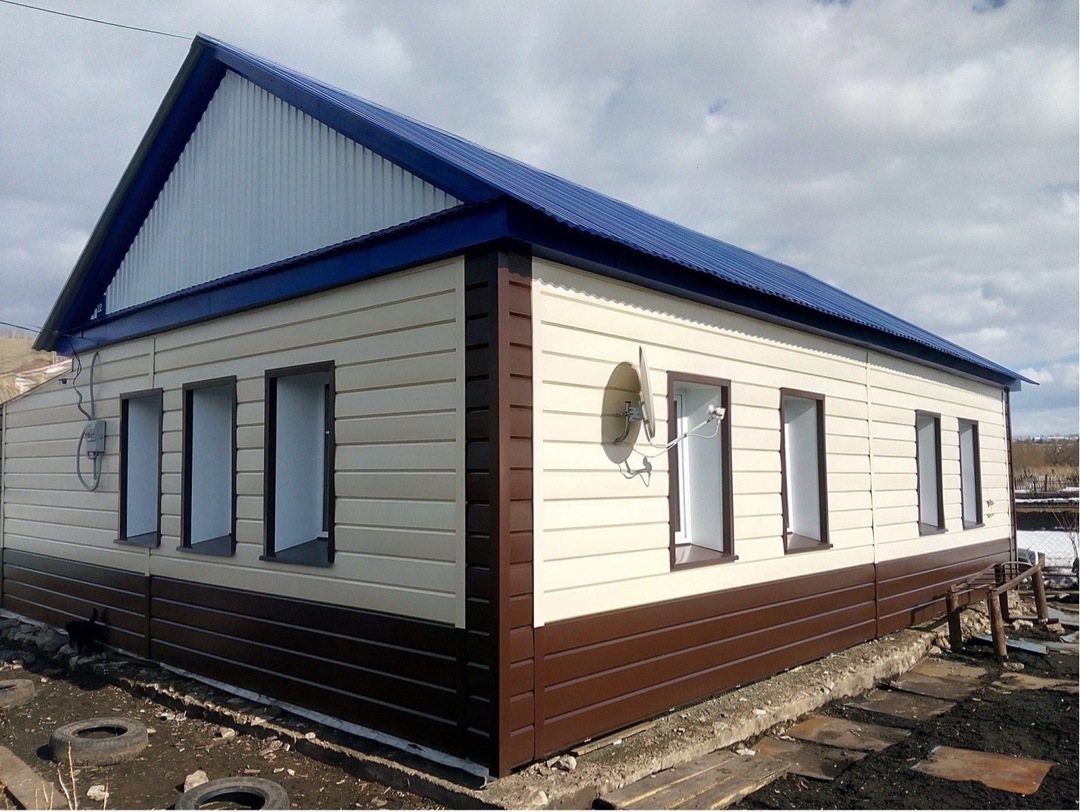
When studying how to sheathe a house with siding with your own hands, you need to consider several types of material:
- Vinyl siding is very durable, lasting up to 50 years. Easy to install, affordable price and variety of colors. Fully resistant to aggressive chemicals and water. A house sheathed with this type of siding looks attractive and stylish. However, it must be taken into account that the material burns out in the sun, although rather slowly.
- Metal is another way to properly sheathe a house with siding. It is made of galvanized steel sheet. From above it is covered with a polymer composition or paint. Thanks to this, the material becomes durable, resistant to moisture, temperature extremes and UV radiation of the sun. But it is heavier than vinyl and requires a new coat of paint every 15 years.
- You can consider how to finish the house with wood siding. This material is MDF panels, which are made from pressed sawdust and other waste. They are affordable, presented in a large assortment of colors, look aesthetically pleasing. But not as durable as the same metal or vinyl.
- If we sheathe the house with siding with our own hands, you can also consider ceramics. This is a modern material based on quartz sand, cement, plasticizers and other additives. It is resistant to water, temperature and sunlight, so it lasts for several decades. But it has a lot of weight and can break on impact.
What do you need to work
When learning how to sheathe a house with vinyl siding with your own hands, it is recommended that you first calculate the expense. To do this is quite simple:
- Measure the height and length of each wall.
- Add up all the areas of the walls.
- Subtract the area that falls on all windows, doors.
- Just in case, add 10% to the resulting number.
To figure out how best to sheathe a house with siding, you need to prepare the tools:
- screwdriver;
- ladder;
- building level;
- roulette;
- hacksaw for working with metal;
- perforator;
- a metal ruler or a corner;
- fastener - self-tapping screws, staples, nails;
- punch - a device that punches holes in the siding material to make fasteners.
The main stages of pontage
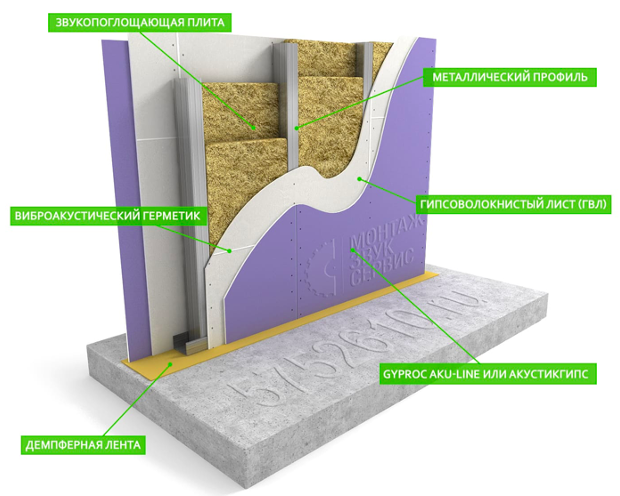
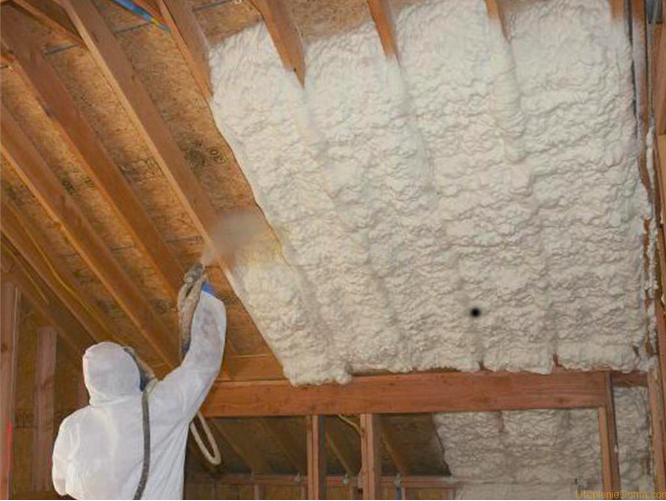
The work is carried out in several stages, usually 2-3 days are enough for this. Do-it-yourself wall cladding with siding begins with the installation of insulation, as well as waterproofing membranes. For this, for example, foam or mineral wool and a dense plastic film are used. Next, they begin to collect the crate, put the starting bar, and then cover the entire wall.
Warming and waterproofing
Sometimes builders doubt whether it is possible to sheathe a house with siding in the rain. It is better to work in dry weather, because first you need to prepare the surface, lay insulation and waterproofing. First, the surface is cleaned of dust and the walls are sealed. Then the waterproofing membranes are attached and a heater is placed on top of it.
This is followed by waterproofing. Moreover, it should not fit too tightly - it is necessary that an air gap remains. If you do everything right, you can be sure that the house is rotting under the siding. Thanks to waterproofing and insulation under the panels, an optimal microclimate with a normal level of humidity is created.
Collection of crates
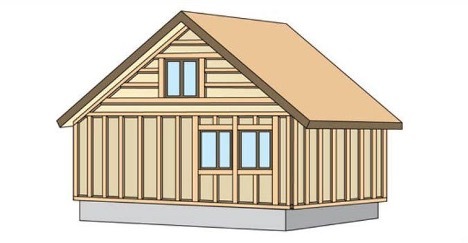
Regardless of how to replace the siding, it is necessary to assemble the crate in order to clad the house. To do this, they act like this:
- A frame is mounted from a profile or rails, which are placed horizontally or vertically at the same interval, for example, 30 cm.
- Additional slats are placed next to the corners and openings to make the frame strong.
- A few more rails are installed next to the gutters.
Installation of the starting bar
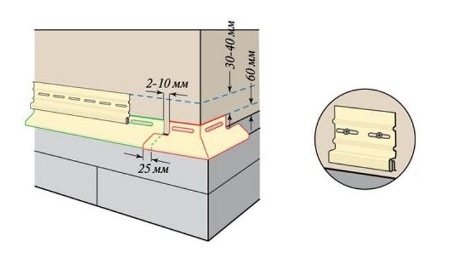
Installation of siding without insulation is usually planned only in a warm house or in southern regions with a mild climate. In other cases, the insulation is laid necessarily. Moreover, the coating itself begins to be made from the starting bar. It is attached around the entire perimeter of the house, stepping back from the bottom edge of 3-4 cm. The sequence of actions is as follows:
- Tighten the rope at the specified height.
- Set the initial (starting) bar.
- Neighboring fragments are not placed tightly, but with an interval of 5-6 mm, since an increase in size under the action of expansion is possible.
Corner mounting
When it is clear what kind of siding to sheathe the house, you should begin to mount the corners (external and internal). They are placed at the junction of adjacent walls. Moreover, the lower edge of the corner should go a little lower compared to the starting bar. First, the self-tapping screw is screwed into the upper hole of the fastener so that the corner just hangs, and then into the remaining holes.
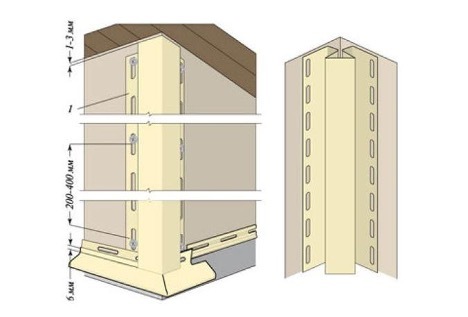
Each corner must be aligned strictly vertically. The remaining self-tapping screws are screwed in the center of the hole, and not completely - it is necessary to leave a small gap. The corners overlap each other by 20 mm so that the structure is strong.
Installing slats
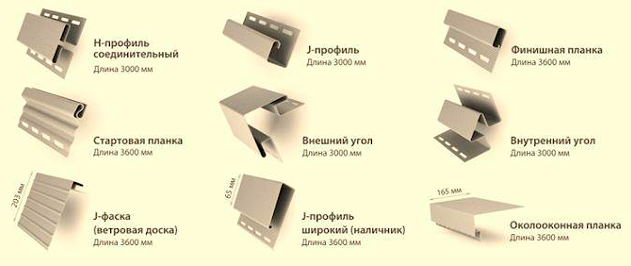
Now you need to sheathe the openings of the house - the contours of doors and windows. To do this, they take type J profiles and make cuts from the sides, install them from above. In the lower profile, a cut is made at an oblique angle (45o).
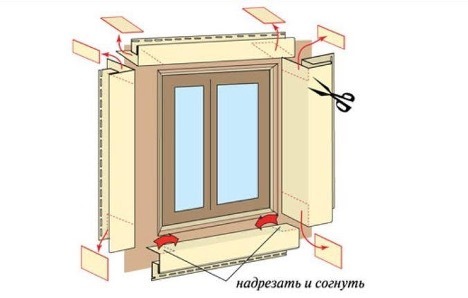
Planks are also cut vertically at 45 degrees. The platbands of each element must be connected so that the structure is sealed - the joints must be in close contact with each other.
Installing the main panels
Next, they put the main bars, the sequence of actions is as follows:
- The first bar goes to the starting profile, then it is fixed to the crate. The rest are stacked sequentially. This is the easiest step that does not require special equipment and skills.
- If the length of the planks is insufficient, several planks must be joined through the H-profile. It is pre-set and also fixed to the crate, taking into account the interval above and below (exactly the same as at the outer corners).
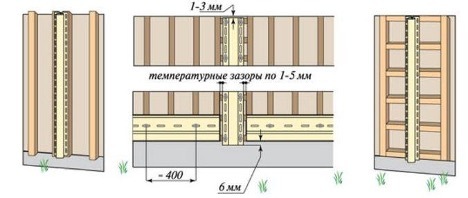
- Installation is sequentially carried out from the bottom bar to the top, as shown in the diagram.
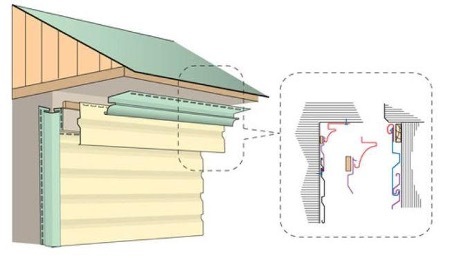
- "Hooks" are formed on the top panel.
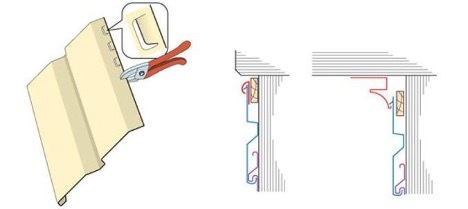
- From above fix the final bar.
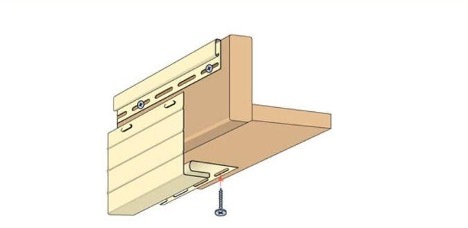
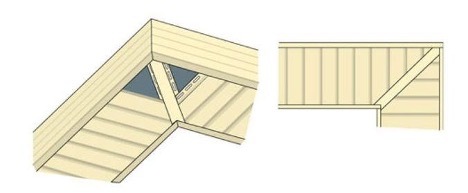
- This is how a corner is assembled - they put soffits between the J profile and the molding.
From this review it is clear how houses are sheathed with siding. The material is very popular because it is easy to install, durable, does not rot and practically does not fade in the sun. Installation can be done without special equipment, but it is important to properly insulate and crate. It is on this that the durability and strength of the structure depends.
