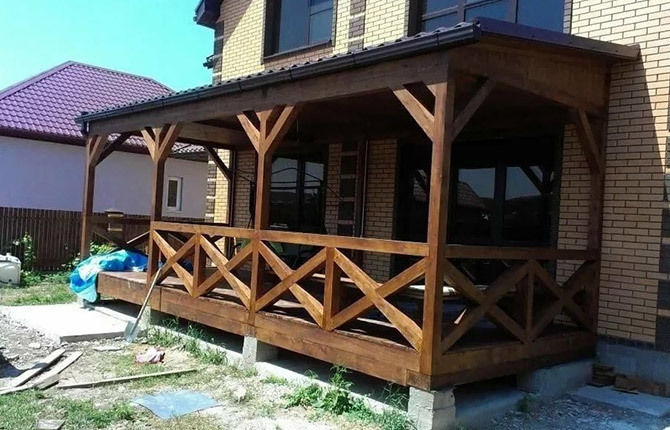
Building a house requires allocating time and money to make the structure spacious, strong and comfortable. After the housing is ready, it is necessary to carry out finishing work, depending on the type of walls. One option is plaster for foam concrete. The procedure can be carried out on both external and internal surfaces of house walls.
The content of the article:
- Why do you need internal plaster, facade
-
The best way to plaster a foam block
- Outside the house
- Inside the house
- Necessary tools, materials
- Surface preparation
-
How to properly plaster walls made of foam blocks
- Application of primer
- Fastening the plaster mesh
- Is it necessary to install beacons?
- Laying plaster in several layers
- Grout
- Popular manufacturers of plaster mixtures
- The nuances of plastering foam blocks from the inside, outside
Why do you need internal plaster, facade
Plastering of walls is carried out after rough repairs. Depending on the area being treated, plastering has several functions:
- For facade (exterior) finishing, plaster is used to increase the strength of foam concrete, strengthen resistance to sudden temperature changes, resistance to physical and mechanical influences. The wall is less susceptible to cracks and moisture ingress is prevented. Provided decorative finishing.
- Internal finishing work with plaster is intended to increase thermal insulation properties and facilitate the task of caring for foam concrete.
Thanks to the characteristics of the solution, the external and internal parts of the house are further enhanced in their protective properties.
The best way to plaster a foam block
The material for work is selected taking into account the type of surface being processed (brick, foam concrete, wood, etc.) and location. Due to the difference in the functional purpose of plastering, different types of plaster mixture are suitable for external and internal work.
If you use unsuitable materials, the finish can quickly crumble, be unevenly distributed, or damage load-bearing walls.
Outside the house
It is recommended to use plaster for treating external walls:
- silicate based;
- cement-based;
- cement-lime;
- acrylic.
They enhance the reinforcing properties of foam concrete, prevent destruction, thereby increasing the stability of the structure. The following mixtures are used:
- PROFIT contact;
- KNAUF Unterputz;
- Volma Layer - universal plaster;
- Foundation PC21 M - provides the ability to lay out layers up to 4 cm thick;
- Farbe Silicone mixture - tinting is possible to the desired shade, there are several types of the resulting surface: bark beetle, lambskin, etc.

When using Faber, you can decorate interior walls with the same composition.
Inside the house
Foam blocks inside the house are treated with plaster with a limestone base, based on the gypsum component in the case of dry rooms. If the room has high humidity, then craftsmen use waterproof acrylic-type bases (condition: no open sources of fire, such as a fireplace, open stove, etc.), silicone, cement or cement-polymer.
After studying the ratings, we see a high demand for the following models of plaster for processing foam concrete in the house:
- Aegis TM-35;
- Decor Ш-36 - cement, synthetic elements in the form of fibers responsible for enhancing reinforcing properties (suitable for manual application to foam concrete);
- Ceresit CT24 - high-quality mixture, affordable;
- Glims Velur is based on perlite rock (application in 2-3 layers ensures strong adhesion to the surface and does not crack).
It is recommended to study the characteristics of the plaster, methods of its application, and the properties of the resulting coating.
Necessary tools, materials
Do-it-yourself plastering requires a preparatory stage - preparation of tools:
- Spatulas. You will need a serrated, wide, narrow one depending on the location of the work and the depth of the unevenness.
- Grater.
- Mixer - makes mixing the solution easier and saves time.
- Trowel.
- Level.
- Roller.
- Rule.
- Brushes.
- Masking paper tape.
- Container for solution.
- A rag for removing excess material, cleaning brushes, rollers, etc.
Having prepared the necessary tools, it is worth preparing materials for repairs, calculating the quantity depending on the area of foam concrete being processed:
- to choose from: a mixture for preparing plaster or a ready-packaged liquid composition;
- primer for processing foam concrete;
- reinforcing mesh;
- corners, including perforated ones;
- beacon strips;
- sandpaper;
- if a wet facade is planned, then an adhesive composition.
The level of adhesion to foam concrete and the shelf life of the layer depend on the quality of the material. The tool will affect the speed of work, the density of plastering, and the smoothness of the walls.
Surface preparation
For tight adhesion of foam concrete and plaster, you will need to carry out step-by-step preparation steps. For this purpose the following is required:
- filling cracks, chips, potholes with the composition;
- cleaning from dirt, removing dust;
- leveling by smoothing protruding areas.
When working with foam concrete, it is recommended to use sandpaper to remove micro-grooves.
How to properly plaster walls made of foam blocks
Plastering a wall made of foam blocks is carried out in compliance with the stages and application rules. In order for the mixture to stay on the surface, the following must be observed:
- Carry out work at temperatures from 5 to 30˚С. When fluctuations are below or above the indicators, the mixture loses elasticity and adhesion deteriorates.
- Plastering of blocks is carried out no earlier than a month after completion of construction. Time is allocated for the shrinkage process.
- High-quality cleaning of foam concrete.
- The applied layer dries completely, then a new one can be applied.
- During interior work, the room must be isolated from drafts.
- The humidity regime is maintained - no more than 60%.
- To speed up drying, do not use a fan and/or heater. Otherwise, internal processes are disrupted and the characteristics of the plaster are violated.
- Electrical wiring must be de-energized during operation due to safety precautions.
To apply the mixture, you can use one of two options: in one thick layer or in several thin ones. Among the stages of preparing foam concrete, experts highlight the main ones, described below.
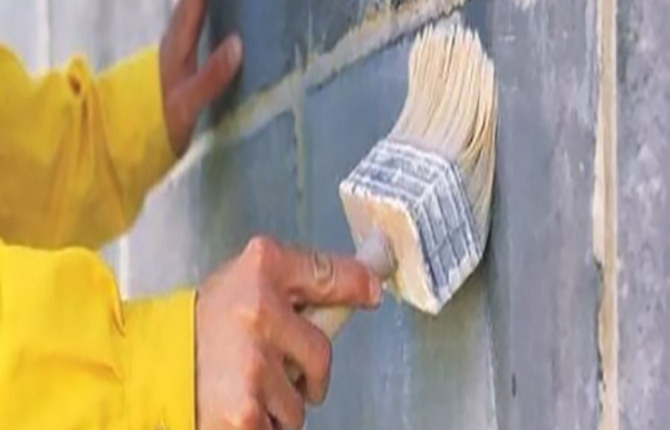
Application of primer
Priming is required to seal the open pores of the block, which helps prevent the mixture from dehydrating during drying. There is an increase in the adhesive bonds between the base and the cement mortar of the plaster, and the block material is strengthened.
Experts recommend using soil compositions developed for foam concrete. When choosing among several models, the level of humidity in the environment, temperature changes, porosity of foam concrete, and the presence of roughness are taken into account. The primer is applied in 2-3 layers, each of which must dry completely before laying the next one. A roller is used for the job.
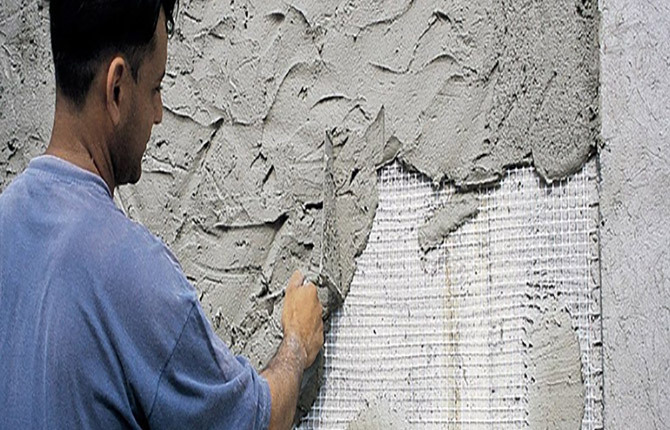
Fastening the plaster mesh
Fiberglass mesh is designed to enhance the adhesion index - the level of adhesion of surfaces to each other. The mesh element is laid in the first plaster layer. After installation, you need to level the material using a spatula from the center to the periphery. It is important to remember that the mesh must be evenly covered with the solution.
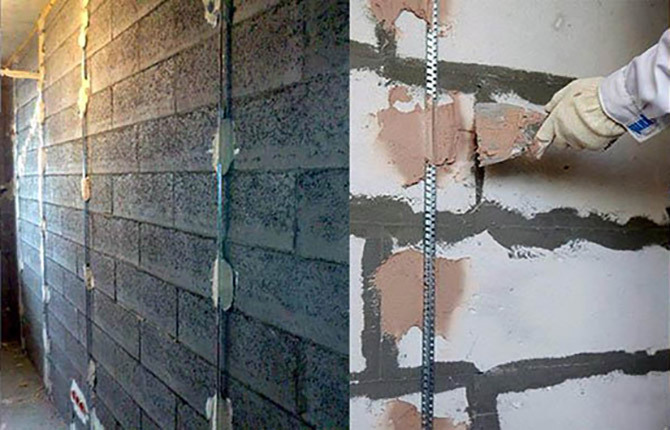
Is it necessary to install beacons?
If the planned plaster layer with cement mortar is planned to be 7 mm thick or more, beacons must be used. You can choose metal, wood, plastic. Installation occurs on the wall surface in increments of 100 to 130 cm. Using a level or plumb line, the beacons are distributed so that with their upper surface they form the upper plane of the plaster.
Laying plaster in several layers
If the area of the room being processed is large, builders advise performing plastering work in stages. Solution distributed in several layers. The process takes a long time to complete, but the layer-by-layer distribution and drying of the material helps strengthen the foam concrete and enhance the protective properties of the plaster.
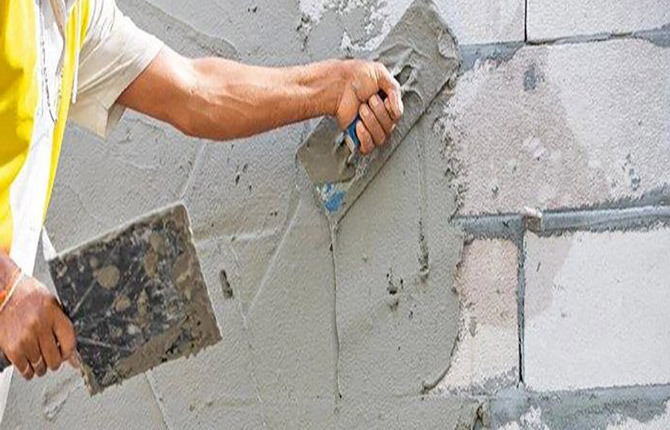
The technology involves applying the composition with a spatula or trowel. Before spreading the solution, wet the wall by spraying water.
Grout
After the solution has dried and stopped sticking to your hands, the grouting stage begins. A tool in the form of a grater needs to be applied to a leveled surface, with light pressure, go parallel to the wall, this is a circular grout.
At the end of it, “stretching” is carried out - straight movements of the tool, alternately vertically and horizontally with clear, quick rubbing. It is required for subsequent gluing or painting of the plastered area.
Compliance with all stages and careful execution of work is the key to quality.
Popular manufacturers of plaster mixtures
After studying these ratings and surveying craftsmen, it turns out that among manufacturers of facade and interior plaster mixtures the following brands are used:
- Volma;
- Founds;
- KNAUF;
- PROFIT;
- Farbe;
- Aegis;
- Decor;
- Ceresite;
- Glims.
You can familiarize yourself with the models and their characteristics in the table.
| Model | The basis | Distribution | Min., max. layer thickness, mm | Adhesion(MPa) | Fraction size |
| Volma Layer | gypsum | outside | 5,60 | 0,3 | 1,25 |
| Founds PC21 M | cement | outside | 5,40 | 0,4 | 0,63 |
| KNAUF Unterputz | cement | outside | 10,35 | 0,4 | 1,5 |
| PROFIT contact | mineral filled cement | outside | 5,50 | 0,3 | 1,25 |
| Farbe | silicone | outside | 2 | 0,3 | 2 |
| Aegis TM-35 | gypsum | inside | 3,40 | 0,4 | — |
| Decor Ш-36 | cement | inside | from 3 | 0,8 | 2,5 |
| Ceresit CT24 | cement | inside | 3,30 | 0,4 | — |
| Glims Velor | cement | inside | 5,35 | 0,3 | 1,5 |
The use of plaster helps strengthen the foam concrete and extend the life of the building.
The nuances of plastering foam blocks from the inside, outside
Working with foam concrete requires mastering and applying sanding technology. Master builders pay attention to the need for preparatory procedures aimed at improving the properties and strengthening of foam concrete. A nuance in the work is the requirement to artificially increase the adhesion index.
Plastering the facade and interior walls is an important stage carried out after the construction and shrinkage of the building. Mixtures are used for leveling, insulating, and decorating surfaces, which allows owners to make their home more comfortable and stronger. It is worth carefully approaching the choice of plaster, paying attention to its characteristics, drying time, and the presence of additional elements with a fraction of 1 to 2.5 mm.
What composition do you plan to use for plastering and why? Share the link on social networks and bookmark the article.