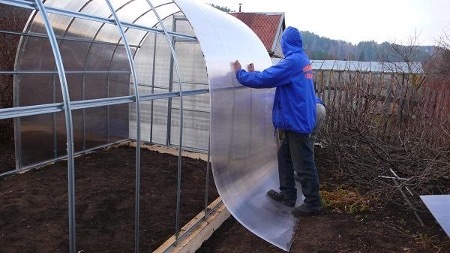
A greenhouse with a polycarbonate coating is a reliable and durable structure. However, over time, polycarbonate may need to be repaired, especially if cracks or holes appear on its surface. Before starting repairs, it is important to inspect the surface of the polycarbonate and determine the extent of the damage.
The content of the article
- How long can a polycarbonate greenhouse last with proper care?
-
How to repair a hole in polycarbonate in a greenhouse
- Covering small cracks and scratches
- Major Damage Repair
- Finishing work
- How to repair polycarbonate in a greenhouse
- How to cover the ends of polycarbonate in a greenhouse
- conclusions
How long can a polycarbonate greenhouse last with proper care?
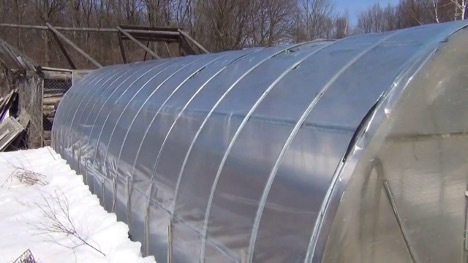
Greenhouses made of polycarbonate are highly durable and can last quite a long time with proper care. The average life cycle of such a greenhouse is from 10 to 15 years, but there are cases when, under favorable conditions and high-quality care, greenhouses have served for more than 20 years. An important aspect that affects service life is the quality of the polycarbonate itself. High-quality polycarbonate with UV protection is able to withstand exposure to sunlight, maintaining transparency and strength for many years.
To maximize the service life of a polycarbonate greenhouse, you should follow the following care recommendations:
- Regularly clean polycarbonate from dirt, dust and sediment. This will help avoid darkening and loss of transparency of the material.
- Avoid strong impacts and impacts on the polycarbonate surface to prevent cracks and chips.
- Check fasteners regularly and tighten them as necessary to ensure the polycarbonate sheets are securely attached to the greenhouse frame.
- Avoid using harsh chemicals when cleaning polycarbonate as they can damage the material.
If you follow these recommendations, a polycarbonate greenhouse can serve you for many years, providing excellent conditions for the growth and development of plants.
How to repair a hole in polycarbonate in a greenhouse
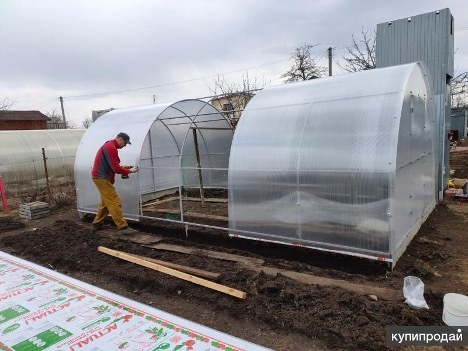
Damage to polycarbonate in a greenhouse can occur for various reasons, be it mechanical shocks, weather conditions or natural wear and tear of the material. However, do not despair if a hole appears on the surface of the polycarbonate. There are various ways to seal the hole and extend the life of your greenhouse. Here are step-by-step instructions for repairing polycarbonate in a greenhouse:
- Assess the size and extent of damage. This will help determine whether the entire sheet needs to be replaced or if local repairs are sufficient.
- Purchase the necessary materials: polycarbonate glue, transparent or colored polycarbonate patches in depending on your preferences, as well as an all-purpose cleaner to remove dirt and grease from surfaces.
- Thoroughly clean the area around the hole of dirt and dust using an all-purpose cleaner.
- If the edges of the hole are uneven, carefully trim them with a knife to get even edges.
- Apply polycarbonate adhesive to the edges of the hole, following the adhesive manufacturer's instructions.
- Place the polycarbonate patch over the hole so that it completely covers the damaged area.
- Gently press the patch onto the surface, making sure the adhesive is evenly distributed between the patch and the polycarbonate sheet.
- Allow the glue to dry completely for the time indicated on the package.
- After the glue has completely dried, check the strength of the connection and make sure that the patch is securely attached.
- If necessary, repeat the process or apply an additional layer of glue along the edges of the patch to improve the seal.
By following the instructions above, you can restore the integrity of the polycarbonate in your greenhouse and continue to successfully grow your plants.
Covering small cracks and scratches
Minor damage can be repaired using a special polycarbonate adhesive or sealant.
Repair step by step:
- Choose an adhesive specifically designed for polycarbonate.
- Apply glue into the crack or scratch using a thin applicator.
- Allow the glue to dry completely for the time indicated on the package.
- If necessary, gently buff the treated area until the surface is smooth.
Major Damage Repair
Larger damage, such as deep cracks or holes, may require more extensive repairs.
Repair Tips:
- if the damage to the polycarbonate greenhouse is too extensive, the damaged area may need to be cut out;
- prepare a patch from a new polycarbonate sheet that exactly matches the dimensions of the cut out area;
- Apply glue to the edges of the cut out area and patch, and then attach it to the polycarbonate;
- let the glue dry completely.
Finishing work
Once the repair is complete, perform a final inspection to ensure that all damage has been repaired and the polycarbonate is securely bonded.
What else needs to be checked:
- make sure that all cracks and holes are securely closed and the surface of the polycarbonate is smooth;
- clean the treated areas from any remaining adhesive and sealant;
- If necessary, polish the surface to restore the original appearance of the greenhouse.
Thus, knowing the main stages of repair, you can significantly extend the service life of a polycarbonate greenhouse.
How to repair polycarbonate in a greenhouse
If the damage is more severe, the polycarbonate in the greenhouse may need to be repaired.
Preparatory stage:
- Assess the general condition of the polycarbonate.
- Determine whether it can be repaired or whether the polycarbonate on the greenhouse needs to be replaced.
- For repairs, you can use special adhesives or sealants, as well as reinforcing tape.
When replacing polycarbonate, it is important to choose high quality materials to extend the life of the greenhouse.
How to cover the ends of polycarbonate in a greenhouse
When replacing or repairing polycarbonate, it is important not to forget about the ends of the material. What can be done to preserve the greenhouse for as long as possible:
- in order to close the ends of the polycarbonate, you can use special profiles.
- they will help protect the greenhouse from moisture and dirt getting inside, and also improve the appearance of the structure.
conclusions
Repairing and replacing polycarbonate in a greenhouse is a task that may require some skill and knowledge. However, with the right approach and quality materials, you can significantly extend the life of your greenhouse and maintain its functionality for many years.
