 Thanks to its mobility, a laptop is an indispensable thing. It is easy to carry anywhere and regardless of location, watch movies, contact friends and partners. For comfortable use, the laptop should be located on a flat and hard surface. In most cases, it is placed on your lap, which is not very convenient. However, making a laptop stand with your own hands is not difficult at all.
What can I make a table with my own hands?
The content of the article
- What can I make a table with my own hands?
- Notebook table - instructions
- Coating
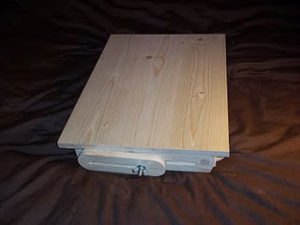
In general, the design of the laptop tables is identical. Differences can be found in the design and some functional features. Most often, wood is used as material. Pine is considered sufficiently durable and light. You will need wooden shields, the sizes of which are selected taking into account the future product. You can also use plywood or particleboard. Consider making a standard wooden table. The following materials will be required:
- wood glue;
- paint, brush, wood coat;
- sandpaper;
- hammer, nails;
- saw, jigsaw;
- primer.
IMPORTANT! When using plywood, its thickness must be at least 5 mm.
Notebook table - instructions
 Before starting work, you should prepare materials and draw a diagram of the future product. The dimensions of laptops can be different, so you need to choose the optimal size for a particular device. First you need to make blanks. With a simple pencil, the sketch is easily transferred to a wooden base. Cutting out forms is one of the most difficult stages of work. In this example, it is recommended that you prepare the following details:
- countertop 66.5 x 30 cm .;
- legs 2x2 cm thick. and 23 cm long .;
- 28 cm side apron. in length.;
- two long parts of an apron on 63 cm.
On average, even an inexperienced craftsman can make a similar design in a couple of days. Follow a certain sequence of actions:
- Feet on the edges are best sanded so that they look more aesthetically pleasing. This operation can be done either with a special tool or manually.
- Place the countertop face on the work surface and glue all the details of the apron with glue. Hold the parts firmly for a firm hold. It is better to remove excess adhesive immediately with a sponge so that there are no unaesthetic stains.
- Then flip the countertop to the other side and attach it to the apron with nails.
- Turn the tabletop over again and in the corners strengthen the legs with glue and screws. Each must be fixed on both sides. The main thing is not to overdo it with the length of the screws so that they do not crawl out.
- The work is almost done. It is recommended to leave a table for a day for complete drying.
- Next, the countertop is sanded with sandpaper, and it acquires smoothness.
- If the part was combined from several planks, then the surface is primed and leveled with putty.
REFERENCE! You can show imagination and, if you wish, make a recess in the countertop for various devices. Lovers will appreciate this in bed with a laptop and a cup of tea.
Coating
In the hardware store it will be easy to choose the color of the paint, which will harmoniously combine with the style of the room. It is more convenient to use materials that dry quickly. Paint is best applied in several layers. The fact is that many of them are good liquid absorbents. So, when drying, gaps appear. Sometimes after the initial staining, the paint is not noticeable.
 It is recommended to clean the surface with a fine-grained sandpaper. You can also apply colorless matte or glossy varnish on top. The process of varnishing is much simpler than painting. Vinyl stickers are also better to cover with a layer of varnish, so that they retain their original appearance longer.
ATTENTION! When staining, the brush should be driven only along the fibers, constantly making sure that there are no smudges.
A laptop table is an indispensable thing for those who spend a lot of time at the computer. In addition, it is multifunctional and can be used as a breakfast tray or bench. We hope that this article will be useful and will help you make this useful item yourself.


