The bed is where we spend a third of our lives in a dream. That is why its choice must be approached responsibly. Of course, you can purchase a bed at any furniture center. But, you see, it is much more interesting to make a bed yourself.
Therefore, further we will tell you how to make a bed with your own hands and figure out what tools and materials you need for this.
The content of the article:
- Materials for building a bed
-
Bed assembly instructions
- Option number 1 - wooden bed
- Option number 2 - podium bed
- Option number 3 - double bed with headboard
- Option number 4 - pallet stock
- Option number 5 - children's bunk bed
- Option number 6 - hanging bed
- Making a soft headboard
- Conclusions useful video on the topic
Materials for building a bed
In large construction hypermarkets and specialized furniture stores, you can find everything you need to build a bed.
For the manufacture of the frame, as a rule, wood, plywood, laminate are used. Those structural elements that will be visible are trying to be made from MDF the color and texture you like. Painted looks especially attractive MDF.
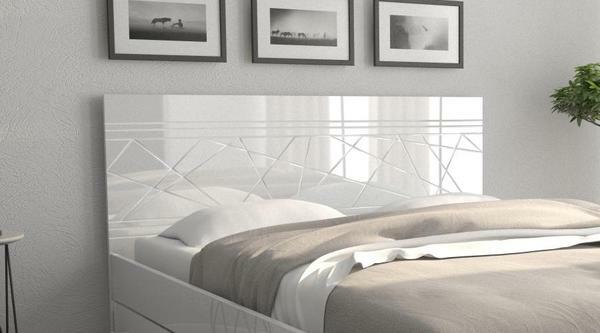
A bed with a headboard made of painted MDF with corrugations in geometric patterns, ideal for minimalist and neoclassical interiors
Very often, the headboard is supplied with foam rubber and covered with fabric / leather /eco-leather. This element is decorated in the style capitone or a carriage coupler.
Basic materials for assembling the bed: wood or sheets MDF not less than 2 cm thick, contrasting edge or to match the main color of canvases 1-2 mm thick, wooden beam 50x50 mm, at least 4 m long. It is better if the beam is made of pine or beech.
You will also need solid boards, up to 2 meters long, and, depending on the chosen design, plywood sheets may come in handy.
To make a bed from boxes, it is advisable to buy chipboard. This material is much cheaper. MDF. The only thing is that chipboard sheets are not suitable for forming the flooring, since they are very thin.
In order to end up with a durable and strong bed, you need to choose the right mount. When calculating the number of fasteners, take into account the drawing of the bed.
Also, do not forget about purchasing glue, without which it is impossible to connect the structural elements.
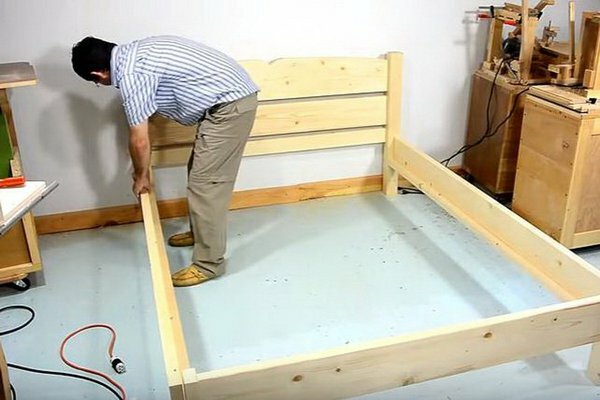
The glue is applied with a notched trowel to those parts of the bed that will adjoin each other. For a secure connection of parts, they are held tightly pressed against each other for 3-4 minutes
In addition to glue, you will need: self-tapping screws, 3-7 cm long, nails 6-7 cm long, metal corners.
When choosing metal corners, attention is paid to stiffening ribs and bending. Stiffeners should be rounded and wide. The bending surface should be smooth.
The presence of burrs indicates that burned-out low-quality metal was used for the production of corners. Such connecting elements are fragile - they quickly crack and break.
Bed assembly instructions
There are many types of beds. They differ in the materials of which they are made, in appearance, in the method of joining parts, in size. The bed can stand on legs or sit directly on the floor.
Which option is best is up to you. Focus on your taste and materials at hand. If you plan to place the bed on a concrete floor in a room with high humidity, worry about treating the wood with special antifungal agents.
Option number 1 - wooden bed
The first step is to build a frame that will serve as the basis for our entire structure. The standard frame height is 15-20 cm. When assembling a bunk bed, you will need to prepare two frames of the same size.
If the product rests not on the legs, but on the side walls, it is advisable to provide drawers. Such parts of the structure are designed to store bedding and other things.
Stages of assembling the bed:
- Collect the frame. The connection in the corners is carried out by means of a "lock" type fastening and metal corners.
- Bars are installed in the center on which the central jumper is placed.
- The legs are attached with self-tapping screws and bolts and place them, as a rule, along the ends of the bed and the central beam.
- Next, transverse boards are cut from the boards and fixed with screws to the support strips with a pitch of 35-40 mm.
- When everything is ready, all ends are sanded, the product is stained and varnished.
We have considered the option of the simplest bed that does not have a headboard. But in modern interior solutions, more sophisticated types of sleeping places are used.
The design feature of such beds is the presence of a headboard or footboard.
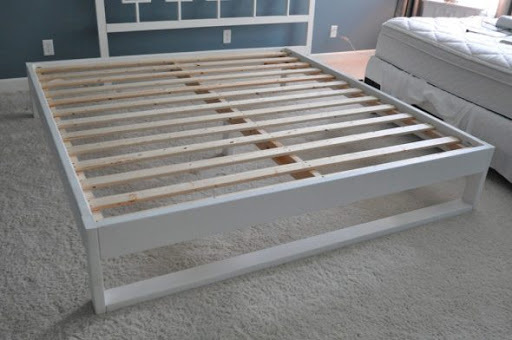
For strength and so that the bottom of the bed does not sag, legs must also be placed on the central lintel.
Remember, the length of the berth is selected taking into account the height of the person, 20-30 cm is added to it. The standard length is 190-210 cm. The width of the berth is determined by the number of sleepers. There are single beds - 100-150 cm, one and a half - 120-160 cm, double - 140-160 cm and children - 90-100 cm.
The height of the bed can be in the range from 20 to 90 cm, but the standard is considered to be a height of 40-60 cm. As a rule, tall beds are placed in small rooms, and nbedside the area is used for storing things.
Instead of drawers, the entire space of the bed can be used. The flooring with a mattress, in this case, is lifted using a gas lift mechanism.
Option number 2 - podium bed
For those who want to assemble a podium bed with their own hands, the first step is to decide on the type design, since the berth can be located inside the frame or move out, and its zone placement.
Next, you need to complete the drawing and make markings on the walls and on the floor. When placing the podium close to the wall, it will be necessary to remove the skirting board.
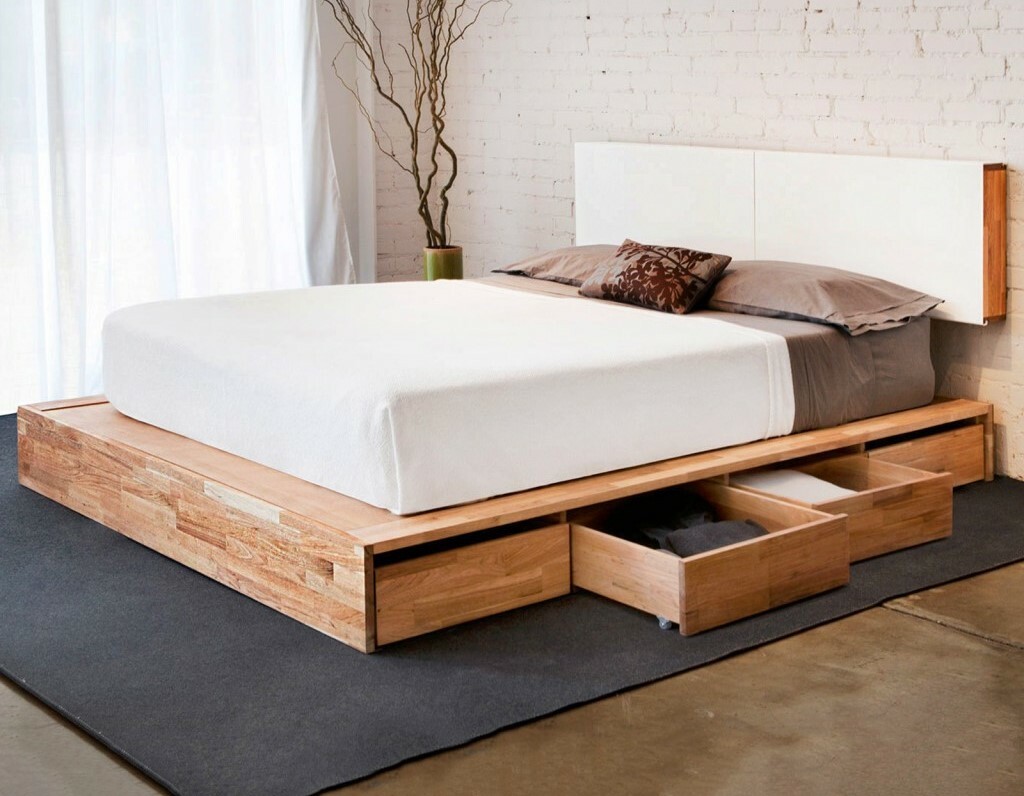
The stylish podium bed by the window gives the room a special touch. This option will look advantageous in almost any interior.
Consumables: timber with a section of 50x50 mm, plywood sheets with a minimum thickness of 12 mm for rough finishing, boards, MDF, laminate or Chipboard for finishing cladding, galvanized corners, glue, screws, anchors. Of the tools you will need: building level, screwdriver, tape measure and saw.
Stages of creating a podium bed:
- The prepared beams are fixed to the floor and walls horizontally according to the markings. For this, anchors are used.
- Vertical bars are attached to the resulting workpiece, which will serve as the legs of the structure. The distance between the lags should not exceed 40 cm.
- Determined with the location of the mattress. At its location, an additional frame is created: 2 long beams on the sides and 1 along the center line.
- Stuff slats at the locations of the frame beams.
- Place the head of the bed by attaching it in the right place.
- Prepared plywood sheets or MDF fastened on top and on the sides of the frame with screws. The visible sections of the panels are pasted over with an edge matched to the frame color.
Additional elements of the podium bed can be built-in drawers or steps. The decor of the product involves the placement of carpet, LED strips, bedside tables.
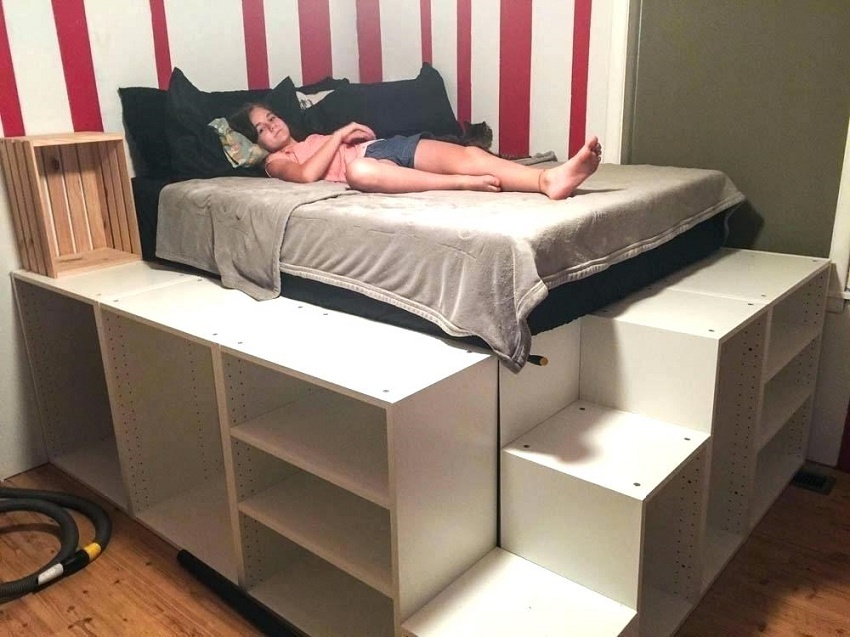
Steps always look decent on a podium bed. They are made from plywood or polished wooden planks, and the space under them can be equipped to store various things.
Stylish podium beds perfectly zone the space, allow you to allocate more free space in the room, hide the unevenness of the floor, and also look very original and stylish.
Option number 3 - double bed with headboard
Double beds with a headboard are the perfect solution for bedrooms decorated in any style. The headboard can be soft or hard. The standard bed is 200x160 cm.
Before starting work, a drawing must be developed. He will allow not only visualize future product, but will also help to correctly calculate the amount of consumables.
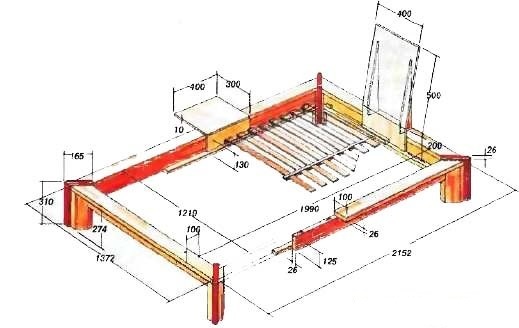
An approximate scheme for arranging a Japanese-style bed with a designation of the sizes of all structural elements. All dimensions are in mm
Stages of making a bed in a soaring style:
- Cleaning the edges with a sander. Coloring the tree.
- Joining boards using metal corners.
- Formation of the head of the bed. Planks are attached to two beams, and boards are placed between the planks.
- Accession lamellae to the sides.
- The vertical beams are connected to the horizontal bar using wood glue and large bolts.
- Connecting the base of the bed to the headboard.
With such a floating bed, your abode will look stylish and unusual.
Option number 4 - pallet stock
Recently, beds made of pallets have been especially popular. They are located in the country, in the back rooms of commercial real estate and in apartments.
Homeowners consider this solution as a temporary option, used until a suitable bed is purchased.
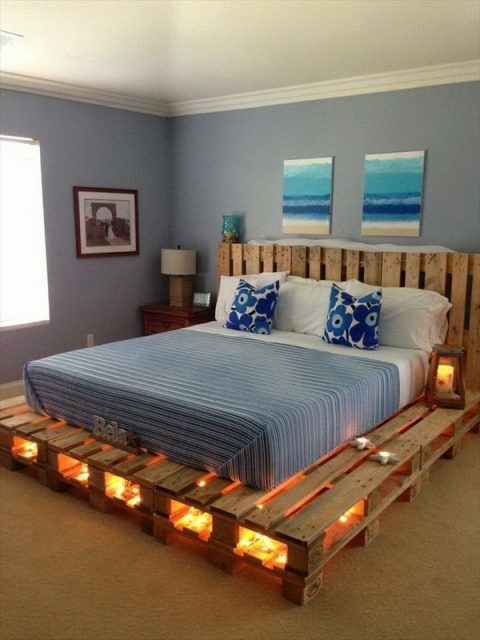
A pallet bed is a modern and fashionable solution for decorating a sleeping place. A little decor and imagination and a pallet bed will turn into something fabulous
When assembling a bed from pallet wooden pallets are treated with protective agents that prevent moisture from acting on the tree and the formation of fungus. For the construction of a standard double bed, only 6-8 pallets are used or 4 euro pallets.
Furniture must not be placed near fireplaces. It is also not advisable to jump on it, otherwise you can simply break through the bottom.
It will take very little time to assemble the product, because pallets - these are ready-made structures that just need to be correctly connected to each other.
Stages of work with Euro pallets:
- Cleaning pallet from dirt and dust with a sander or sandpaper. Primer, opening with varnish or paint. Waiting for complete drying.
- Fastening pallets together in the selected order. As a rule, 6 pallets are connected to each other. Metal corners, plates, bolts are used as fasteners.
- To collect the bed, the design of which assumes a niche for the mattress, the top layer of the pallets is laid upside down. The supports are cut in such a way that the letter "P" is obtained.
- The pallet headboard is placed on top of the hammered frame.
The knocked-down frame of the finished product is placed in the room. A mattress is placed on top and bedding is laid.
A pallet bed can have side cabinets on which it is convenient to place a lamp, mobile, magazines.
Option number 5 - children's bunk bed
Bunk beds are relevant for families with several small children. Designs with two berths allow you to rationally organize the space.
The lower tier can be made in the form of a bed or a desk, the upper one is designed for a child's sleep.
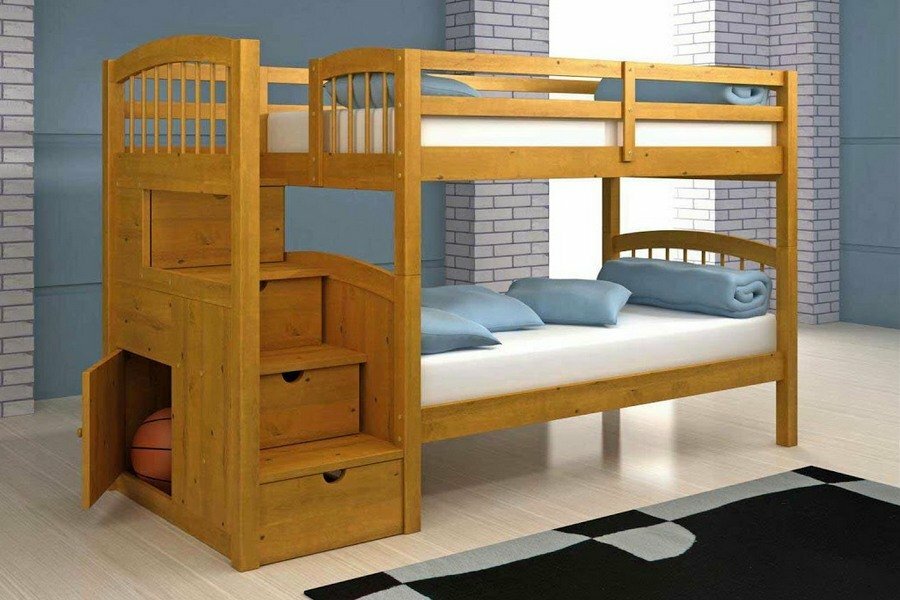
There are many options for beds in several tiers. The most popular of them are traditional beds, beds with steps and built-in drawers, beds for 3 people, furniture with an additional pull-out bed, a bed with a separate work area
To create a traditional bunk bed, you need to stock up on boards and self-tapping screws. The calculation of materials is carried out taking into account the drawing. The thickness of pine or beech boards varies from 20 to 45 mm.
The first step is to start forming the end frames of the bed. The boards are attached to one another with self-tapping screws. Collect the horizontal bars and then place slats. Finally, a staircase is built. All other elements are attached according to the drawing.
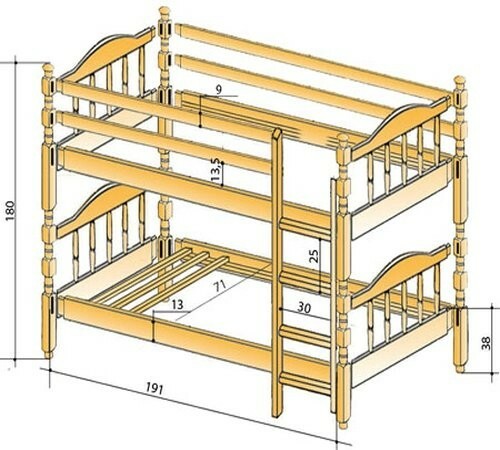
Assembly diagram of a children's bunk bed made of wood. The diagram in cm shows the dimensions of all parts of the product
Before attaching parts, be sure to drill holes in the screw locations. After the bed is assembled, cover it with wood stain or colorless glossy varnish.
Option number 6 - hanging bed
In the world of interior design, hanging beds deserve special attention. They are distinguished by their unusualness, stylish appearance and the possibility of easy swinging - the ceiling version.
Can you make such a bed yourself? Of course! It is enough to be patient and strictly follow the recommendations of professional furniture makers.
There are several types of hanging beds: ceiling, wall, combined - attached to the ceiling and wall.
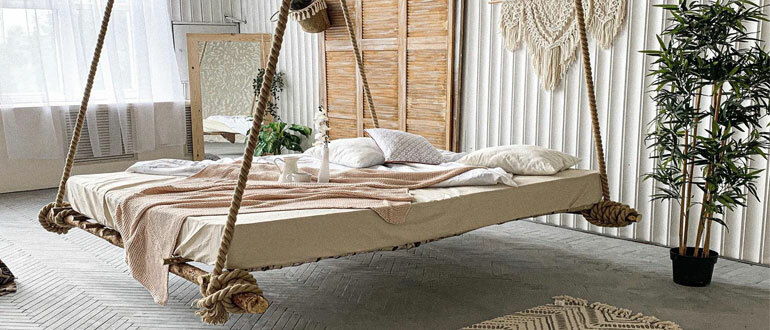
Ceiling hanging beds resemble a swing. From 4 sides, they are attached to the ceiling with ropes or metal chains. Suitable for interior styles of country, provence, loft, minimalism. Products can be supplied with backrest and armrests. Small swing beds are ideal for decorating a loggia or veranda
Furniture is made as follows. First, they are determined with the location of the bed. It is best to install it away from furniture, otherwise it can touch and damage other objects in the room during movement. Then the frame is hammered together. Corners are used to connect wooden elements, self-tapping screws and glue. The sides are attached with nails to the frame.
Bolts are installed along the perimeter of the bed in 4 sides, and anchors are fixed in parallel on the ceiling. To fix the bed in a floating position, the ropes are first threaded through the anchors on the ceiling, and then they are attached to the swing frame. Next, you can put a mattress and bed linen on the bed.
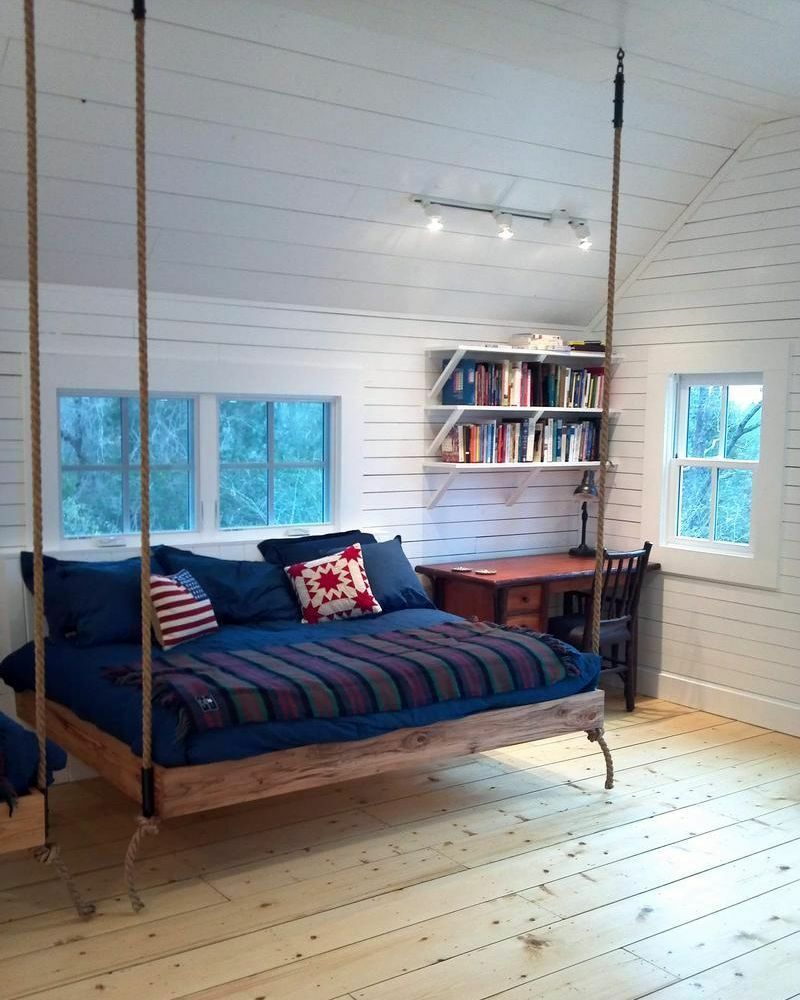
It is not necessary to use special bolts to secure the ropes to the bottom of the bed. You can just make holes and tie the ropes with a sea knot.
The hanging stock has an extraordinary design. These swing beds are simply adored by children and young people.
The only drawback of sleeping places is the lack of the ability to move around the room. The difficulty of making a bed has more to do with a secure fit than with making a frame.
Making a soft headboard
Beds with a soft headboard look like a million. You absolutely do not need to spend fabulous money to buy such a bed, because you can make it yourself.
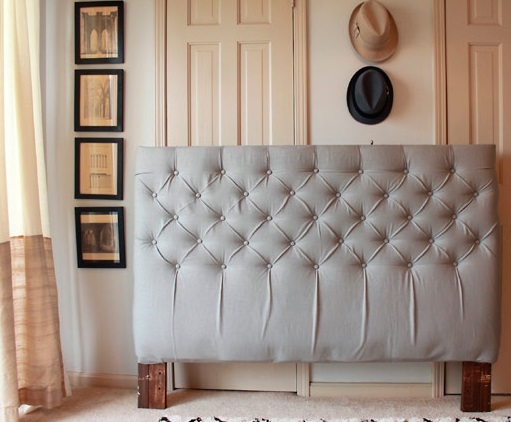
A bed with a soft headboard is a great solution for modern, art deco, neoclassical interiors. A soft headboard can be a good decoration for almost any homemade bed.
We will consider the most difficult method of making a soft headboard in the form of a carriage coupler - in a different way capitone. To do this, prepare glue, foam rubber, upholstery, buttons, silk thread and stapler with brackets.
Manufacturing steps:
- Choose pretty fabric-covered buttons. If you wish, you can cover the buttons with the material yourself.
- Mark the slab. Draw parallel and perpendicular lines, mark the vertices of the rhombuses. Drill 2-3 mm through holes in the tops of the rhombuses.
- Cut a piece of foam to the correct size and use glue to attach it to the slab. If necessary, the excess foam is trimmed with a sharp knife.
- On the foam rubber, mark the places where the buttons will be located. To do this, remove the awl through the holes of plywood or chipboard, pierce the foam rubber with it and put a dot with a felt-tip pen at the puncture site.
- In foam rubber in the mark area cut out small diameter holes. They should be clear and rounded.
- Overlay layer padding polyester to level the surface. Fix it stapler. Use your fingers to break through the area where the buttons will be placed.
- Place fabric / leather on the headboard. Secure it stapler. For better material tension, use a rail that is nailed from the inside of the product. Pay particular attention to the corners when working.
- Using an awl, pull the buttons with silk ropes inward. Tighten each rope one at a time and secure with staples.
After these rather complicated procedures, the headboard is placed above the bed. The most important thing in the work is the accuracy of the marking and the correct tension of the fabric / leather, especially in the corners.
Conclusions useful video on the topic
To learn how to assemble a bed from a bar with your own hands, see the video:
We hope we have answered in detail the question of how you can independently assemble a bed with your own hands. This will require: desire, minimal skills and some free time.
And if you have experience in self-construction of a bed from scrap materials, be sure to write to us in the feedback form located under the article.


