Agree, you do not always follow the boiler and try to check it as little as possible. At the same time, you may love to repair household appliances yourself, and not necessarily for the sake of economy. If you have been using boilers for a long time, then you know about the features of their heat exchangers, as parts that often cause breakdowns. If you want to repair the heat exchanger of a gas boiler with your own hands, read our instructions and make sure that it is not at all difficult.
From our article you will learn how to get the primary and secondary heat exchangers out of the boiler. In addition, you will learn how to care for and repair these parts. If you are not familiar with the structure of the boiler, then, among other things, you will understand the structure of exchangers, learn about their location, the principle of operation.
A lot of water passes through the heat exchangers of the boilers, over time they become clogged, sometimes deformed. In the article, we have provided important information about cleaning, repairing and replacing them. We will tell you enough about heat exchangers so that you can repair these boiler parts alone.
The content of the article:
-
Primary heat exchanger for gas boiler
- Repair of the primary heat exchanger
- Cleaning the primary heat exchanger
- Replacing an old or broken heat exchanger
-
Secondary heat exchanger for gas boiler
- Secondary heat exchanger repair
- How to replace a part?
- Conclusions and useful video on the topic
Primary heat exchanger for gas boiler
The primary, or simply the heat exchanger, is a large piece in the form of a tube with bends through which thin plates pass. This shape and the device itself is also called a coil.
Manufacturers make heat exchangers from stainless metals like copper and stainless steel. For different brands of boilers, they almost do not differ in structure - shell-and-tube in the form of a coil.
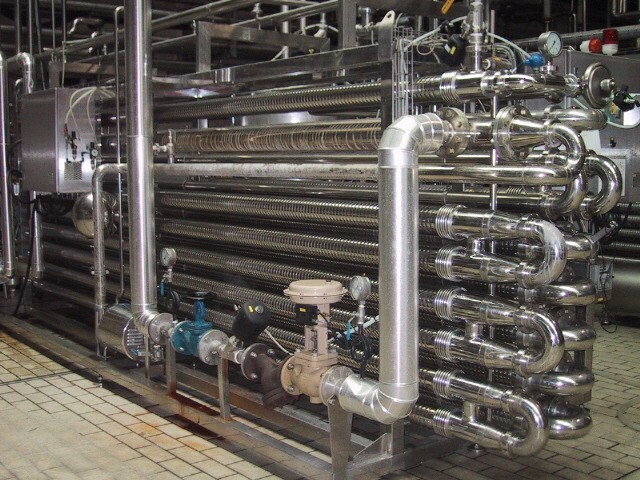
Coil heat exchangers are actively used in industry. They sometimes combine two systems: water and steam, water and antifreeze, water in two ways
The device transfers thermal energy from gas to a heat carrier - usually water. The units differ in power, and the longer the pipe length and the number of ribs (bends), the higher it is. The heat exchanger works well as long as there is no excess soot on the outside and excess salt on the inside. Then the circulation is disturbed and the thermal conductivity of the walls decreases. Heat exchangers should be cleaned in time and protected with water filters.
In the boiler design, the primary exchanger is located in the combustion chamber, above the main burner flame. The material of manufacture with high heat transfer retains heat well and loses it quickly enough, as necessary. Thanks to the narrow fins, the heat energy is distributed more evenly. The primary heat exchanger is the main heating element of a gas boiler, excluding the burner.
Repair of the primary heat exchanger
The exchanger deteriorates due to low-quality coolant or materials from which it is made, as well as other factors. Pressure, high temperatures and their differences lead to cracks, due to which the element begins to work less powerfully and breaks down over time. The life of the heat exchanger can be extended by supplying purified water and not overloading the boiler.
Removing cracks will be more difficult than clogging. The heat exchanger is soldered for this. Solder is selected from the same material as the unit itself. Boiler heat exchangers are usually made of copper, less often of cast iron or steel. Aluminum, silicon, manganese, nickel and zinc are added to the composition.
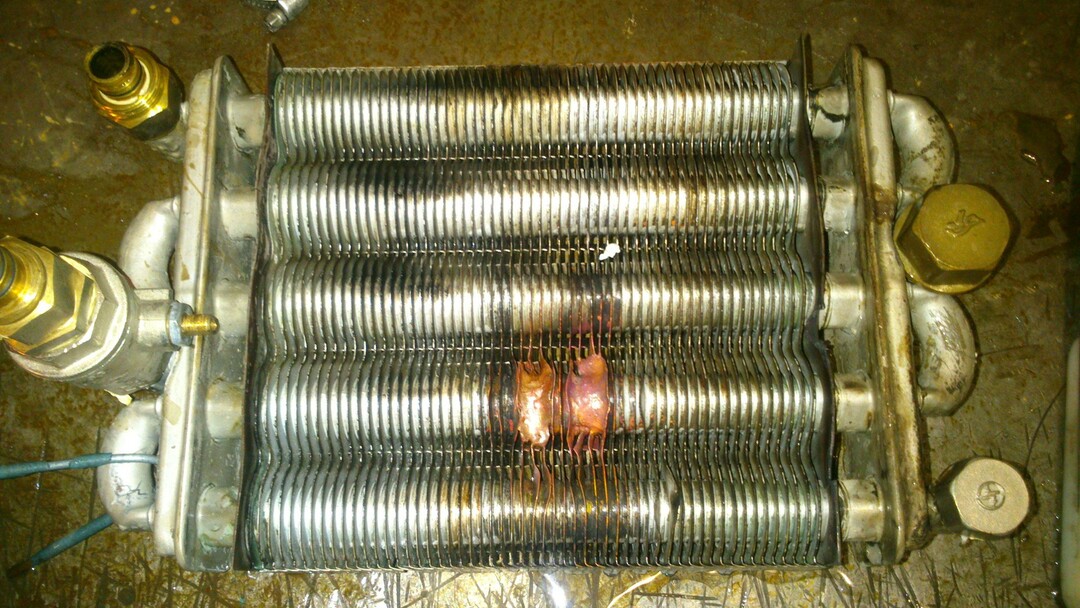
Leaks on the primary heat exchanger can appear due to the effects of flame, water hammer, and in some cases, corrosion leads to them.
Additional solder requirements:
- melting temperature not lower than 700 ° C;
- sufficient viscosity;
- the fluidity is the same as that of the heat exchanger.
Copper-zinc solders are considered one of the best. They are used to solder most non-ferrous metals with a higher melting point than the auxiliary material itself. For the human body, solders with inclusions of silicon or tin are safer - up to half a percent.
It is better to avoid copper-phosphorus materials, and if you solder the exchangers with them, then without load, such as shocks or vibration shocks. A well-chosen solder is half the battle.
Heat exchangers are soldered with gas torches and blowtorches. Before soldering, the desired place is cleaned with fine-grained sandpaper and wiped with a rag with a solvent, and then heated. The area is heated with a hairdryer or a weak torch / soldering iron. At this moment, the main thing is to get into the temperature corridor and take into account the subsequent cooling. Barely noticeable lesions are found in small spots of a greenish tint.
Before heating, the water is drained, and its residues are removed with a compressor or blown out through a flexible hose. The hose is fixed along the thread if it has a union nut and this is allowed by design features. If you leave water, then it will take some of the heat energy.
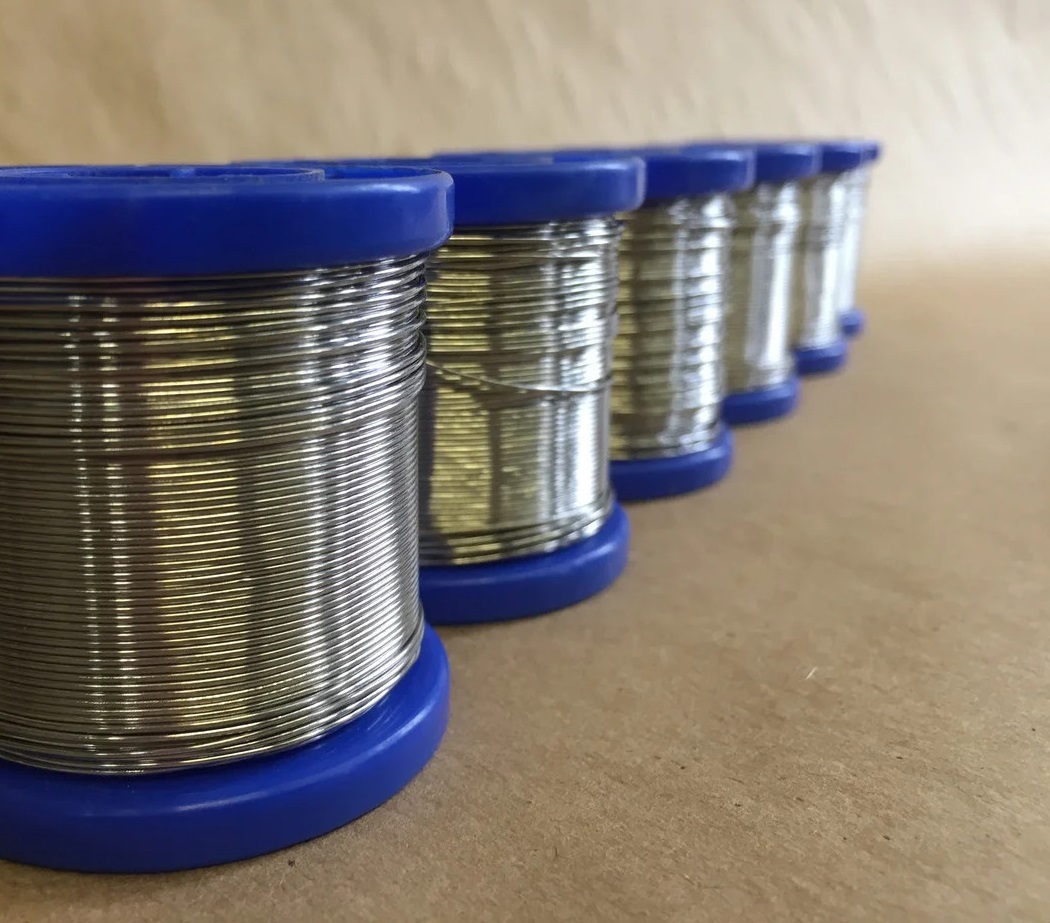
Solder coils: at high temperatures, the material wets the base and spreads over it, gets into the smallest gaps and stretches, resulting in an intermediate layer from a combination of base and solder
The solder is preferred in the form of a wire or a rod: the melted end will be well immersed in the flux during soldering, which will stick to it. If the wire falls on the exchanger itself too intermittently or loosely, the preheating was weak. After work, the place of soldering is sometimes covered with heat-resistant paint - for better insulation.
In the next two weeks, the soldered section is checked daily for integrity. At the first leak detected, it is worth contacting the master. If it appeared in the first half of the month, then the soldering was of poor quality.
The flux is suitable for universal, as well as soldering flux gel. Avoid rosin, unusual options like aspirin, and more.
Cleaning the primary heat exchanger
Buy a solution for cleaning heat exchangers - it removes even stubborn dirt. Use special brushes and scrapers to manually clean the accessible areas inside and outside the exchanger. Remove the soot.
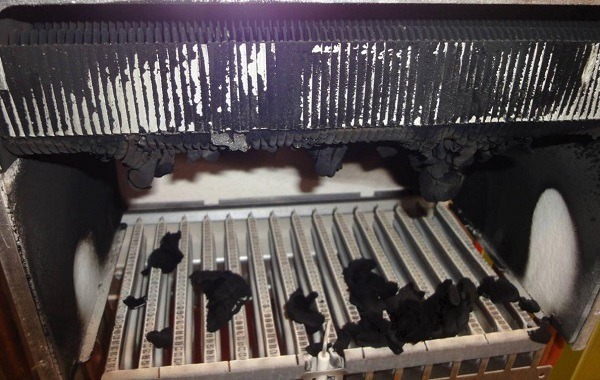
Soot appears due to too intensive boiler operation and small fuel leaks, a special metal brush can be used to remove most of the carbon deposits
In a difficult situation, order a chemical flush. The craftsmen will clean the exchanger through a booster, to which they will add acid - sulfamic acid, for example. After special treatment, there will be no old and persistent deposits. Or you can flush the heat exchanger yourself. To do this, we suggest using following instruction.
Cleaning is possible without disassembly - with hydrodynamic flushing. Fine particles under high pressure will remove any contamination.
Replacing an old or broken heat exchanger
To pull out the exchanger for flushing or replacement, first of all, you need to disconnect the boiler from the gas supply and the power supply. Then remove the front panel of the boiler and block the supply and return pipes of the heating. The coolant is drained through the drain valve on the boiler.
Further actions require greater precision and concentration of efforts:
- We remove the fasteners on the tube that supplies gas to the combustion chamber. We disconnect this pipe.
- We release the combustion compartment cover from suitable communications: we move the ignition and control electrodes to the side.
- We remove the sensors from the combustion chamber. We unscrew the fasteners on its cover and remove the last one.
- Disconnect and take out the fan.
- We remove the clips from the pipes suitable for the primary heat exchanger. We take these pipes.
- We detach the combustion chamber from the boiler wall and move it outside.
- We unscrew the hardware of the upper combustion chamber cover. We remove the top.
- We remove the fasteners that hold the primary heat exchanger and take it out.
Now we can replace the faulty exchanger with a new one. We fix it in the combustion chamber, separately from the boiler. We fix it around the perimeter with hardware and put the top cover back in place.
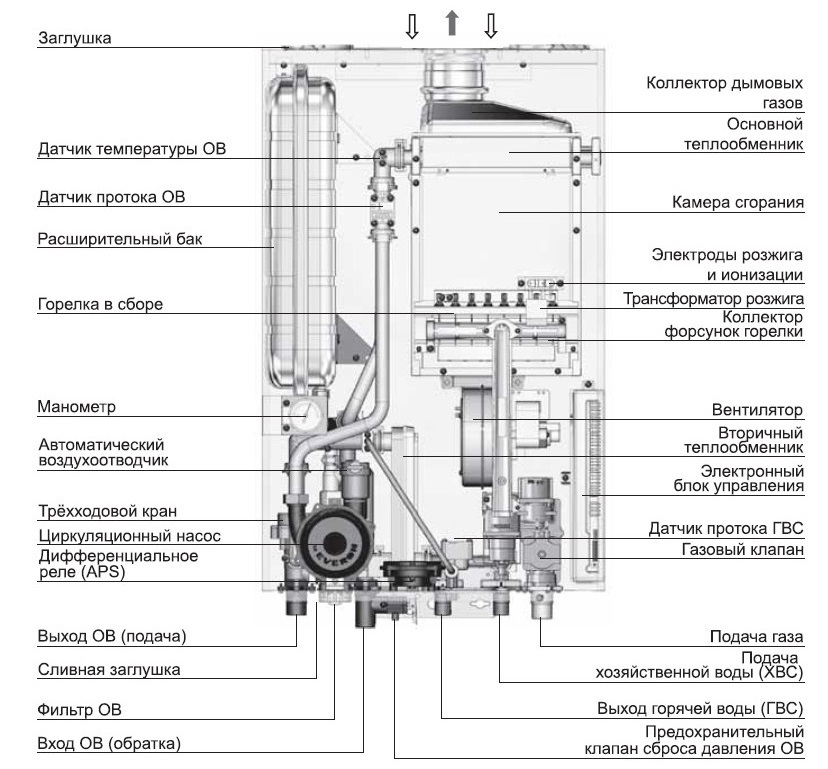
Diagram of the internal structure of the Navien Deluxe Coaxial boiler for natural and liquefied gas with a turbocharged combustion chamber and a stainless steel primary heat exchanger
We attach the combustion chamber back to the inner wall of the boiler. We attach the front cover. We return to their place all the disconnected parts and the removed nodes next to the combustion chamber.
See how the gaskets look inside the gas boiler and change them on the necessary connections before installing the heat exchanger. After complete assembly, prepare the boiler for operation and make a test run.
Secondary heat exchanger for gas boiler
It is also called a heat exchanger for hot water supply (DHW). This is a rectangular device with interconnected food-grade stainless steel inner plates. The more there are, the higher the performance of the unit. Inside, they form 8 to 30 layers. The high thermal conductivity of the materials and the large interaction area provide the necessary heat transfer during the rapid movement of water.
Each of the layers is a channel isolated within the heat exchanger. The plates have a relief from which these passages are formed. The thickness of the baffles is usually 1 mm. The channels have corners, and the sharper they are, the higher the fluid velocity and vice versa. The pattern of water movement can be single- and multi-way - with a change in direction. In the second case, higher efficiency is achieved.
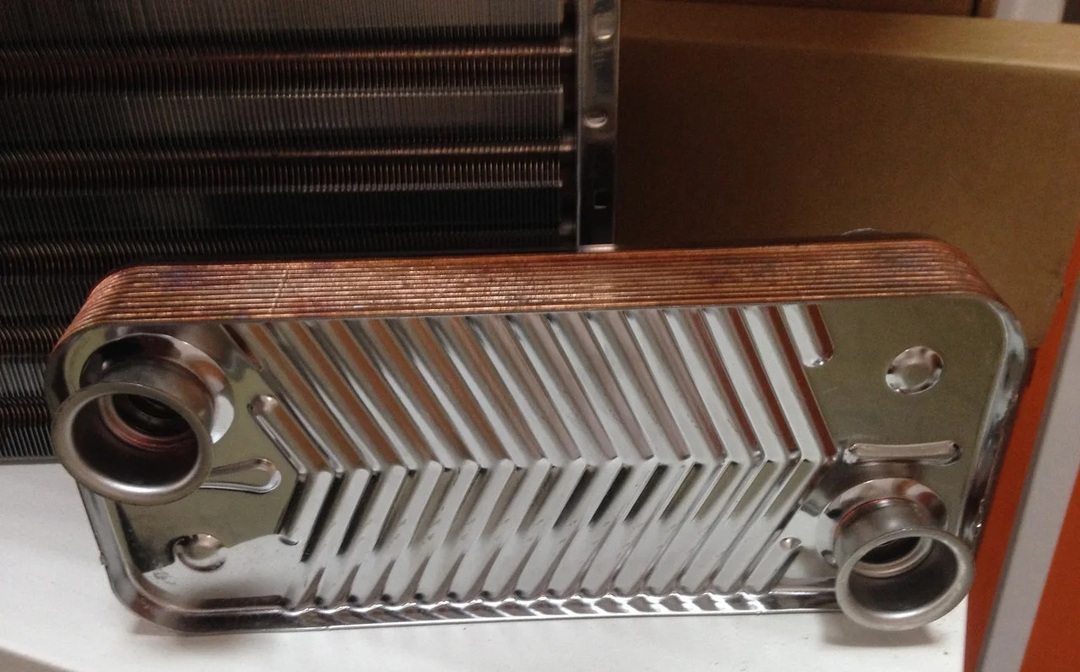
The secondary exchanger should be washed annually with poor water quality and once every three years if using a softener filter.
After opening the hot water valve on the mixer three-way the valve directs part of the heated coolant to the secondary exchanger. Then the hot liquid gives off heat to the cold tap water in the unit, after which heated water comes out of the heat exchanger for supply through the faucets in the kitchen and bathroom.
The cooled coolant then goes into the pipe, where it mixes with the return flow - the spent coolant from the heating system, and again enters the primary exchanger.
The secondary heat exchanger is usually located below the combustion chamber. In different boilers, it is mounted vertically or horizontally on its side.
Combined heat exchangers - bithermal - are also used in boilers. In them, communication with hot water is surrounded by channels with a heat carrier for the heating system. First, the gas transfers energy to the coolant, and then the latter directs part of it to the hot water supply. Since gas boilers with such heat exchangers are simpler, a three-way valve is not needed.
Secondary heat exchanger repair
Secondary heaters are often clogged, especially models with narrow channels. Without cleaning, they break down over time and finally fail. The scale layer inside the unit reduces heat transfer, which is why the boiler consumes more gas.
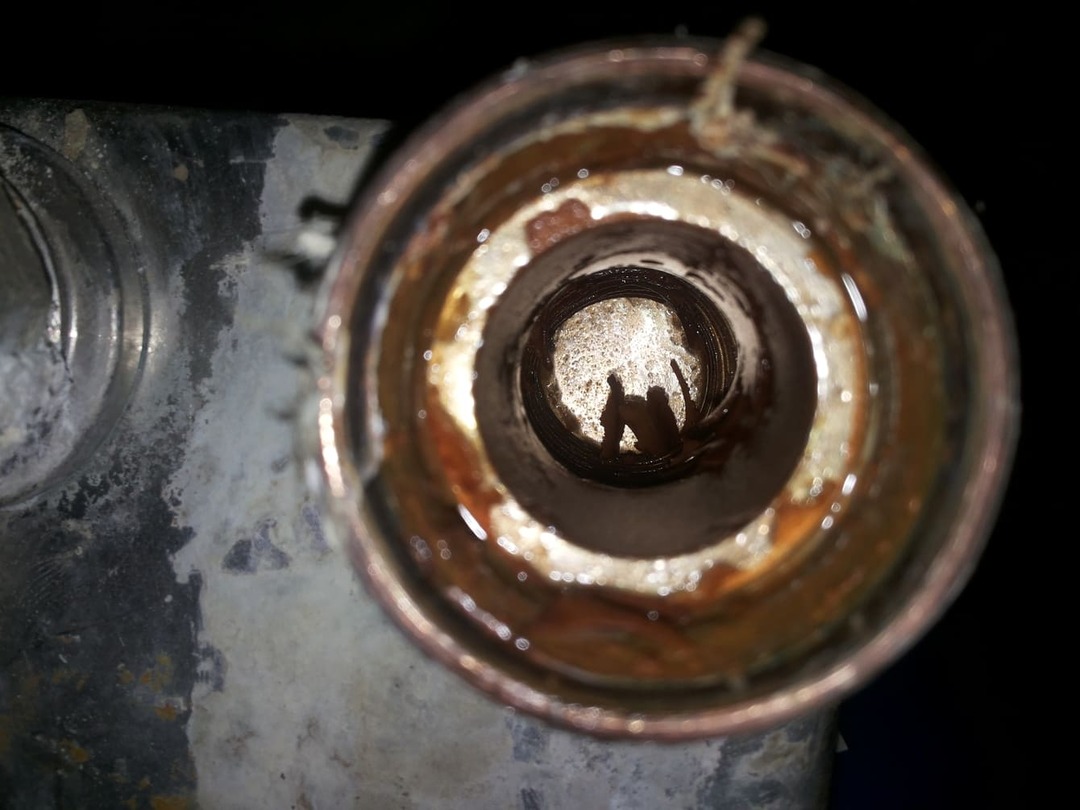
Salt deposits, scale and rust form the bulk of the pollution: in addition to the secondary heat exchanger, it does not hurt to also check the heating and DHW circuits
Problems with heat exchangers will be reported by codes on the boiler display. In this case, there is a plan of action.
Let's take a closer look at the problem with the secondary heater:
- We take out the secondary heat exchanger.
- We look at the joints, internal and external threads. After the last cleaning, their condition may have worsened. This happens due to aggressive acids. We replace the worn-out removable elements.
- We check the integrity. The heat exchanger could happen water hammer. A very small fistula (hole) can only be found by a specialist.
- We examine the exchanger better, and for this we call the wizard. We replace a badly damaged unit.
- At the very beginning, pollution can be found. We look for plaque visually in the entrance holes. We blow air into the part and also orient ourselves by sound. We clean if the exchanger is clogged. Lumps of limescale can fall out even after a light knock.
- You need to choose 1 of 3 cleaning options: home remedies such as detergents and citric acid solutions, special mixtures, or professional cleaning.
First of all, flush the exchanger with a cold tap water. Then pour citric acid into the device and place in a bucket of water. Then - take out the heat exchanger and fill it with water to check the patency.
If it comes in slowly or does not move, then prepare a saturated solution of vinegar in water and pour in there. Then rinse with hot water and blow. Use an air pump whenever possible. Repeat the vinegar cycle.
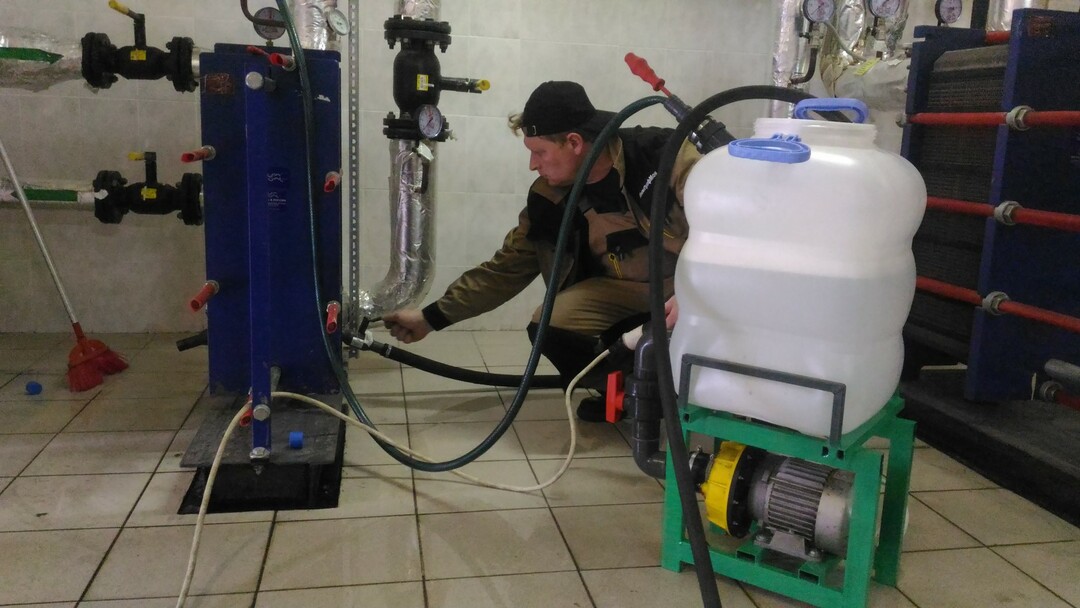
Among the arguments for professional cleaning, it is worth noting the inconvenience of the design for cleaning, the difficulty in assessing contamination, the risk of damage due to independent mechanical action.
If the steps above do not work, try a special cleaning solution, such as a cleaning gel or a low percent adipic acid solution. If this method did not work either, then call the master or order a professional cleaning.
How to replace a part?
No special knowledge is needed for this. To remove the old exchanger for inspection or replacement, follow these steps:
- Disconnect the power supply and turn off the gas.
- Remove the front cover of the boiler.
- Shut off the cold water supply for the DHW circuit. Close the valves on the flow and return pipes of the heating circuit.
- Remove the drain plug. Drain all water from the boiler.
- Reduce the pressure in the system, if necessary, and remove the air.
- Pull out the electronic board. Remove the necessary fasteners for this.
- Remove the terminals from the gas valve.
- Get out the boiler elements that prevent easy removal of the secondary heat exchanger: cold water inlet, water fittings, etc. Remove the corresponding brackets, nuts and clamps.
- Insulate all electrical assemblies and wires with waterproof material.
- Unscrew the fasteners holding the secondary heat exchanger. Use a handy tool. Sometimes this can be done with a hexagon. Manufacturers try to place the exchanger in a convenient place so that the boiler elements do not suffer during its removal.
- Remove secondary heat exchanger, remove water from there.
At the time of removal, it is worth remembering the location of the exchanger in order to install it back or put a new one in the same way.
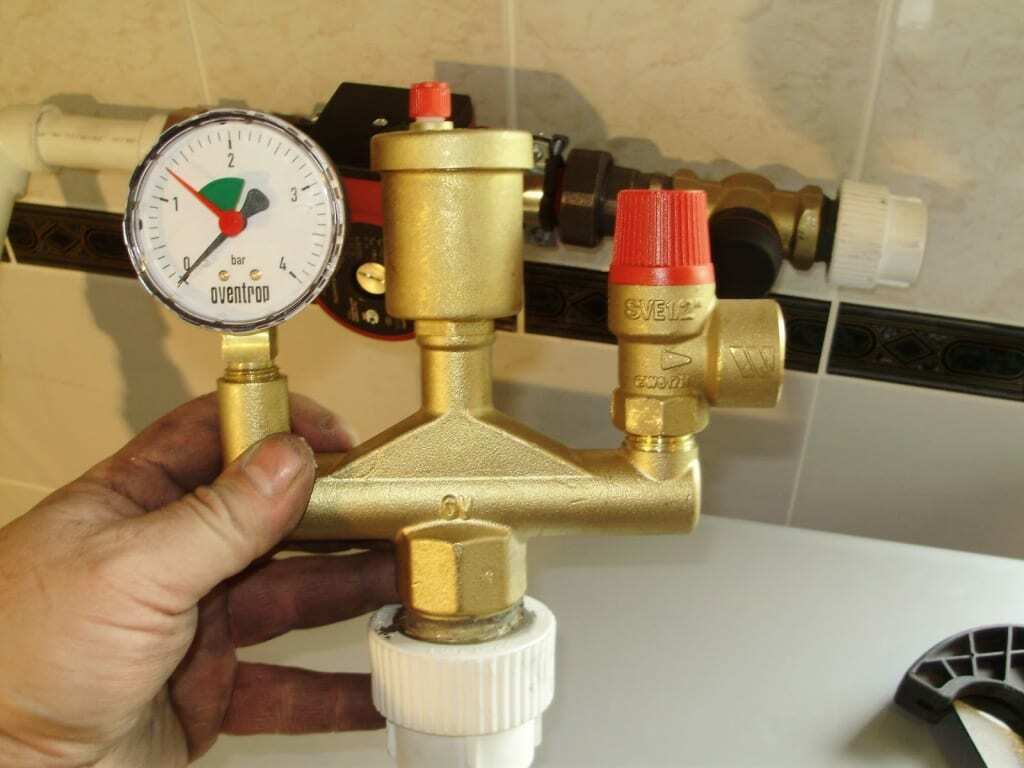
Heating system safety group: navigate by the pressure gauge (left) and in the case of readings, so-called. red zone, bleed air through the vent (in the middle)
Apply copper grease to the connections that secure the unit to the inside of the boiler. This will protect it from oxidation.
Also, replace worn seals before putting the part back in place.
Conclusions and useful video on the topic
How to get the heat exchanger out of the Baxi boiler, how to clean it:
Cleaning the primary exchanger with reagents, overview of funds and end result:
Idea for repairing a broken primary heat exchanger inlet:
We talked about two types of heat exchangers. Primary - above the burner of the combustion chamber and secondary - for heating running water. Now you are better versed in the design of gas boilers and understand the importance of heat exchangers in their operation. We also presented two partially similar algorithms for replacing exchangers.
If necessary, you can start soldering this part. You will be able to do home washing. Do not forget about the quality of materials, if you still have to buy a new part.
Leave comments and ask questions. Tell us about your boiler. Write down how many heat exchangers there are. Have you changed them, and how long did the old exchangers last? Write about it in the contact form, which is located under the article.
