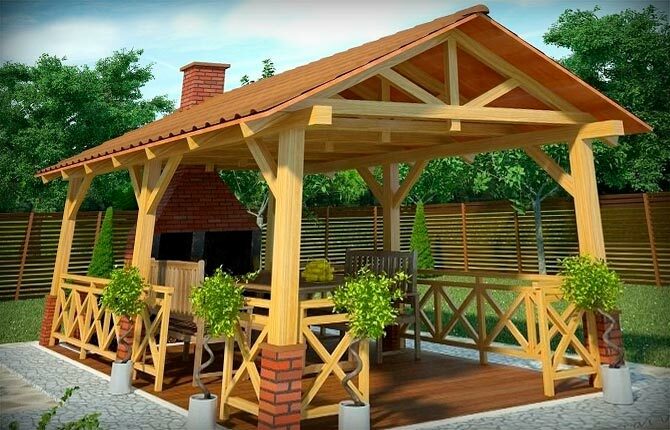
If you need a full-sized building for recreation by a large company, then a gazebo with a gable roof would be the best option. The only difficulty that may arise during the construction process is related to the docking and balancing of the rafter legs.
The content of the article:
- Benefits of a gable roof
- The device and design of the gable roof
- Design and calculations
- What tools and materials will be needed
-
Do-it-yourself erection - step by step instructions
- Installation of vertical supports under the gable roof of the gazebo
- Installation of a gable roof frame
- Preparing the roof of the gazebo for laying the roof
- Roofing installation
- Installation of jibs
- Results
Benefits of a gable roof
The scheme with two symmetrical slopes makes it possible to build roofs for sufficiently large arbors. The only drawback, when compared with a shed roof, is the increased consumption of materials for arranging the frame and laying roofing on the roof of the gazebo.
Features of the gable scheme:
- With the right calculation, the roof of the gazebo is able to withstand strong winds, rain, a layer of snow up to 50 cm thick. Shed and hip roofs are much inferior to a gable roof.
- The gable roof truss system is balanced, two slopes rest on the ridge and mutually compensate for the pressure from the weight of the rafters in the horizontal direction. Shed roofs have always had a side pressure problem.
- The design, appearance of a gazebo with a gable roof is much more attractive than shed buildings.
Oddly enough, but it is the last point that most often becomes the main criterion when choosing the type of roof for a gazebo. The construction of a gazebo with a gable roof must begin with the choice of a rafter system scheme and a foundation.
Gable roofs are durable and reliable, but only on condition of a rigid foundation. It makes no sense to build a gazebo of “normal” capacity with a gable roof on pillars or piles. It is necessary to make MZF or fill the stove.
The second option is more preferable, although it will require additional funds for pouring concrete. This will help to avoid most of the problems associated with surface slopes, the presence of near-surface waters and heaving of the soil in the summer cottage.
Healthy: Shed roof do-it-yourself step-by-step instruction on arrangement
The device and design of the gable roof
The main elements are the truss frame, foundation and vertical racks. You will also need to choose the right type of roofing. For a gazebo, it is advisable not to use slate or metal tiles. This is a roof for a bathhouse or a barn. Ondulin or shingles are best suited.
Structurally, the roof frame consists of two rows of rafters (rafter legs), laid in pairs against each other and connected by a horizontal ridge beam. The ridge rests on vertical supports on the gables and in the center of the ceiling. Each row of rafters forms a roof slope.
The lower ends of the rafters rest on the upper trim of the gazebo. On top of the rafters, horizontal boards of battens and counter battens are sewn. A vapor barrier film and roofing are laid on them.
The most difficult thing in arranging a gable roof is to correctly align the rafters so that the laid roofing on the slope does not stick out with a “bubble” and there are no holes. In addition, special attention should be paid to the ridge beam, it must be perfectly flat and strong so that a gap does not form on the edge of the gable roof and the roof does not flow during rain.
Design and calculations
Most amateur builders traditionally put up a gazebo without drawings, a couple of small sketches are enough. In fact, this is not entirely correct, since the detailing of the nodes in the drawing makes it possible to pre-calculate the dimensions, determine the type and quantity of fasteners.
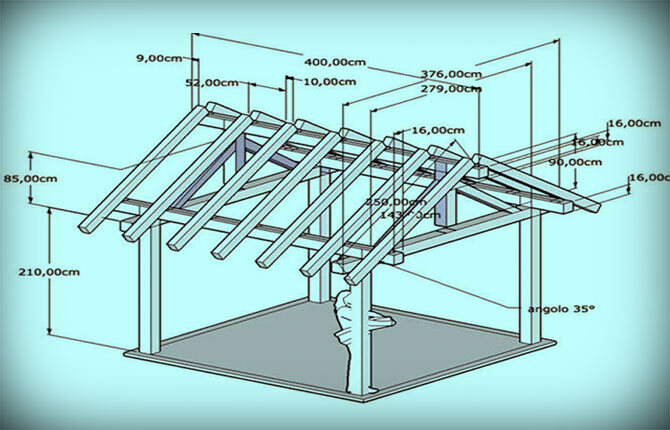
You can even not do the design yourself, but use the finished project as a template.
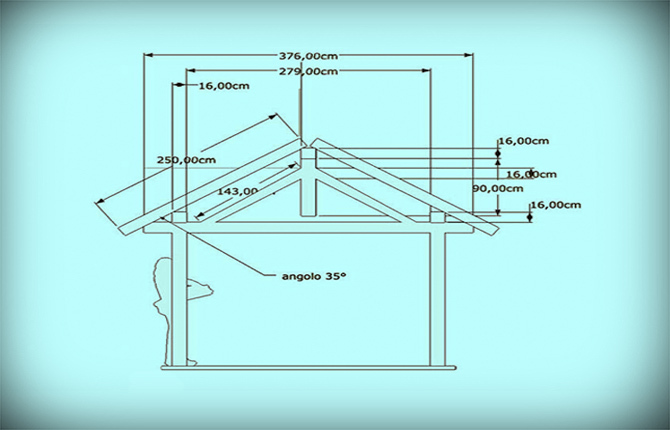
All dimensions can be reduced or increased in proportion to those indicated on the drawing. A gazebo is not a house, so there will be no big mistake. And in order not to miscalculate the strength of the beams, you can use timber and boards with a small margin in thickness.
For wooden structures, this approach works without problems. This is when building a gazebo frame made of metal, you need to recalculate the section, since there is a risk of deflection of too long sections of a gable roof.
What tools and materials will be needed
To build the frame of the gazebo you will need:
- timber 200x200 - for vertical supports;
- timber 150x150 - for the upper harness, ridge beam, support bench;
- plywood or OSB board 9 mm thick.
- in addition, you will need a slab, edged board one and two inches.
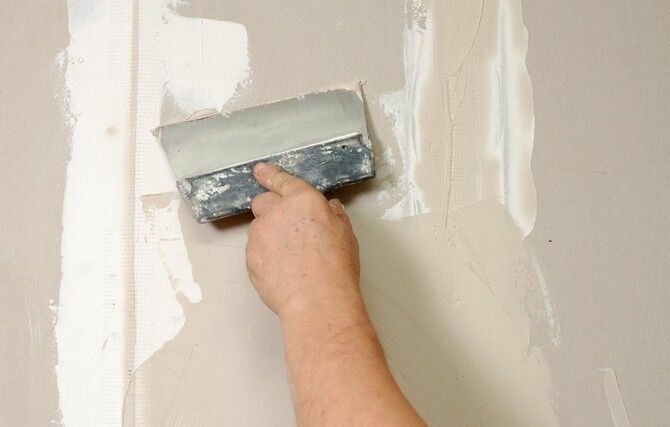
Before putting the lumber into action, you will need to walk along the timber and the board with an electric planer. Before putting a gable roof and supports, the material must "gain" moisture.
Bituminous tiles, half a ton of gravel and 400 kg of sifted clean sand are used as roofing. The slab will need to be reinforced, so 6-8 mm reinforcement will be used for the frame, you can even use fiberglass.
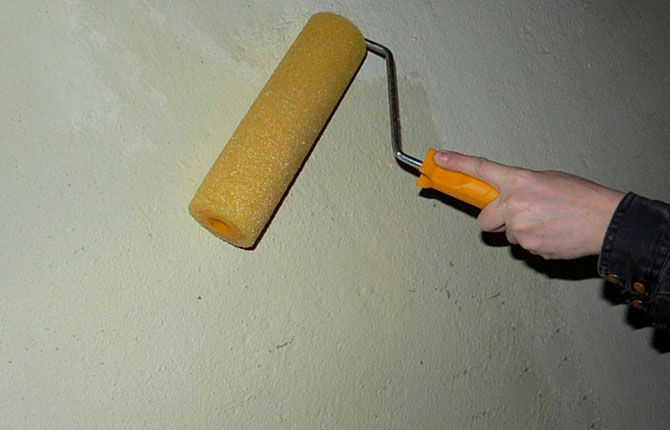
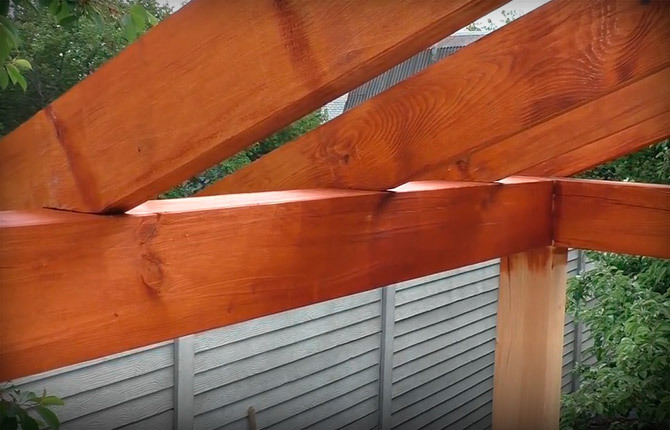
In addition, all wooden parts are covered with a protective varnish and dried thoroughly. Gable roof elements are recommended to be processed before installation. Then, after the construction of the gazebo is completed, the whole tree will need to be opened again.
From the tools you will need:
- a circular saw;
- hammer, axe, hand saw, Bulgarian;
- electric planer;
- electric drill, screwdriver;
- hook for bandaging reinforcement;
- you will also need fasteners - nails 90-120 mm, self-tapping screws.
In addition, you will need to stock up on a shovel and a rule. Concrete, all other tools and materials can be purchased as needed. It takes 7 days to set the concrete, and 5 days to assemble a gable roof with your own hands if you have at least one assistant.
Useful: Do-it-yourself gazebo with a pitched roof
Do-it-yourself erection - step by step instructions
First of all, you need to make a slab foundation. On the site allocated for the construction of the gazebo, the top layer of soil is cut off, a layer of sand with crushed stone, a film and several rows of bricks are laid out on the bottom. The reinforcing cage of the slab will be laid on them.
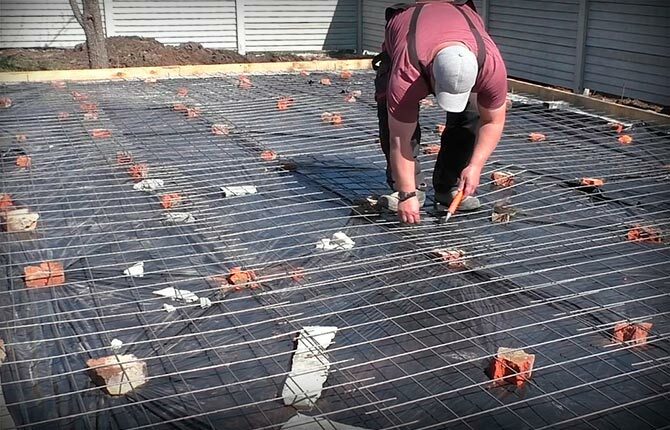
It is better to buy ready-made concrete. Filling from the machine 2-3 cubes guarantees the high quality of the plate. True, the surface of the plate will have to be leveled with your own hands. The poured foundation of the gazebo is covered with a film and left for 4-5 days.
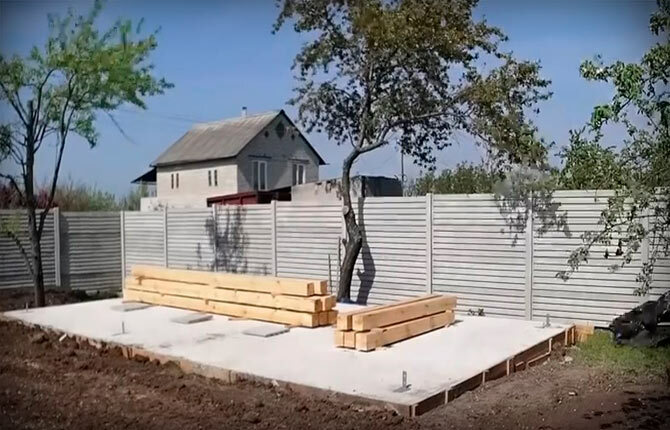
Installation of vertical supports under the gable roof of the gazebo
After cutting the supports of 2.5 m each, as well as the beam of the upper trim, all parts are taken out and stored on the slab. Vertical supports will be installed directly on the foundation, without any waterproofing.
In places where the pillars are installed, bent steel plates (metal thickness 4 mm) are sewn to the concrete. This is better than putting a massive gable roof on nails or on embedded studs.
Each vertical support is aligned vertically using a building level, fixed with two struts to the formwork, screwed to the plate with screws.
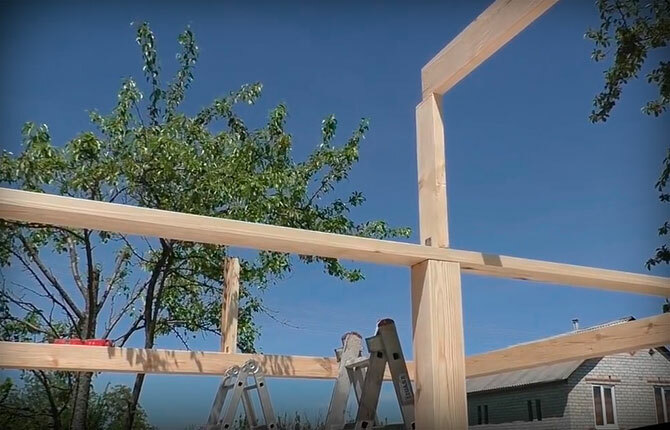
Immediately after the pillars, you need to make the upper trim of the gazebo frame. To do this, use a bar with cuts at the ends in ½ thickness.
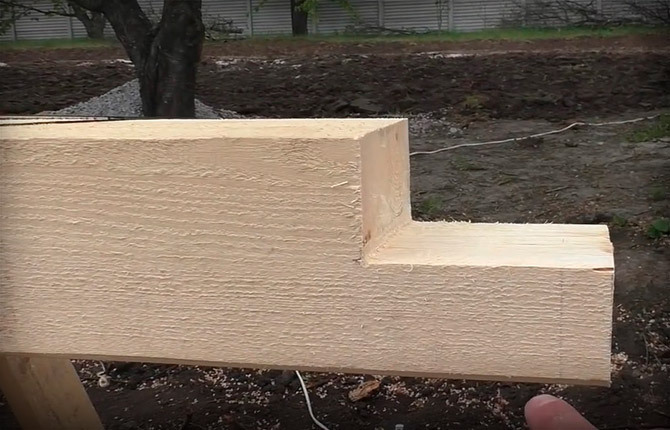
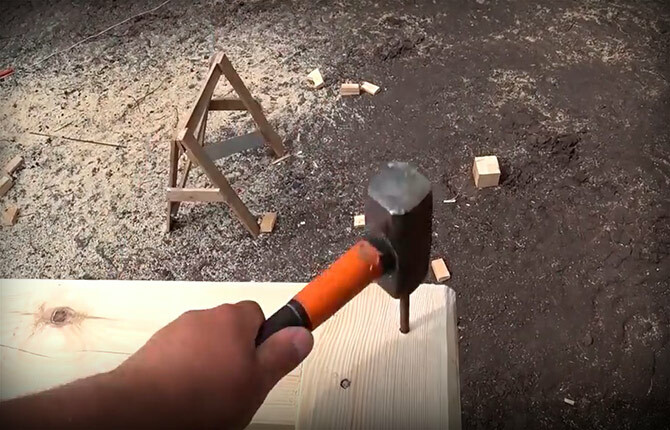
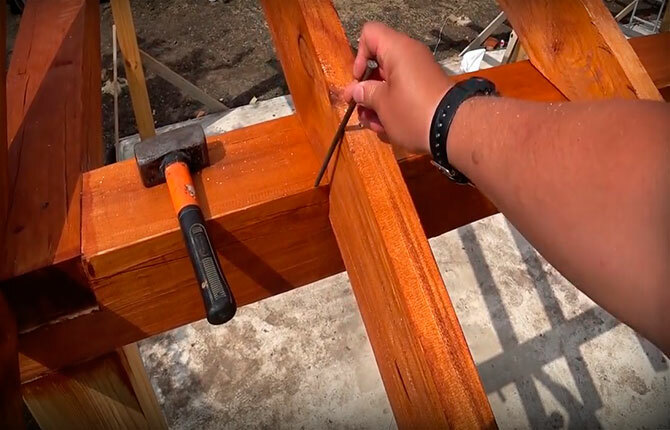
The blanks are lifted onto supports and installed. Now you need to fix the details of the upper harness. To do this, holes are drilled in the corners in the timber.
After that, reinforcing bars of 8 mm, 300 mm long, are hammered into the holes.
The lower part of the gazebo frame is ready.
Installation of a gable roof frame
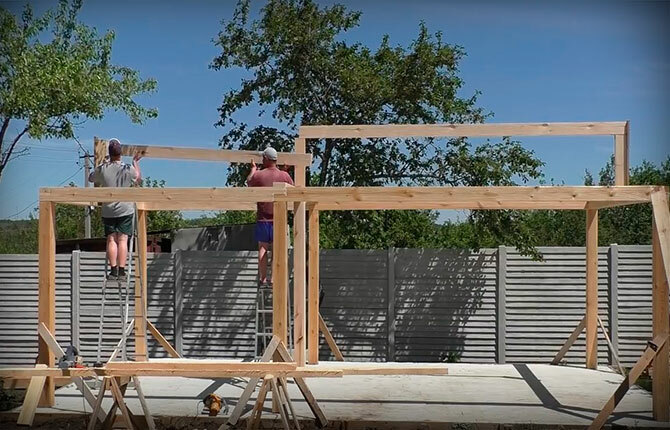
The first step is to install the ridge beam. To do this, a vertical support under the ridge is placed on the left gable of the roof.
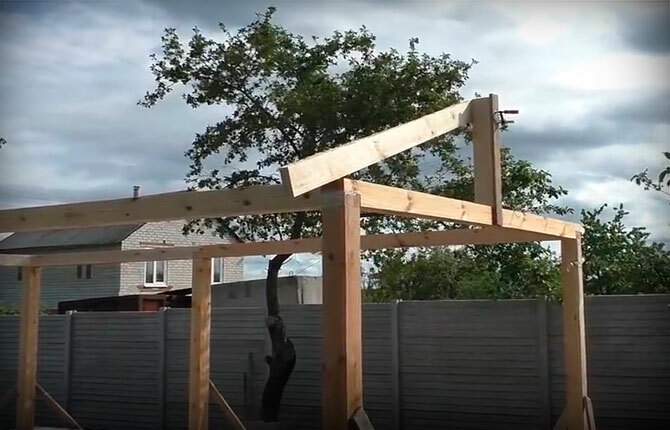
Then they put an intermediate support (it was necessary to temporarily support it with a pillar) and the extreme right one.
After leveling, you can install the ridge beam of the gable roof.
The design of the gazebo turns out to be quite massive, the base of the gable roof is assembled from timber and boards of an excessively large section. Moreover, the foundation is a slab, one of the most durable and rigid options. In general, a very solid construction without bottom strapping with a finished floor is obtained.
The high rigidity of the frame makes it possible not to cut out each rafter separately, but to make a template of one board and cut out all the rafter beams of one row of a gable roof along it.
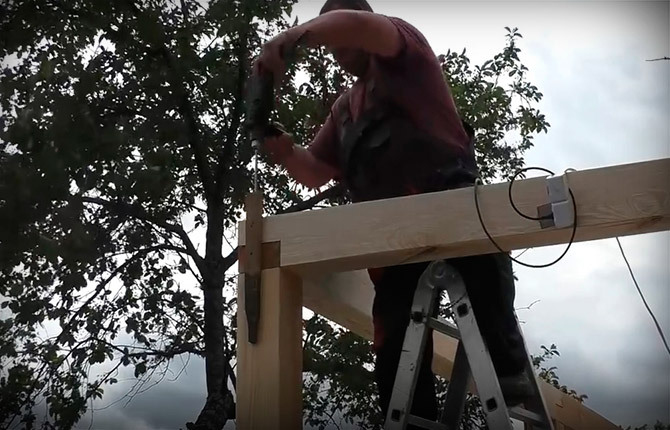
At the same time, you can paint all the rafters before installing on the roof frame. The rafter beams are lifted to the upper trim of the gazebo and attached in pairs to the ridge.
Now you need to cut the ends of the rafters and hem the overhangs of the gable roof. In order to cut evenly, in one line, you need to pull the cord, then cut off all the protruding edges with a hand circular saw.

The ends of the rafters are sewn up with a side of 9 mm. This is the thickness of the OSB boards with which the gable roof will be sewn up.
The rafters are nailed.
Preparing the roof of the gazebo for laying the roof
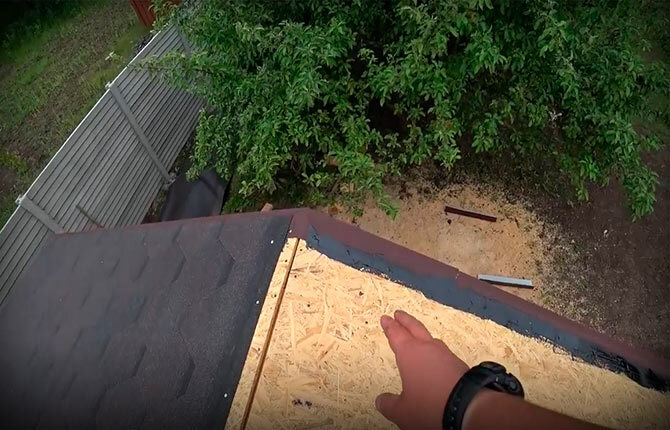
The first trim strips are sewn onto the ends of the rafters with literally a couple of nails. The problem is to sew it on so that the top edge matches the surface of the slab. Therefore, the miter bar is only slightly attached to the rafters. Each OSB sheet laid on a gable frame has a barely noticeable geometry curvature. While the material lies on the foundation of the gazebo, it is almost impossible to detect curvature.
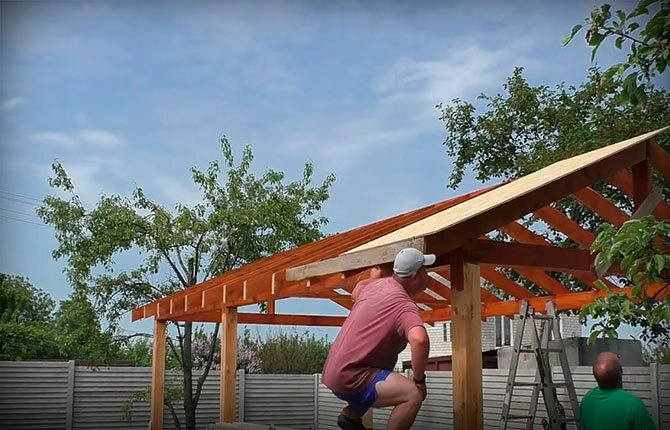
Therefore, after laying on the rafters, each sheet and plank is carefully aligned, adjusted, and only then attached to the rafters. After all the sheets have been screwed to the gazebo truss frame, additional struts can be removed. OSB holds a gable frame no worse than a crate, so you can walk on the roof without fear of deformation of the upper part of the building.
The next stage of work is to fill a special-shaped wind bar along the perimeter of the gable roof just under the bituminous tiles. To avoid problems with water flowing under the roof, the joint is treated with mastic waterproofing.
Roofing installation
Next, you need to lay the starting strip of shingles along the edge of the slope. The work is difficult, you have to constantly move away from the gazebo in order to assess how evenly the lower edge of the roofing is laid out.
By tradition, packages with shingles are unpacked and mixed together. It may happen that the shingles will be of a different shade. Therefore, if you lay tiles on the roof of the gazebo directly from the package, then a color spot may appear on the gable roof.
The roofing on the gazebo is stuffed with a stapler. The joints between OSB boards must be glued with mastic waterproofing.
The laying pattern is used for the entire roof, except for the ridge joint. Tiles are laid over the entire surface of a gable roof, not reaching 3-4 cm to the junction line between the slopes.
If there are no strong winds with rains in the area where the gazebo is built, then the easiest way is to seal the joint with pieces of shingles on mastic, followed by nailing.
If stormy weather is not uncommon, then the ridge should be sewn up with a galvanized metal corner, painted in the color of the wind bar or roofing.
Installation of jibs
The gable roof of the gazebo turned out to be massive, the strength of the beam supports is enough to withstand a heavier structure. But there is one circumstance - if in the lower part the pillars are fixed to the foundation with a thick steel plate, then in the upper part of the gazebo the fasteners are limited to two steel bars.

Therefore, in order to compensate for the shear (horizontal) load on the gazebo, which occurs during strong gusts of wind, it is necessary to install jibs, two for each support.
Details will not only strengthen the racks of a gable roof, but also “ennoble” the design. With jibs, the gazebo becomes like mountain huts in the Chalet style.
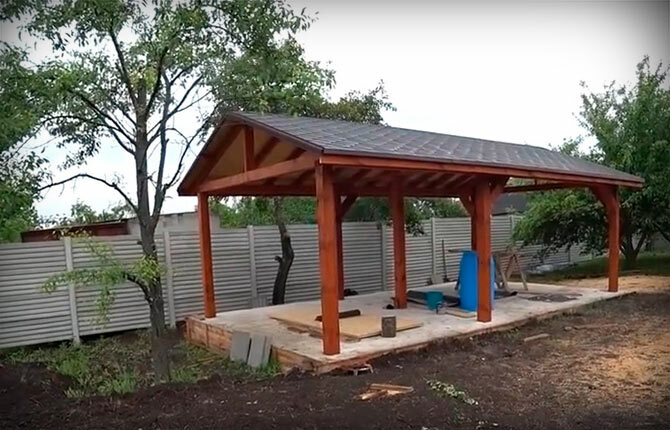
Results
Building a large gazebo with a gable roof in the country requires patience and considerable physical strength. You have to work with a massive beam, thick rafters. In addition, in order to properly cover a gable roof with shingles, skill and patience are needed.
Tell us about your experience with the construction of buildings with a gable roof. What design features should you pay attention to in the first place? How justified is the use of a gable scheme? Also share the article on social networks and bookmark it, this will help the development of the site.