The first thing that comes to mind when choosing a place to stay is the location and size of the site. There is usually enough space in the country, but everything is clear with the dimensions, the best option would be a 3 by 4 gazebo with a gable roof, preferably in a corner of the site closed from the wind.
The content of the article:
-
Building on your own
- markup
- Foundation
- Bottom trim
- pillars
- Top harness
- Roof
- Cross railing
- Roof
- Legs and floor
- Decor and interior design
- Results
Building on your own
Of course, a 3 by 4 gazebo or a canopy can be bought ready-made or as a kit of parts. All that is required for the construction is to bring a disassembled building, make a 3x4 foundation or even more, and assemble the gazebo according to the instructions.
But there is one circumstance - high-quality 3x4 buildings are quite expensive. Affordable, as a rule, of poor quality, you have to change a lot of things. Therefore, it is easier and cheaper to make a 3 by 4 gazebo with your own hands.
The plan is something like this:
- the foundation is mounted on block supports;
- vertical racks are placed;
- top binding is performed;
- lags, crate are mounted;
- the roof is laid.
If necessary, then jibs are installed on racks under the ceiling. For example, if the 3x4 gazebo turned out to be too high. The last stage is decorative finishing, varnishing, painting.
But first you need to select the material and markup. To build a gazebo made of wood 3x4, a beam of 100x100 mm will be used. The material will need to be pre-cleaned and sanded.
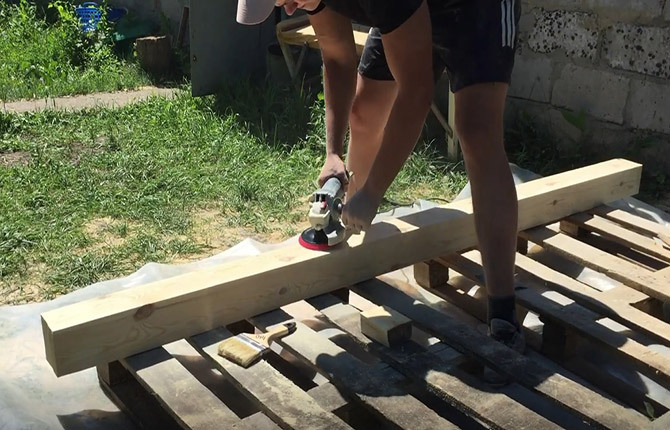
It is not worth cutting the base of the 3x4 gazebo in advance to size, you can easily make a mistake. Therefore, the lower trim will be assembled sequentially from blanks, cutting out the beam, as they say, in place.
markup
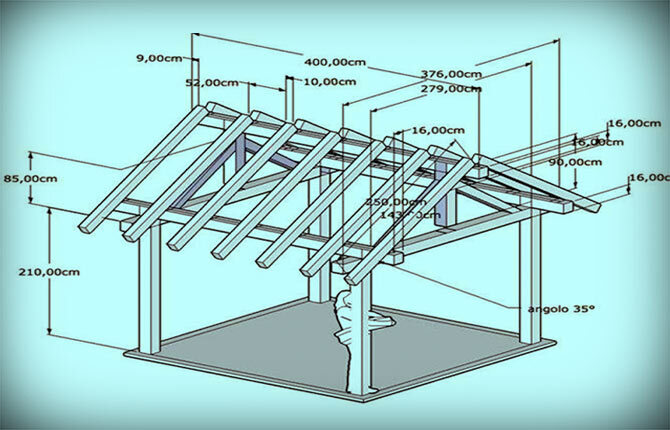
The classic columnar version will be used as the basis. The size of the gazebo is 3x4, with a ceiling height of 2.5 m. Thanks to the gable roof, the box is balanced, there will be no lateral forces. Therefore, it will be enough just to correctly lay the support blocks in the pits and level them.
If it were planned to make a gazebo of the same size, 3x4, but with a shed roof, then instead of blocks, pile supports would have to be cast into the ground.
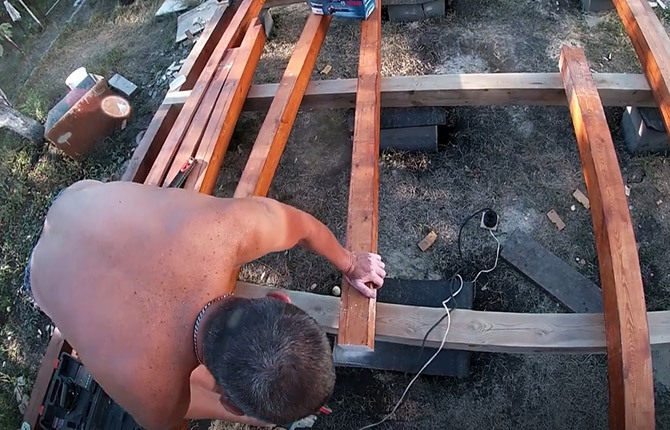
The first step is to prepare a platform for a gazebo - mow the grass, clean the surface, remove debris. Next, you need to mark the contour of the future upper harness. For now, it is enough to measure the 3x4 contour with the help of pins hammered into the ground and a fishing line (painting cord) stretched between them.
The next step is to lay out 12 PBS blocks on the ground in three rows. First in the corners, then the remaining eight are laid, four pieces in each row.
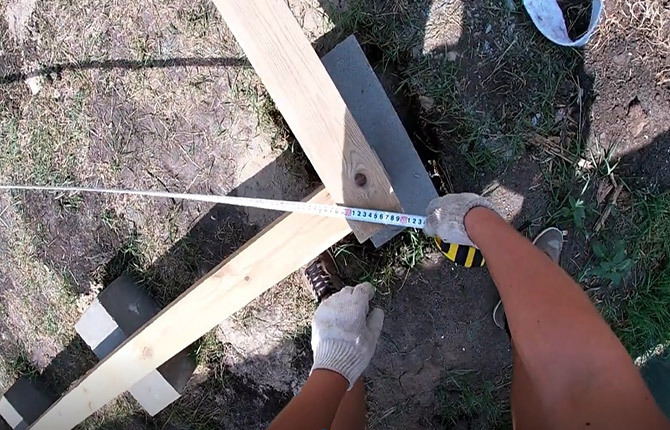
Next, four blanks of the future lower strapping are laid out on the blocks. They will also be 3x4 in size. Now you need to do the following:
- Using a tape measure, measure the length of both diagonals. The position of the beam must be adjusted so that the diagonals are the same in length;
- Having fixed the beams, you need to adjust the position of the corner and ordinary blocks. It is necessary that all wooden blanks rest on the middle part of the PBS blocks.
- Now you need to mark the position of the support blocks on the ground and proceed to the arrangement of the foundation for the 3x4 gazebo.
Foundation
The construction of the foundation for the construction of 3x4 begins with digging holes for each block separately. It is rare when it is possible to pick up a relatively flat horizontal platform for a 3x4 gazebo. Most of the sites have a slope in the range of 3-10O.
Therefore, simply digging a hole of the required depth and installing a block will not work. Moreover, the pillars should rest on a pillow of compacted sand or a cement-sand mixture, if the soil under the foundation of the 3x4 gazebo turned out to be completely soft (chernozem).
You have to act as follows:
- cords are pulled;
- the block is removed;
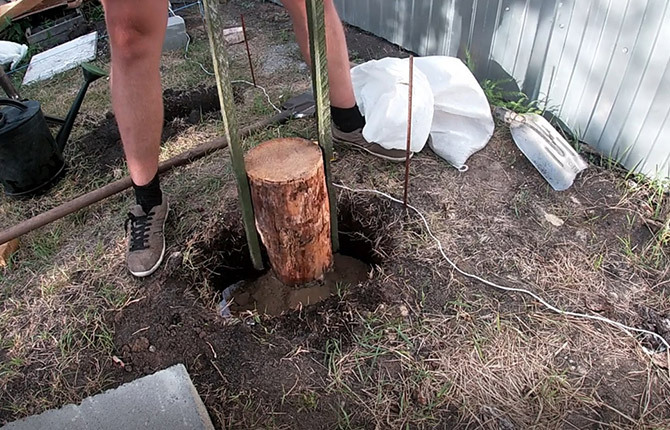
- a hole is dug, on the bottom of which wet sand or cement mortar is laid.
In this case, you have to adjust the height of the pillow, removing sand or mortar with your hands. Next, you need to lay the block in the pit, gently tap it along the edges with a wooden hammer to align it in height (along the cord), and the supporting surface is also in a horizontal plane.
If the blocks are placed only on the sand, then you can only get by with a sand cushion. For massive 3x4 gazebos, a piece of geotextile will need to be laid under the block, then a mixture of sand and fine gravel, and only then a small amount of cement-sand mortar is thrown.
Each pole is made up of two blocks 19 cm high. All supports must consist of two PBS.
If, due to the slope of the site on one side of the gazebo, one block is enough for the foundation, and two PBS are required on the opposite side, then it will be necessary align the 3x4 foundation in height by changing the depth of the pit, or pre-plan the plot along the horizon - cut off part of the surface layer soil. A 3x4 site can be cleaned with a shovel in 4-5 hours of work.
Bottom trim
After the supports have hardened, the blanks of the lower belt are returned to their place. At the same time, the diagonals and the 3x4 dimension of the future harness of the gazebo are checked again.
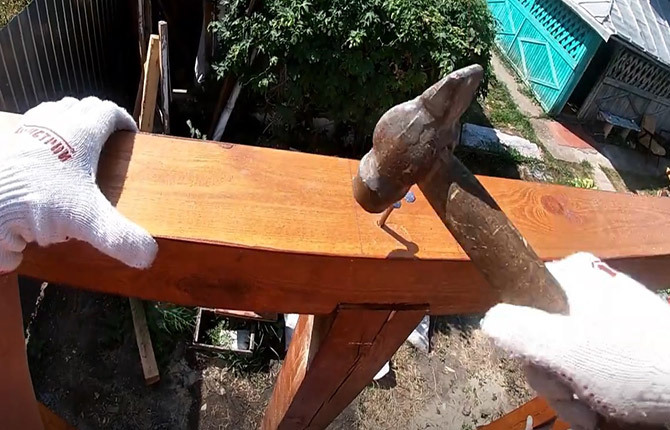
The next step is to assemble the connections at the corners. One of the beams is cut down "half". The thickness of the spike is measured and the end of the second beam is sawn along it. That is, the 3x4 harness begins to be built from a common contour.
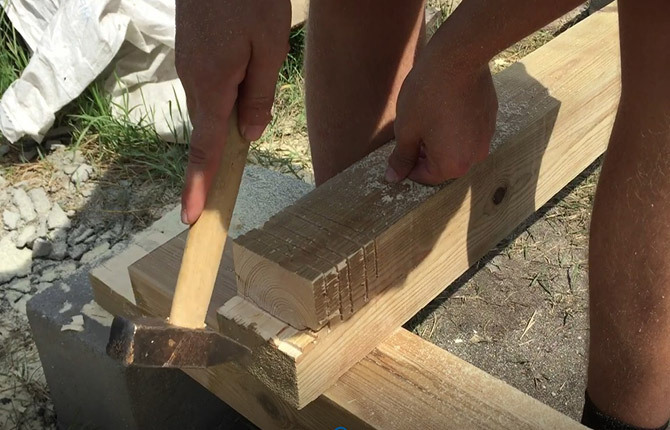
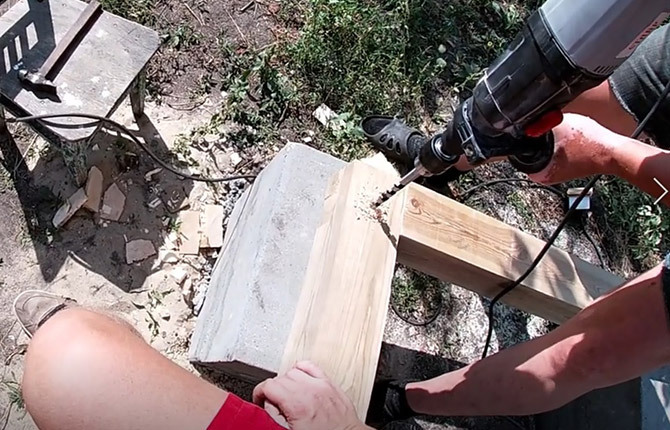
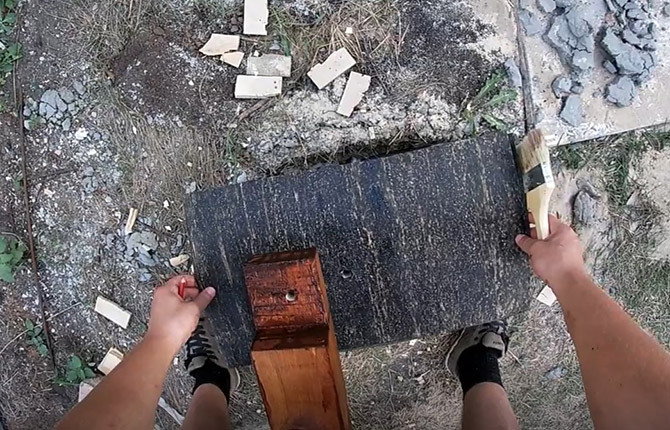
Now the joints need to be fixed on the supports and painted. Initially, you will need to drill through holes in the connection, as well as in the pole. This is necessary to install the stud. It will be necessary to lay a piece of glass roofing material at an angle, and treat the joint itself with drying oil or protective impregnation.
Since the size of the gazebo is 3x4, the central beam is used in the lower harness. It is also cut into the contour with a preliminary washed down with a half-size end. In this case, the thickness of both parts is carefully checked. After installing the jumper in the harness of the gazebo, the timber should not protrude above the surface of the contour.
pillars
Almost the entire frame of the 3x4 gazebo is assembled from the same type of material - a beam of 100x100 mm. This makes it possible to use the material more rationally. For example, for the pillars of the gazebo, the remnants of the blanks sawn during the arrangement of the lower trim 3x4 m will be used.
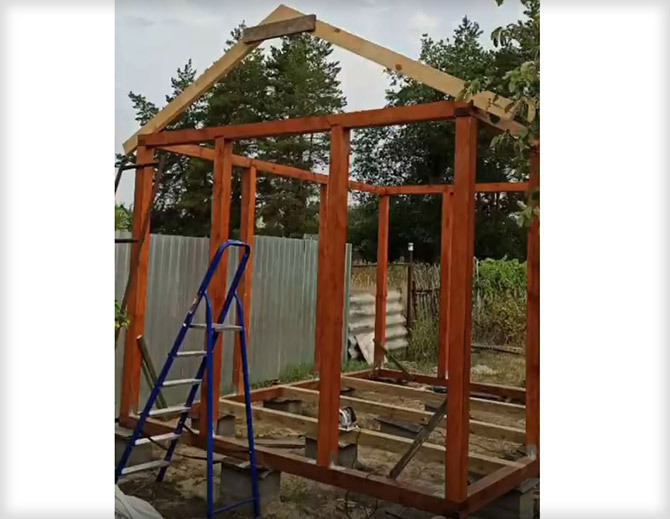
Pillars or vertical supports are pieces of timber 225 cm long with a cut in the upper part. The blanks are pre-treated with a varnish coating and dried. In total, a 3x4 gazebo will require 10 pillars.
Each such stand-support is exposed above the foundation block, aligned vertically in two planes.

The pole is attached to the lower harness of the gazebo with the help of two steel corners.
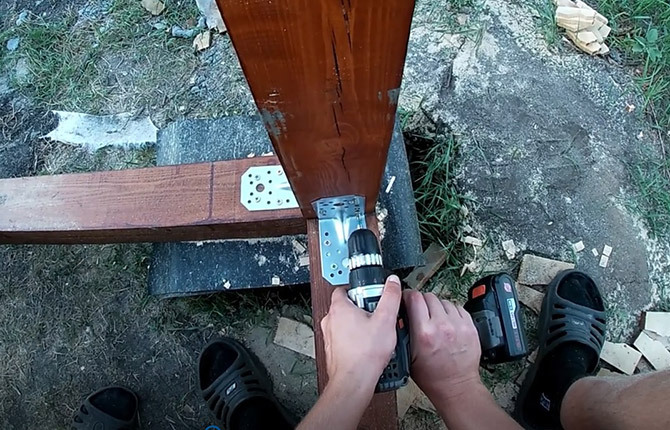
In order for the pillars not to fall until the assembly of the upper part of the gazebo, the vertical posts are reinforced with stuffed struts.
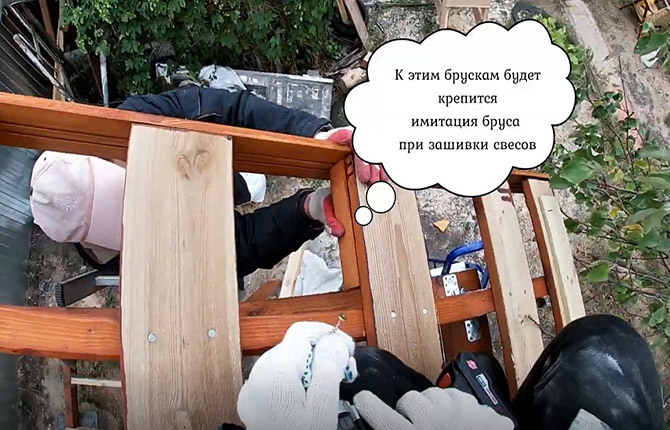
Four corner posts are clearly not enough for a 3x4 gazebo. They will still hold a simple roof or a roof laid along the ceiling, but in general the rigidity of the building is not enough. Therefore, on the long sides of the gazebo, you need to install two more intermediate vertical supports, as in the drawing.
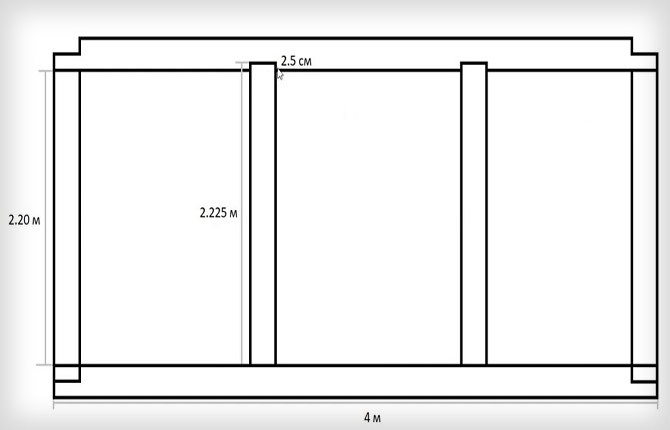
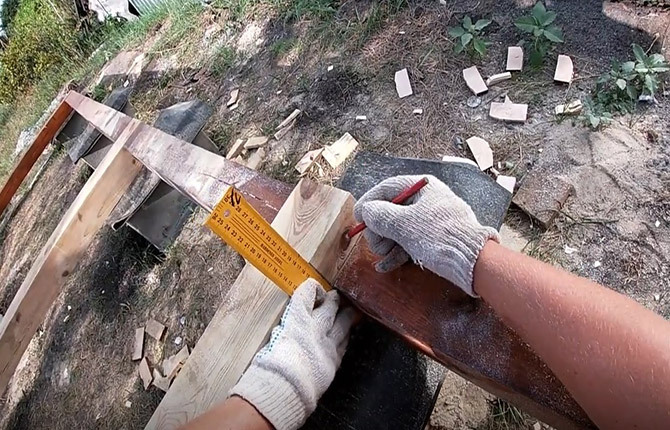
They will be 2.5 cm higher than the corner posts. That is, when installing the upper trim, you will need to make a gash in a bar for docking with intermediate racks.
Therefore, before putting all the racks, you need to measure and cut each longitudinal beam of the upper harness of the gazebo by 2.5 cm. At the same time, try on so that the grooves of the washed down match in size with the heads of the intermediate supports.
Top harness
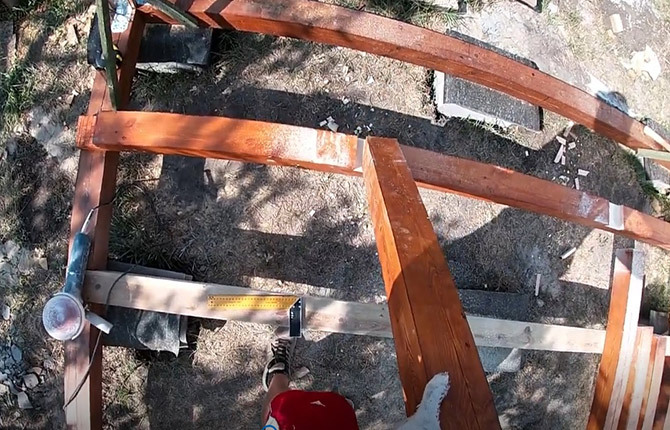
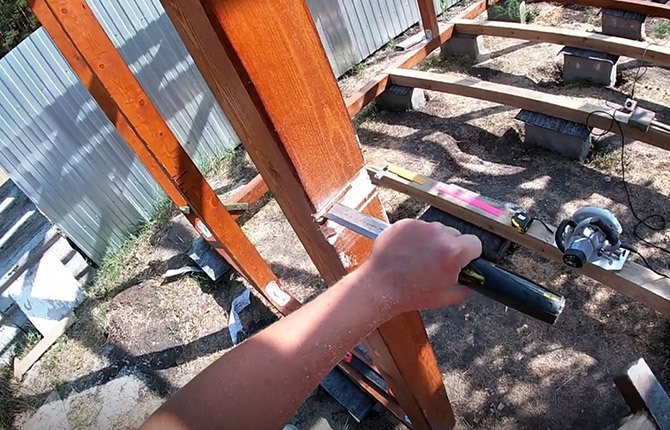
The construction of the upper contour of the gazebo begins with the installation of the longest beams with cuts for two additional pillars. In order not to complicate the assembly of the 3x4 gazebo, the intermediate supports have not yet been installed. They will be mounted on the lower and upper trim a little later, after the upper runs are aligned.
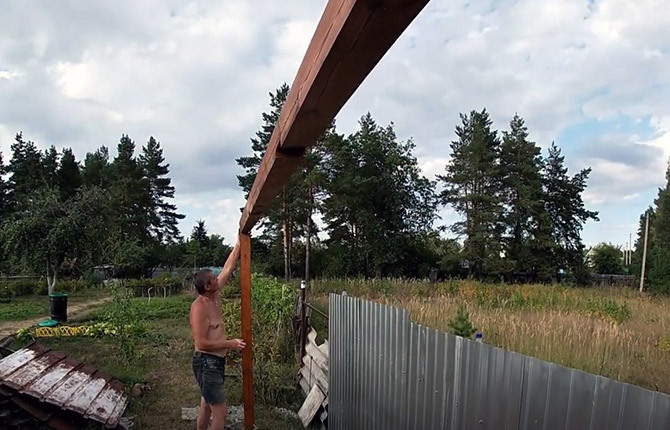
Before laying, the longest part of the upper contour is sawn at the ends “in half a tree” and laid on corner posts.
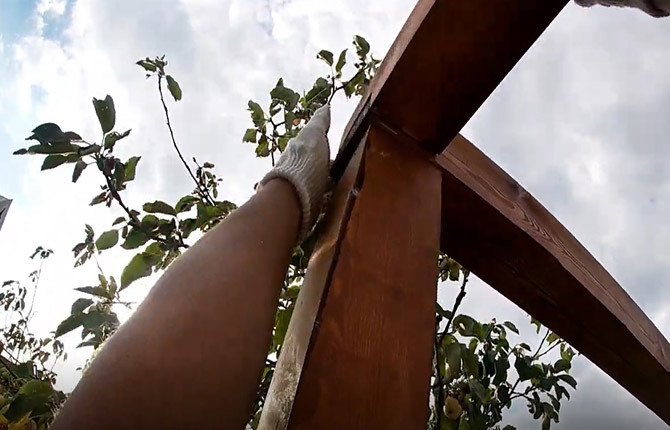
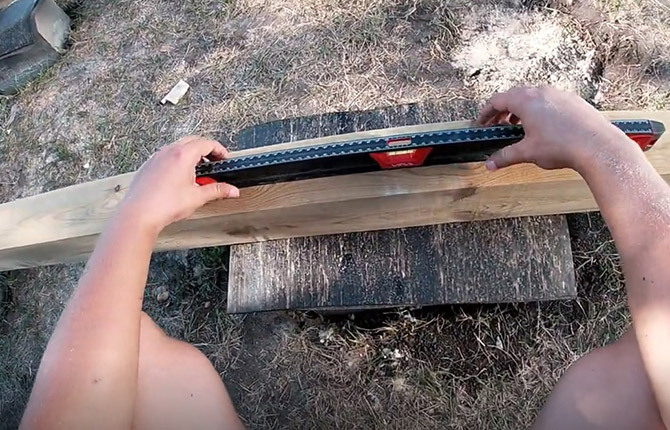
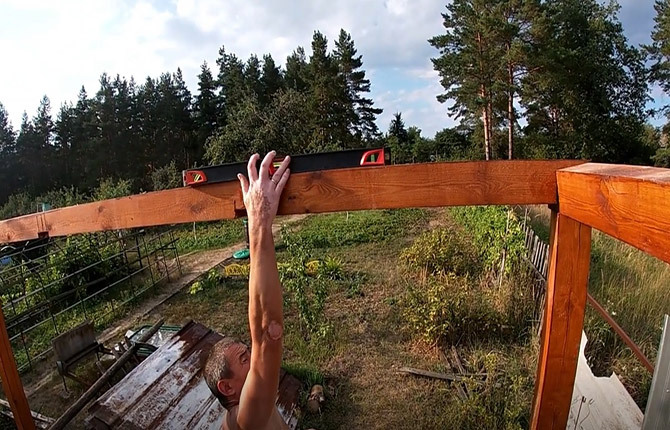
Before final fastening, long beams must be checked for level. If you do not check, then there is a risk that the 3x4 roof may turn out with a slight slope to the side.
Now it will be necessary to lay short beams of the upper harness of the gazebo with docking along the sawn parts at the corners.
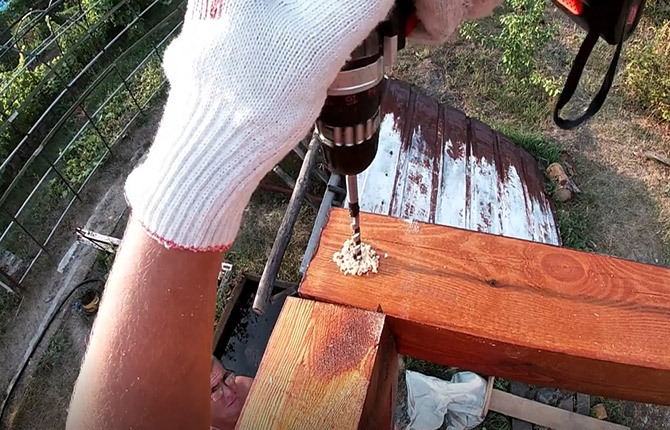
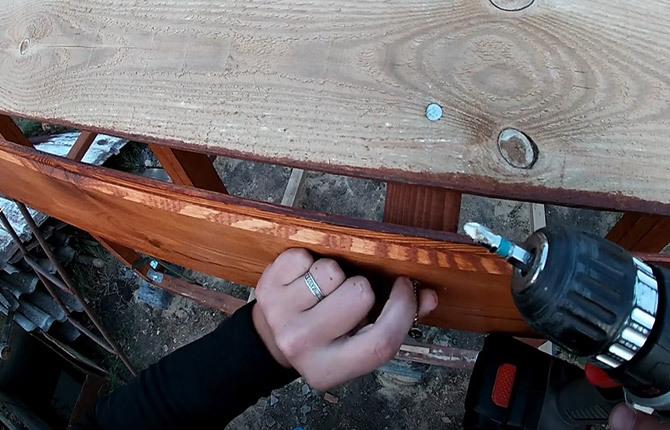
In places washed down, holes for fasteners are drilled and carpenter's self-tapping bolts with a hex head are wrapped.
Now you can install intermediate vertical supports of the gazebo 3x4. Each rack is inserted into the groove and attached to the beam of the upper harness of the gazebo with ordinary nails. Before hammering fasteners, you need to drill holes in the beam so as not to split the tree.
In a similar way, short three-meter bars of the upper trim are cut and sawn down. All intermediate posts are attached to the lower base of the gazebo with the help of corners. At least two corners per post.
Roof
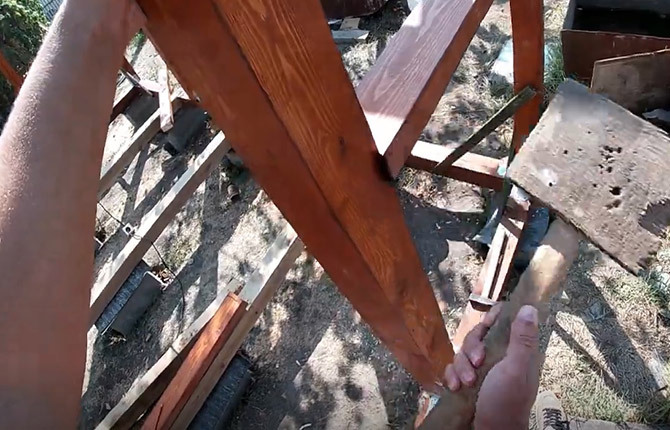
The framework under a roof of an arbor is executed according to a gable scheme. With a size of 3 by 4, 4 pairs of rafters will be required for the roof.

For a 3x4 gazebo, a fairly massive roof is selected, designed for bad weather, heavy rain and wind. The rafters will be made from 150 mm wide forty boards, auxiliary parts are cut from sawn timber scraps.
The length of one rafter is at least 180 cm, and a pair is up to 3.8 m. Given the dimensions of the 3x4 gazebo, it is extremely inconvenient to lift and saw down heavy rafter beams on the stairs. Therefore, all assembly work is carried out below on the ground or on a workbench.
First you will need to make a template of two rafters and a lintel. The template knocked down from the boards is lifted to the upper trim of the roof and fixed vertically from the side of the pediment.
Further, on the lower edge of the rafters, the contours of the wash down of the supporting surface are marked. Since the error when assembling the roof on a 3x4 frame is quite large, one more climb to the top trim will be required to make sure that the gash was washed down correctly.
Now, according to the template, you can make a rafter pair for the back wall, then for two intermediate ones.
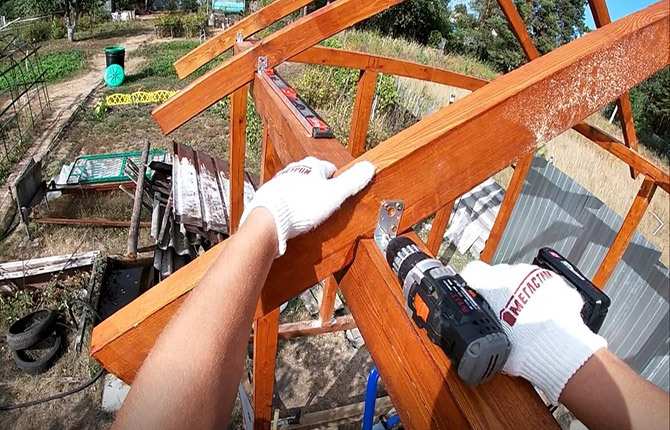
Each pair is reinforced with a spacer patch (nailed). In addition, along the junction line, two parts are pulled together with self-tapping screws.
From the inside, the junction is reinforced with a metal plate. On the upper strapping of the gazebo, each pair is attached using metal corners.
In this case, for a 3x4 gazebo, the roof frame is assembled on the same rafters. There is no ridge beam as such. The lower and upper trim, vertical racks are made of a fairly massive timber 100x100 mm.
The size of the entire building is small, only 3x4 m, so there is no particular need to embed an additional ridge beam. In addition, the roof of the gazebo is supposed to be made of metal, so there will be no deflection or deformation of the rafter legs, even if there is a half-meter layer of snow on the roof of the gazebo.
But the use of a ridgeless roof imposes certain restrictions. For a 3x4 gazebo, the length of the overhangs should not be more than 30 cm. If you need to make a small 3x4 hut in the style of a chalet, you will have to make a ridge beam with supports on the ceiling.
The longitudinal rigidity of the roof frame is provided by a sufficiently powerful crate made of boards 150x30 mm. For a 3x4 m frame construction, thinner slats plus a ridge beam with struts could be used. But in this case, a more reasonable solution is to strengthen the crate.

The scheme of laying boards on the rafters is the same, holes are drilled, after which nails are hammered.
After sheathing, the overhangs (cut ends of the rafters) are hemmed with a cornice board. In this case, a screwdriver with "yellow" self-tapping screws is used.
Cross railing
The fence is built from separate blanks cut between the vertical posts of the gazebo. In this case, for a 3x4 building, you will need to cut 11 pieces of "shorty pieces" from a forty board. The length of the blanks for the three-meter side is 85 cm, for the four-meter side - 140 cm. The latter will need to be adjusted in size, since the distance between the vertical posts on the long side may vary.
The blanks will cut between the racks, so the length of each and the depth of the gash will need to be selected. It is optimal to make a groove on the rack up to 1 cm deep. But for arbors 3x4 in size from a weaving timber, if necessary, you can do more.
The cut joint will need to be cleaned, sanded if possible, be sure to open it with varnish. Before installing the railing, the end surfaces of the crossbars (as well as the grooves) are rubbed with a wax candle. This makes it easier to install the crossbar into the groove. Ideally, the fence of the gazebo should be inserted by hand, but you can lightly knock it out.
Important! If the workpiece is tight, then it is impossible to beat, it will be necessary to cut the ends. If you hit hard, you can break off the fasteners or deform the racks. The rigidity of the 3x4 frame is not strong enough to withstand hammer assembly.
Roof
The roof of the gazebo is covered with metal. As a roofing, you can use corrugated board, it is easier to install, does not require calculations, preparation of the crate, as well as special self-tapping screws.
Metal roofing will cost twice as much. First, you will need to correctly calculate the number of sheets 118-119 cm wide for slopes. The actual dimensions of the covered roof surface of the gazebo 3x4 may differ from the calculated ones. It all depends on the length of the rafters and overhangs. In addition, in most cases, the upper harness of the arbor turns out to be slightly larger or slightly smaller than the 3x4 size, and also far from the ideal rectangular shape.
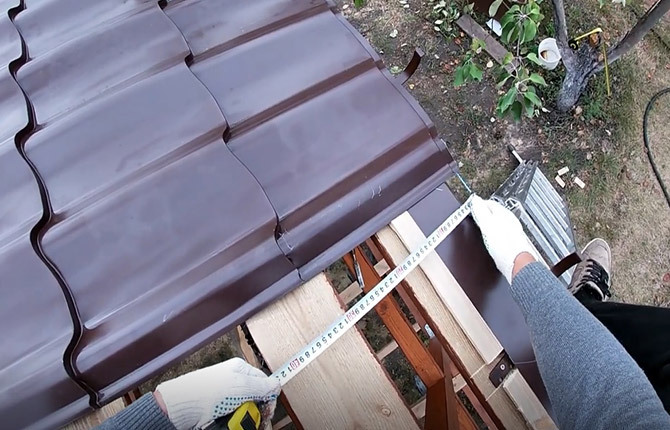
Therefore, each roof slope must be measured individually - in length, width and diagonally, check every meter. This is the only way to calculate the real area of \u200b\u200bthe roof 3x4.
One sheet will be laid for the entire length: from the ridge line to the frontal board. Before buying a metal tile, you need to know in advance the vertical step of the wave. The step with which the self-tapping screws will be wrapped in the roof crate depends on this. It may happen that the overhang of the sheet edge will be small. Accordingly, the normal flow of water into the gutter will not work.
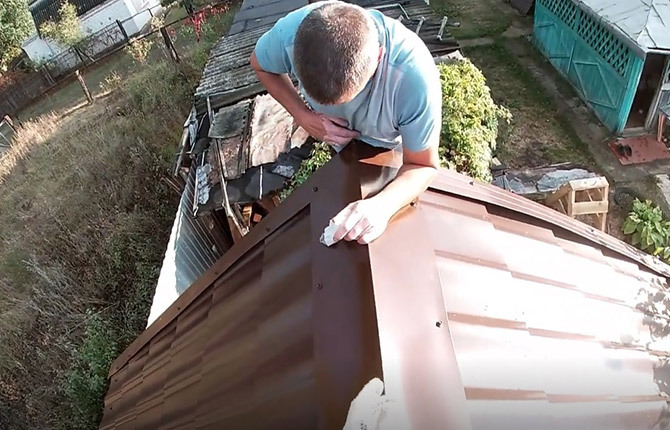
At the last stage, it will be necessary to sew wind and ridge trims onto the roof of the gazebo. Everything is fastened with screws. The quality of the 3x4 roof will show the first or second rain.
Legs and floor
First of all, you need to choose a scheme for arranging the floor. It can be plywood or, more often, OSB sheets (18 mm) sewn directly onto the bottom trim beams. Such a scheme is allowed for floors 3x4 m, subject to dry soil with a low level of soil water. For example, if the gazebo is built on sandy soil.
Often, the owners make a backfill over a 3x4 area with a mixture of sand and fine gravel. It is believed that a layer up to 10 cm is guaranteed to block the evaporation of moisture.
In fact, this is not entirely true, therefore it is better to make a deck for chernozems and loams. This means that relatively thick boards of 35-40 mm are selected for the floor, which are sewn directly onto the beams of the lower trim, without any lag.
A gap of up to 5 mm is left between the boards, thanks to which moisture easily leaves the underground.
In a 3x4 gazebo, the distance between the beams is 90-100 cm, this is enough to hold the floorboards without deflection. The only condition for using such a scheme is the annual treatment of boards with protective oil or varnish.
Decor and interior design
To improve the appearance, you can use a crate or make the fence completely closed from polycarbonate.
For example, if a gazebo for a summer residence is built in a garden or next to the beds, then instead of a crate, you can stretch a mesh or make a wire support for grapes and climbing plants. The sunny side can be sewn up with polycarbonate, there are enough options.
Selection for you:
- Arbors with their own hands made of wood
- Do-it-yourself brick gazebo
- How to build a comfortable metal gazebo with your own hands
- We build a gazebo from polycarbonate with our own hands
- How to make a gazebo from a profile pipe with your own hands
- We make a gazebo from improvised materials with our own hands
- We build a modern gazebo with a barbecue for a summer residence with our own hands
- How to make a beautiful gazebo from pallets
- Do-it-yourself gazebo with a pitched roof
- DIY hexagonal gazebo
Results
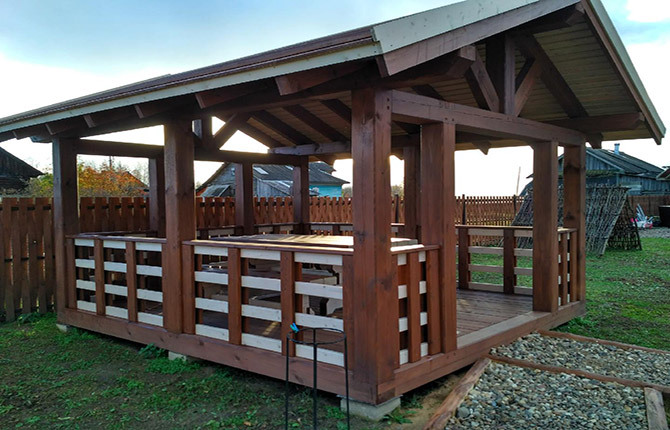
Building a 3 by 4 gazebo with your own hands is not as difficult as it might seem. Of course, much depends on the chosen material and design features. In this case, a massive timber was used, a simple tie-in into half a tree, joints on nails and self-tapping screws with a minimum number of struts and jibs.
A 3x4 gazebo can be built from a lighter material, but in this case, the experience and skills of a professional carpenter will be required.
Tell us about your experience with installing a 3x4 gazebo. How do you think the foundation and roof of a building can be made simpler? Also share the article on social networks and bookmark it, this will help the development of the site.