The decision to build a barn from a profile with your own hands is usually dictated by the presence of a certain amount free material - professional pipes and corners, as well as a slightly simpler work with metal than with tree. A metal building may cost a little more than a wooden one, but the end result is worth it.
The content of the article:
- What are the advantages and disadvantages of a barn from a professional pipe?
-
Construction of a barn from a metal pipe
- Drawing preparation
- Building foundation
- Manufacturing of the bottom trim of the frame
- Platform installation
- Frame assembly and sheathing
- Door assembly
- Roof and floor
- Shed wall cladding
- Results
What are the advantages and disadvantages of a barn from a professional pipe?
Building a simple metal shed cannot be called the best solution. You will need the skill of working with cutting blanks, as well as assembling frame structures by welding. It will not work to master the technology in the process of building a barn from a profile pipe. You need to immediately achieve high quality, without training and experimenting with metal.
Nevertheless, a metal barn has many advantages over a wooden one:
- Reliability - a metal frame with proper assembly will last 30 years or more. A wooden structure is always temporary, the wood rots, is damaged by mice and rodents.
- With the help of magnetic holders, you can connect parts at right angles with great accuracy. This means that the barn from the profile will turn out to be quite even, without curved walls, as is often the case with wooden buildings.
- Higher level of anti-vandal protection. A wooden shed is easy to dismantle in a short time. A steel garden hozblok for tools rarely becomes an object of vandalism, even with a long absence of owners on the site.
The only significant drawback is the need to properly mark and weld parts. It is much more difficult to fix a marriage; a thin-walled profile is easy to burn through or weld with deformation. But if there is material and skill, then the decision to build a metal shed fully justifies the invested effort and money.

Construction of a barn from a metal pipe
The frame will be welded from a profile pipe of two sizes - 50x50 mm and 50x25 mm. It will take 10 pieces of the first 3 m each and 12-15 half-section pieces 2 m long. The size of the tool shed is 3x2 m.
The bulk of the blanks need to be cut in a garage or locksmith shop, where there is a desktop cutting machine. Often, hardware stores will cut a metal profile to size as an additional service. It is inconvenient to carry workpieces 6 m long, and in addition, they will need to be washed with a solvent, white spirit, after drying, painted with a primer containing a rust converter.
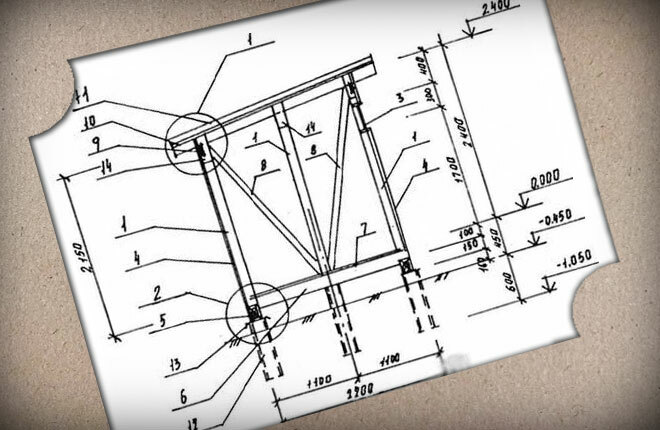
Drawing preparation
The design of a barn made of a metal profile is quite simple, you can even make a drawing. The base and roof are rectangular, assembled in the form of a frame with two cruciform lintels. Long walls are additionally reinforced with one vertical support.
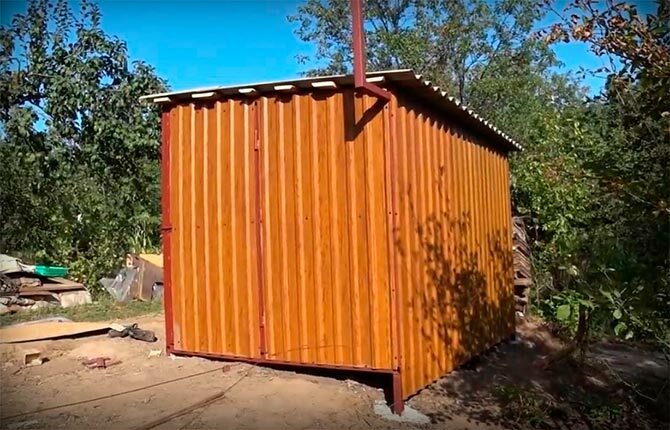
The floor and roof lathing of the barn are wooden, the roofing is slate, the wall cladding is made of corrugated board.
Building foundation
The shed from the profile turns out to be quite heavy, so it is impossible to put concrete pillows on blocks or poured into the formwork. It is necessary to tie the frame of the hozblok to the ground. The foundation will be used in the form of supports from a profile of 50x50 mm, tightly concreted into pits.
At first glance, the foundation is not the most successful, especially for profile frame structures. For example, wooden frames are placed on supports with a dot binding of a tree with a stud to concrete or brick. The absence of a rigid bond allows wooden parts to deform under load without breaking.
In theory, a barn from a profile can also be placed on brick pillars, but not in the case of a garden plot or a country cottage. A steel box made of a profile and corrugated sheets must be firmly fixed in the ground like an anchor. If everything is done according to the instructions, then direct concreting of the supports from the profile into the ground will not affect the strength of the welds in any way. True, it is necessary to weld a profiled pipe in good faith.
Important! You should not try to concrete the entire occupied area under the barn from the profile, this will not give any positive result. If you need to get rid of puddles or dirt, then it is easier to fill the site with sand (gravel) at the end of work.
For now, you need to mark the site and dig six holes the width of a shovel bayonet, 40 cm deep. A small amount of sand, gravel is poured onto the bottom, after which it is qualitatively rammed.
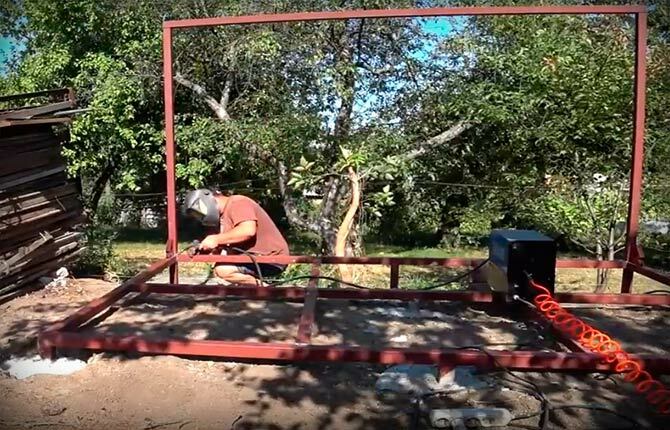
Manufacturing of the bottom trim of the frame
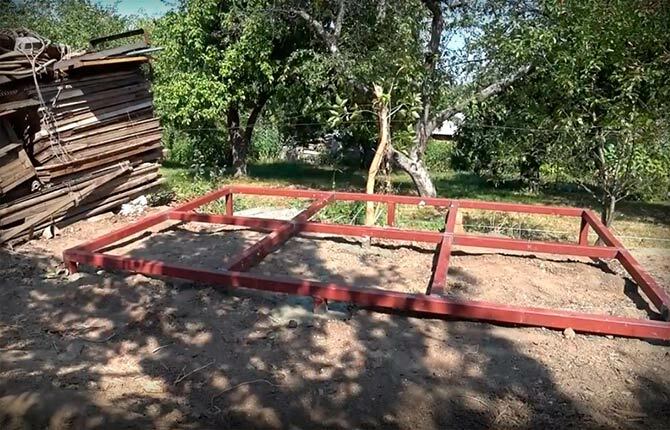
In this project, the base of the barn is connected by welding in the form of a frame with cross-shaped jumpers. A flat frame measuring 3x2 m will have six supports 50-60 cm high.
For the frame cut:
- two blanks from a profile 50x25 mm 300 cm each, two 200 cm each, one 290 cm;
- four blanks from a profile of 50x25 mm, 92.5 cm each;
- six blanks from a profile of 50x50 mm, 60 cm each.
The latter are cut out with a small margin in length. It is possible that some of them will have to be cut so that after installing the platform in the pits, the frame is more or less horizontal.
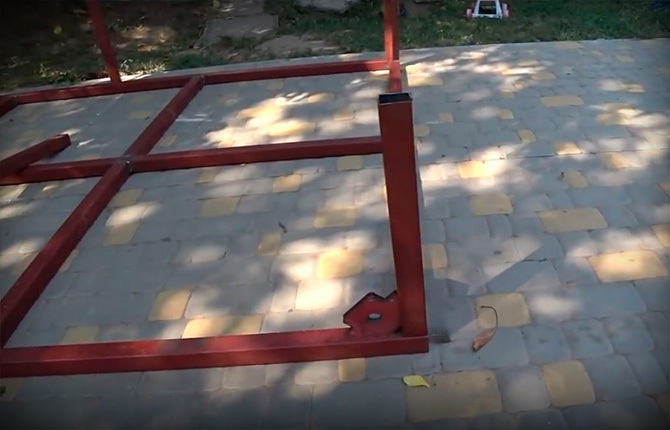
The base parts are laid out on a flat, level area. The first to lay out blanks from a profile of 2 m and 3 m in the form of a large rectangle. Two-meter and three-meter segments must be aligned so that the lengths of the diagonals differ by no more than 5 mm.
The next step is to weld an internal profile of 290 cm, then meter jumpers can be attached.
The most difficult part of the assembly is the mounting on the support frame. Each profile must be perpendicular to the plane of the platform. Therefore, each workpiece is exposed before welding using triangular magnetic holders. Each profile will require a minimum of two holders.
After assembly, the metal of the platform must cool, the welds must be cleaned and be sure to paint over with a primer.
Platform installation
The finished base from the profile pipe is transferred to the installation site of the barn. For now, you just need to insert the platform with supports into the pit and try to level it horizontally using the building level.
In some places, you will have to knock out (besiege) with gentle blows of a sledgehammer through a wooden spacer. If this does not work, then a horizontal position can be achieved by hanging the frame on wooden supports.
Up to about 20 liters of fresh concrete will be required for each support table. That is, only about 120 liters. This is a lot, if kneaded by hand, the concreting process will take a whole day. Therefore, it is better, if possible, to use a concrete mixer.
After pouring the pillars from the profile, the platform is covered with a film and left for several days until the concrete pad sets.
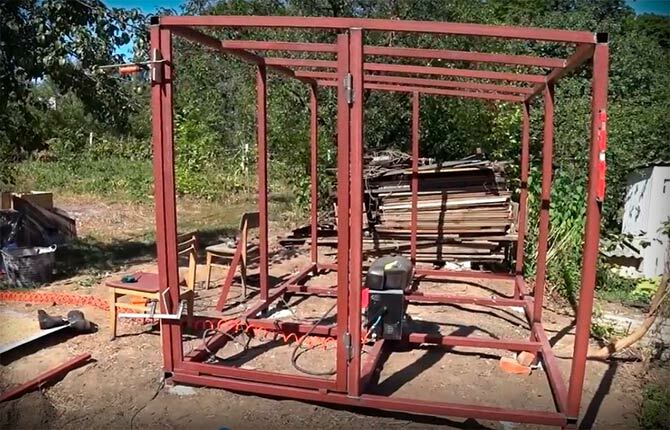
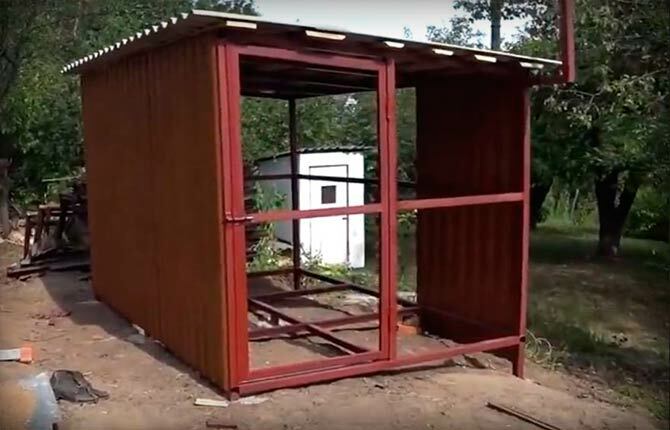
Frame assembly and sheathing
The frame of the barn is assembled from two large U-shaped parts. Each such blank has a size of 3x2 m, it is welded from a profile of 50x25 mm using magnetic corner holders.
Two pairs of magnetic supports make it possible to place the workpiece on the base of the shed very accurately. But just in case, you can check the building level.
It is necessary to immediately grab the racks to the profile of the lower strapping by welding, until the wind has knocked over the part.
Further, from a profile of 50x50 mm, blanks are cut into the ceiling of the barn. They are also placed on the upper trim using magnetic holders and welded by welding.
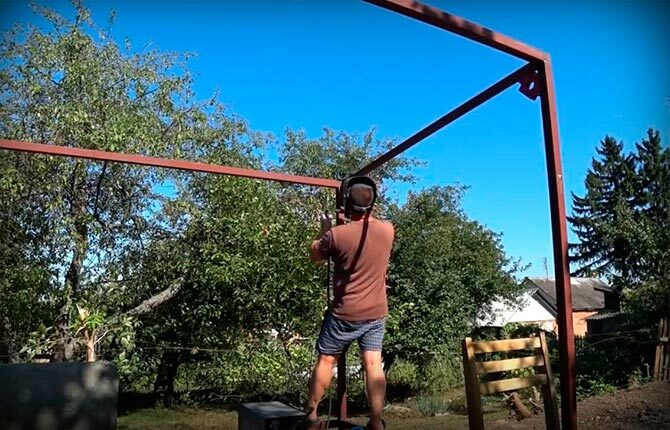
In addition, two additional posts will need to be installed in the middle of the long walls (3 m). They will be needed for fastening the corrugated board in the process of facing the walls of the barn.
Door assembly
The entrance to the barn will be located at the end. To install doors, the most rigid and durable corner of the shed is usually chosen.
First of all, it is necessary to cut out two blanks of 2 m each from a profile of 50x50 mm and 50x25 mm. The first will be used as a part of the door frame, the second is already part of the door.
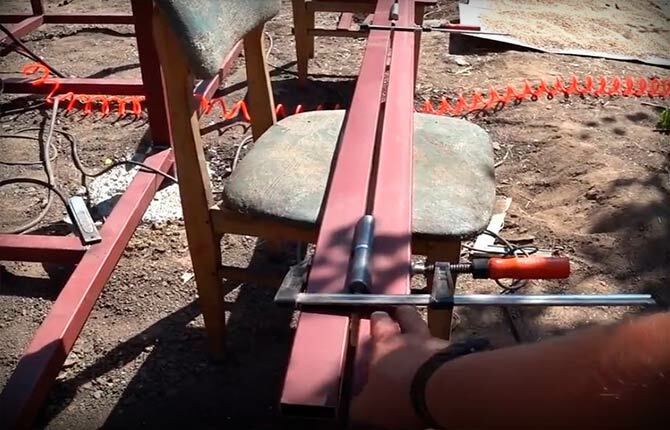
The parts are laid out on a workbench, aligned, fixed together through a couple of wooden spacers using clamps. This is done so that a small gap remains between the two profiles. A garage canopy is laid on the profile and welded to the profile by welding.
Next, the first profile (50x50) is mounted vertically on the barn frame. This will be part of the door frame. The lower cross member of the future door is welded to the second profile (50x25).
Now this half of the door needs to be hung on the frame of the shed and the missing sidewall and upper cross member are welded.
It turned out that the door frame from the profile had to be assembled on site, focusing on the actual dimensions and angles of the barn frame. The method is quite laborious, but this is the only option to assemble the door exactly the size of the entrance to the barn.
Roof and floor
Asbestos-cement slate is used as a roofing. This is the most common roof option for a garden shed. In addition, slate is more durable, not afraid of moisture, temperature changes, without any vapor barrier film.
The crate under the slate roof will be assembled from boards. The step between the filing is usually made 10-15 cm, but you need to control that in the process of nailing the slate, the nail does not dive into the void.
The roof is pitched flat, but a drain slope is needed. Therefore, on one of the long sides of the upper trim of the barn, you need to additionally sew a beam of 70x50 mm. You can do more, but then you will need to hem the overhangs around the perimeter of the barn.
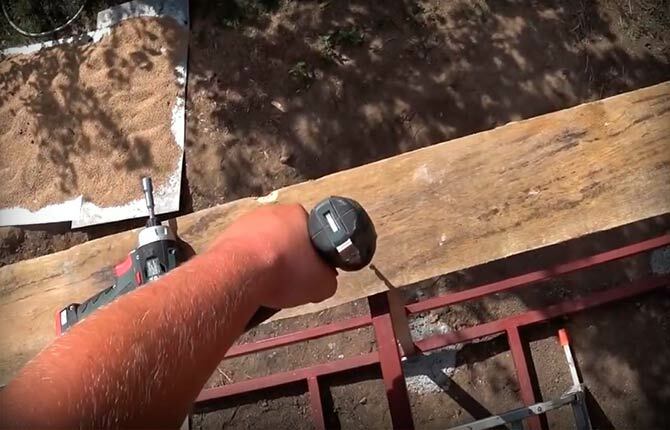
The boards are attached to the profile of the upper crate of the shed using self-tapping screws. Usually work with two screwdrivers. First, a hole is drilled for a self-tapping screw, and the fastener itself is screwed in with the second. Since no protection is provided for the tree, the crate must be treated from bark beetles. Garden sheds always suffer from the invasion of pathogenic microflora and insects.
The edge of the crate is cut along the cord so that an even overhang is obtained. Above the entrance to the barn, you need to hem a cornice strip and put a gutter. There are no steps, since the floor height above ground level is only 20 cm.
For the floor, you can use an edged board, but for a shed made of a metal profile, ordinary plywood is recommended, painted in several layers with enamel for outdoor use. If it is required that the space inside the barn be ventilated, then it is enough to fill boards with a gap between the floorboards up to 5 mm on the metal profile.
However, in this case, it is necessary to stretch a metal mesh onto the profile pipe. This is protection from rodents, hornets or wild animals. For some reason, they most often choose closed metal profile structures for nesting.
The slate is laid on the roof of the barn in a checkerboard pattern, fastened with self-tapping screws with a press washer, then the fastener is glued. It is believed that with this method of fastening, the fasteners and the tree do not get wet during rain.
For a shed with a metal profile trim and an almost horizontal roof, it is imperative to press the slate against the metal profile. Otherwise, in the first strong wind there may be problems.
The optimal size of overhangs for a barn assembled from a metal profile is 20 cm for the facade, 15 cm for the side walls, and at least 30 cm for the back side.
Shed wall cladding
The most time-consuming part of the construction is laying the cladding from the profiled sheet with your own hands on the frame. The work is simple, but it requires patience, since each sheet has to be applied several times to the metal profile so as not to make a mistake with the dimensions.
The corrugated board is fastened to the profile in three parallel rows - first along the middle line, then along the upper and lower edges. One shed will take at least 250 hex head screws.
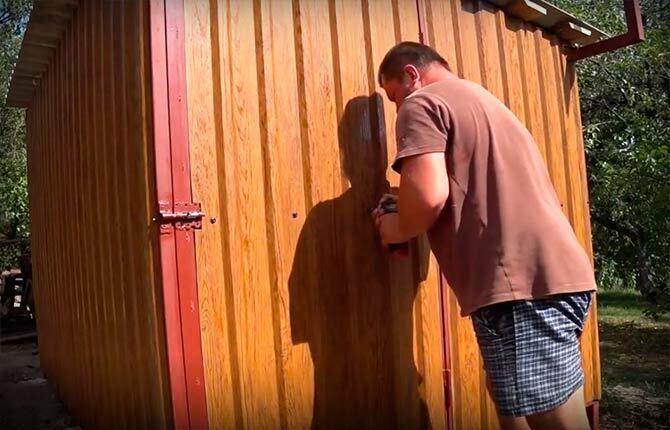
For facing walls from a profile, corrugated board 0.5-0.7 mm thick with a wave height of 20 mm is used. This is an easy option, if an anti-vandal version is required, then you will have to install a profiled sheet 1 mm thick.
The basement of the walls remains open, it is not sewn up, as in the case of wooden sheds. The presence of an air gap ensures normal ventilation of the wooden floor and the profile on the lower trim. In addition, a family of hedgehogs can live under the sheds in the garden. Today it is the best way to protect the garden plot, trees, shrubs from most small pests.
For you: Do-it-yourself shed wooden shed for summer cottages
Results
Anyone can build a shed from a profile, this is an entirely affordable task for most summer residents and amateurs to work with their own hands. The construction technology has been sufficiently developed, tested in practice, so there will be no unpleasant surprises. Most of the details from the profile can be made in advance, then brought to the country and assembled as far as possible.
Tell us about your experience in building sheds from metal profiles. What details should you pay attention to first? Share the article on social networks and bookmark it, this will help the development of our site.


