Wall insulation from the inside with expanded polystyrene is a common technology that has gained popularity due to the effectiveness of the material and its affordability. Such a heater has quite a lot of advantages, but there are also disadvantages. The features of the material and the stages of installation are described in the presented material.
The content of the article
- Pros and cons of polystyrene foam
- Preparing for insulation
- Wall insulation
Pros and cons of polystyrene foam
Expanded polystyrene, as the name suggests, is a polystyrene-based material that has gone through a foaming stage. Due to this, many small air cavities are formed in it, which poorly transmit heat, due to which they effectively protect the room from the cold.
Insulation with polystyrene provides quite a few advantages:
- the material is waterproof;
- has a small weight;
- easy to handle and install;
- resistant to negative and high temperatures (range from -50 to +70 degrees);
- resistant to deformation;
- affordable price.
But the most important advantage is the low thermal conductivity of even a very small layer. Suffice it to say that 10 cm of this insulation corresponds to 120 cm of brick or 40 cm of wood, which is clearly shown in the diagram.

But we should not forget that insulation with polystyrene foam from the inside has its drawbacks:
- material can be damaged by rodents;
- it is combustible, although modern products are coated with a special solution that significantly increases resistance to fire;
- lack of bending strength - this drawback is hardly noticeable, because the insulation layer is covered with a finish that protects it from mechanical influences;
- the material deteriorates from exposure to varnishes and paints, so they must be especially carefully removed from the old wall, which is planned to be insulated.
Preparing for insulation
Insulation of the house with polystyrene is carried out in several stages. First you need to prepare the tools:
- knife and scissors with sharp blades;
- spatulas - with a rubber and metal surface;
- painting tools - brush, roller;
- hacksaw (teeth should be small) or string;
- tape measure and ruler;
- level;
- construction mixer;
- plumb;
- bucket with measured divisions.
At the preparatory stage, the following work is carried out:
- The surface is thoroughly cleaned and the old coating is removed. They do the same in the case when it is planned to insulate brick walls from the outside with polystyrene foam. The remains of paint and varnish compositions are especially carefully removed so that they do not damage the insulation.
- If there are large gaps, they are eliminated with foam. After drying, cut off the excess and level the surface.
- If the wall is brick, plaster is laid, and if it is concrete, this step can be skipped. But in any case, you need to walk with an acrylic primer and wait until it dries during the day.
- Next, putty is applied and with its help even small irregularities are removed. Then they go through the primer again, preferably with a composition with an antifungal component.
Wall insulation
Now it's time to figure out how to insulate the house with polystyrene. The step by step instructions are as follows:
- Measurements are taken in advance and the insulation is cut with a hacksaw (the teeth should be small) or a well-heated string.
- Prepare a solution of a special adhesive mixture. It is diluted with water before installation, because the liquid quickly hardens.
- Apply the composition to the wall with a roller or brush.
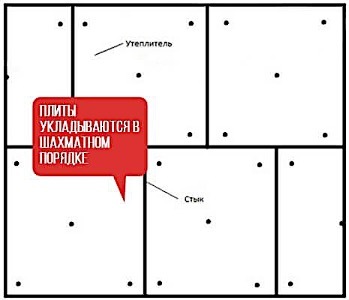
- Sheathing the house with polystyrene starts from the bottom, after which they go up. The plates are laid end to end, close to each other. The next row is laid so that their joint is in the middle of the lower fragment, like brickwork.
- When the gluing is finished, it is necessary to wait 1-2 days for the composition to dry completely. Additionally, the insulation can be fixed using plastic dowels according to this scheme.
- At the final stages, a reinforcing layer is placed, which is glued onto the tiles with the same composition. Install hydro and vapor barrier.
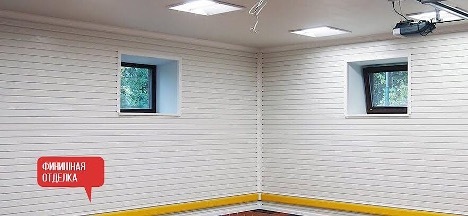
- Plaster the wall, paint or glue the wallpaper. After finishing, the room may look like this.
Wall insulation with polystyrene can be called a universal technology that is suitable for indoor and outdoor work, regardless of the climatic features of the region. Such material will last a long time, and if the installation is done correctly, then even a layer of 20 cm will be enough to protect the room from severe frosts.