You are going to sewage in a private house, but have a very limited budget? This is not a reason to deprive yourself of comfort, is not it? Or did you decide to build a septic tank of tires, using the materials at hand? But doubt your own strength and do not know where to start?
We will help you to sort out this issue in detail - the article discusses the running options for the device of a local sewage treatment plant for which you can use used automobile rubber. This material is easy to find in motor transport enterprises, where it is simply written off as useless, or to search for announcements of private individuals.
The article also provides detailed instructions for the manufacture of a homemade septic tank, starting with the calculations and ending with the laying of the sewer pipeline. All actions are accompanied by step-by-step photos.
In order to help the novice master, video recommendations on the arrangement of this type of septic tanks with useful tips on the implementation of tight connections of pipeline sections from the masters were selected.
The content of the article:
- Arguments in favor of improvised means
-
Rules of arrangement of a septic tank
- The location of the tank on the site
- Sewer pipe
-
Popular septic tank options
- No. 1 - design with a filter system
- No. 2 - structure with a settling tank and filtering system
- No. 3 - septic tank of tires with drainage pipe
-
Stages of construction septic tank
- Step # 1 - Preparing Materials and Tools
- Step # 2 - calculate the amount of materials
- Step # 3 - prepare the pit for the installation of a septic tank
- Step # 4 - we put the tires for the sump
- Step # 5 - we put the tires for the filter well
- Step # 6 - connect the sump and filter well
- Conclusions and useful video on the topic
Arguments in favor of improvised means
How much can you save on a septic tank if you use old tires? One medium-sized concrete ring costs 4,500 r. they need at least three. The cost of a worn tire does not exceed 2,000 rubles, and they need at least three or four.
Accumulative tank series capacity, for example, costs an average of about 18 thousand. rub. Even without taking into account concrete foundations and well covers, the savings would be about 6,000–8,000 p.

The use of automobile tires in the construction of septic tanks solves two important questions at once. Allows you to organize the sewage of a private house and get rid of the need to dispose of virtually unbreakable rubber
But such a septic tank service life is much less than that of concrete or plastic structures. The reason is the lack of solidity of the body, low weight of tires and poor sealing between them.
When the ground moves, the elements often shift. True, if you use a certain technology, then such a septic tank will last longer, and pumping sewage can be done less frequently.
Rules of arrangement of a septic tank
Any construction work, including communication, requires permission from the administration if the depth of the object is more than 5 m.
It is easy to issue it if the survey of the site is done according to the new rules. They entered into force with amendments to the Land Code of the Russian Federation in 2014. Old cadastral passport plots need to be redone. The cost of land surveying is about 6 000 r.
If it is found that a communication cable is embedded in the territory of a private house, additional permission from specialists will be required.
To do this, contact the military unit that owns this cable. They will send a specialist with a metal detector, which will determine exactly where it is impossible to dig.
Image Gallery
A photo of

Stage 1: To build a self-made drain hole, you need to stock up tires, the number of which must be calculated in advance, based on the volume of waste water to be disposed of.

Stage 2: Before assembling the walls of the well a pit is being developed, the depth of which is equal to the total width of the tires used in construction

Stage 3: The bottom of the pit is leveled without tamping. The filtration properties of the underlying soils are checked once again, which should soak up the bucket of water poured into the bottom within a few minutes.

Stage 4: If the filtration properties of the underlying soils are ok, i.e. they do not hold, but pass water, collect septic tank walls from tires. The end of each laid tire is covered with sealant before installing the next one.

Step 5: A trench for connecting and entering the sewer pipe is fed to the septic tank from car tires. It is laid with a slope of 2 - 3 cm per meter running pipe

Stage 6: To increase the volume of the septic tank and improve the throughput of the tire wall inside is pruned. To enhance the design of the connectors with ties

Stage 7: A soil filter is constructed at the bottom to perform a natural after-treatment. The total filter capacity is 1 m, the first 40 cm are covered with clean quarry or river sand

Stage 8: The soil filter is usually 3 layers of soils of different fractions. After sand, 30 cm of fine gravel are poured, a layer of coarse gravel or crushed stone will go on top.

Build tires for facilities

Pit for homemade septic tank

Bottom device and tire installation

The construction of the walls of the tires

Inset sewer pipe

Trimming the tires inside and stitching elements

Backfill the sandy part of the filter

The device is the top layer of the filter
The location of the tank on the site
When permission is obtained, you need to choose a suitable place for the drain tank. There are certain SANPIN normsto be followed.
If you place a tank for the accumulation of sewage or wastewater treatment plant near the source of drinking water, the drains with possible blockages and leaks will fall into the groundwater.
As a result, leaks will make the water unsuitable for drinking. Infections can be avoided by making the septic tank airtight and arranging a filtration system for purification.

You can not have a septic tank near the foundation of the house or bath, otherwise during the development of the pit the soil may settle, and after it the concrete base of the structure may fall and become deformed. With possible blockages, the foundation may become wet and gradually lose strength.
But the reservoir should not be too far from the house either. The large distance between the sewage exit point and the cleaning facility will significantly increase the cost of organizing the system.
It will be necessary to lay a long section of the pipeline, which will need to be provided with manholes.
The outer part of the local sewer network should be provided with at least one manhole. If the length of the line is more than 25 m, an additional well device will be required for auditing and cleaning the system.
In addition, an excessively long pipeline often leads to the formation of blockages. This should not be forgotten, even if a pump is installed for pumping sewage.
Sewer pipe
First you need to be concerned with creating a schema. Installation of autonomous sewer network begins with the release device. After that, the risers are assembled in the direction from bottom to top, the connection of crosses, tees and the construction of floor-by-floor elbows are made.
The installation of the system is carried out on previously prepared routes with punched holes, holes for fixing pipes, made and plastered niches, with a developed trench for the outer branch.
If the house is old, there must be a cellar or underground in it. Then you will not need to remove the flooring. If the house is new, then you need to think about laying pipes in advance, until the floors are laid.
Otherwise they will have to be dismantled, in those places where the pipes will lie. Depending on the complexity and branching of the system, the following elements may be needed.

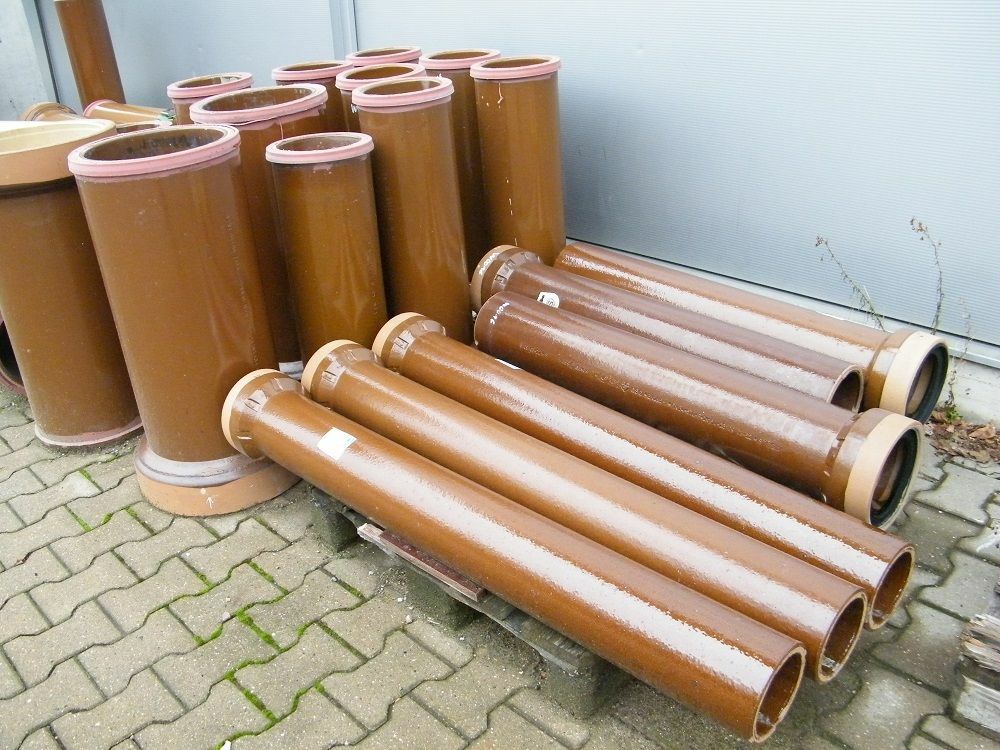
Asbestos-cement, steel, cast-iron and plastic pipes with parts and fittings corresponding to the material are used in the construction of external sewage branches. Element joints are treated with sealants and lubricants.
If the house has two floors, you must immediately install a stand for an additional bathroom or sink on the second floor.
It can be closed with a plug before it is needed.

The assembly of internal sewer lines produced after the construction of risers. All sanitary devices are connected to the discharge line. To install an automatic type washing machine in the diagram in the figure, you need to add another tee
The sewer network should be designed in such a way as to avoid unnecessary turns, branches and connections..
The optimal route for the device of the outer branch in general should be as straight as possible.
If you still have to perform branching, you should use fittings that match the material of the pipes - most often for sewage use PVC and HDPE pipes.
For tight connection of elements there are special sealing rubber bands inserted into the inside of the sewer pipe. Information on fittings for polypropylene pipes discussed in our other article.

For the assembly and construction of sewage pipelines of any degree of complexity produce an extensive range of shaped parts. Polymeric products are intended for the device of lines from similar pipes
The suitable diameter of sewer pipes for laying to an autonomous septic tank is 110 mm. This is a complete sewage system that will last a long time.
It is better not to save on pipes and put them in the calculation of a possible increase in the load on the system, otherwise they may need to be replaced in the future. The approximate cost of materials can be found here.

The main expenditure item of the sewer pipeline is pipes, the cost of which is presented in the table. Corrugation, plugs and tees are much cheaper
After installation of the internal system, the pipe for draining into the septic tank of tires must be brought to the house. You should not arrange a sewer exit from the house under the foundation.
It is better to punch a hole at the depth necessary for output with a crowbar, perforator or use a hollow iron pipe with a sharp end.
Features of laying the sewer pipeline in a private house considered in this article.

It is necessary to pierce for release the entire thickness of the foundation horizontally, so that the connection of the pipes in this place is carried out what is called “shelf in the shelf”. However, it is better to provide for it during the construction period, laying the sleeve before pouring
After this, a trench is developed from the outside of the house. It runs from the outer wall of the basement to the location of the septic tank.
The trench depth is determined by local climatic conditions. Its bottom should be laid below the level of seasonal soil freezing in the region by 20–30 cm.
The external pipeline is laid with a bias towards the natural movement of wastewater - to the septic tank.
The slope on average 2 - 3 cm per linear meter of pipe.
For systems with compulsory transportation of effluent, a slope of 1 cm on the same segment. Details about the slope of the sewer pipe discussed in our other article.
After laying the external and internal system of sewage pipes, it is necessary to proceed to the selection of a structure for organizing a septic tank from worn tires. There are several ways to make it.
Image Gallery
A photo of

Used car tires - an excellent material for the device of a number of different sewer wells

Obsolete drainage wells and ordinary sewers can be constructed from disused tires at virtually no cost.

In the suburban areas they are used in the construction of two-and three-chamber septic tanks, providing treatment and disposal of waste water

Drain pits are arranged from tire covers for cleaning and discharging water from kitchens, baths, and showers into the ground.

The construction of the drain hole

Rotary drainage well of old tires

Device of a two-chamber septic tank

Drain pit under the shower
Popular septic tank options
Septic tanks, collected from worn tires, are of three types:
- With filtering system.
- With a sump and filtering (absorption) well.
- With a filter system and drainage pipe.
It is necessary to choose a design proceeding from volumes of sewage. For a family of three people is quite suitable septic tank of tires with a filter system. If the family is large, then such a septic tank will quickly become unusable due to congestion, so it is better to choose the option with a sump and a filter well.
No. 1 - design with a filter system
This is the most cost-effective way for those who did their own hands to make a septic tank of tires. It is enough for him to dig a pit, prepare the bottom and lay the wheels.
The principle of installation of simple facilities for wastewater treatment is clearly and clearly shown in the picture.

Capacity and the associated working capacity of the septic tank will depend on the diameter of the wheels. It is better to take from large technology.
The principle of operation is simple:
- Drains fall into the tank.
- The solid insoluble component of the effluent does not pass into the ground and is deposited on the surface of the drainage layer of rubble.
- The filtered water goes into the ground through the drainage.
The disadvantage of the construction is that this type is intended for collecting and cleaning only gray drains: water polluted during cooking, and from the shower room with a bathtub, from washing machines and dishwashers.
Processing of fecal masses in a similar construction is not made.
However, if you arrange a sealed bottom instead of a drainage layer and ensure the tightness of the connection in walls, this option can serve as a reservoir for collecting all types of waste that are to be regularly to pump out.
The advantage of this system is its simplicity. As a dusting, you can choose clay, sand and just plain earth. The disadvantages include the rapid formation at the bottom of the capacity of a sticky sludge residue, which over time will impede the outflow of fluid.
If this happens, it will be necessary to pump out the septic tank and clean the bottom with the subsequent replacement of gravel. Such a septic tank can not be located close to buildings or cellars.
No. 2 - structure with a settling tank and filtering system
This option is more complicated than the previous one, but also more durable. The design consists of two tanks. One is used for settling wastewater, and the other for filtering them before entering the ground.

From the previous version, this is characterized by the presence of a sump with a sealed bottom. In it the sewage flows through the sewer pipe are settled. The insoluble component settles at the bottom, and the liquid is moved to the absorption well for additional treatment by filtration through a drainage layer of rubble
Principle of operation:
- Wastewater is discharged through the pipe into the first tank.
- Large fractions settle at the bottom of the sump.
- Light fractions along with the liquid component fall through the adjacent pipe into the filter well.
- Liquid effluents are filtered from gravel and sand, and then go to the ground. Light fractions are deposited at the bottom of the absorption well.
This design of a septic tank from old tire covers is the most environmentally friendly and cost-effective. Pumping out of it will need to be carried out no more than 4-5 times a year. Moreover, if the septic tank is constantly used, it is unnecessary to additionally warm it.
No. 3 - septic tank of tires with drainage pipe
This is not the most successful design. The presence of a drainage pipe does not play a special role in the operation of the system.

Drill holes in the pipe. To do this, use a drill with a drill that matches the pipe material. Do not forget to cool the drill, otherwise it will heat up and become brittle.
The principle of operation of this homemade septic system:
- Drains fall into the tank.
- Insoluble impurities are deposited on the rubble.
- The filtered water goes into the ground through a drainage pipe and rubble.
The purpose of the drainage pipe is to drain the water, bypassing the bottom clogged with mud. But she also quickly clogged them and serves not for long.
Stages of construction septic tank
In addition to sewer pipes and components need to stock tires. Fit tires from Kirovtsa. Mounting larger tires cannot be done alone.
Step # 1 - Preparing Materials and Tools
Tools for the device septic tank do it yourself:
- Drill.
- Bulgarian.
- Pliers.
- Shovel sovkovaya.
- Shovel pick.
- Stairs.
- Scrap.
- Ax.
- Buckets.
- Roulette.
For trimming polypropylene pipes use pipe cutterbut you can use a knife. Materials required for the work are available. They can be bought at any hardware store.

To seal the joints of the elements and to enter the pipes, liquid bitumen is needed - the most compatible with the material of the tires
If the “native” soil chosen during the excavation of the excavation and trenches does not contain layers of sandy loam and loam, it can be used for backfilling.
In the presence of clay interlayers and lenses replacement is required.

For backfilling of a trench with an installed septic tank and trenches with pipes it is better to stock up on river or quarry sand.
It is not necessary to fill up in the sewer construction expensive granite rubble, which is represented in the photo.
It is suitable budget dolomite or lime equivalent.

Crushed stone with a fractional “caliber” of 5–20 mm is required for backfilling the drainage layer. Within the septic tank, the thickness of the layer must be at least one meter
Step # 2 - calculate the amount of materials
The required depth of the septic tank is 2, 5-3 m. As a result of the tire connection, one large tank should be obtained without a cap, with a bottom or without a bottom.
The depth of the septic tank should be divided by the width of the tire. It will be enough seven tires from Kirovtsy and two tires from Kamaz.
The number of pipes must be determined on the basis of the distance from the septic tank to the house. This distance should be divided by 3 meters (the length of the longest sewer pipes). The resulting number will be equal to their number.
It is better to take it with a reserve, as in the process of the device of a septic tank they can be damaged. Still need one pipe to connect the two tanks septic tank.
To take collars at the rate of 5 on two wheels (with a stock). If knitting wire is used instead, 1-2 meters is enough. For waterproofing need a piece of rubber the size of 1x1 (can be a little more).
One roll of roofing material, which is needed for waterproofing tanks.
For the device filter pads need 2 tons of sand and gravel. You can use the CBC, but the filtering quality will be worse, since the sand will quickly clog with silt. Remains of sand and gravel can be used as a bedding tank.
Step # 3 - prepare the pit for the installation of a septic tank
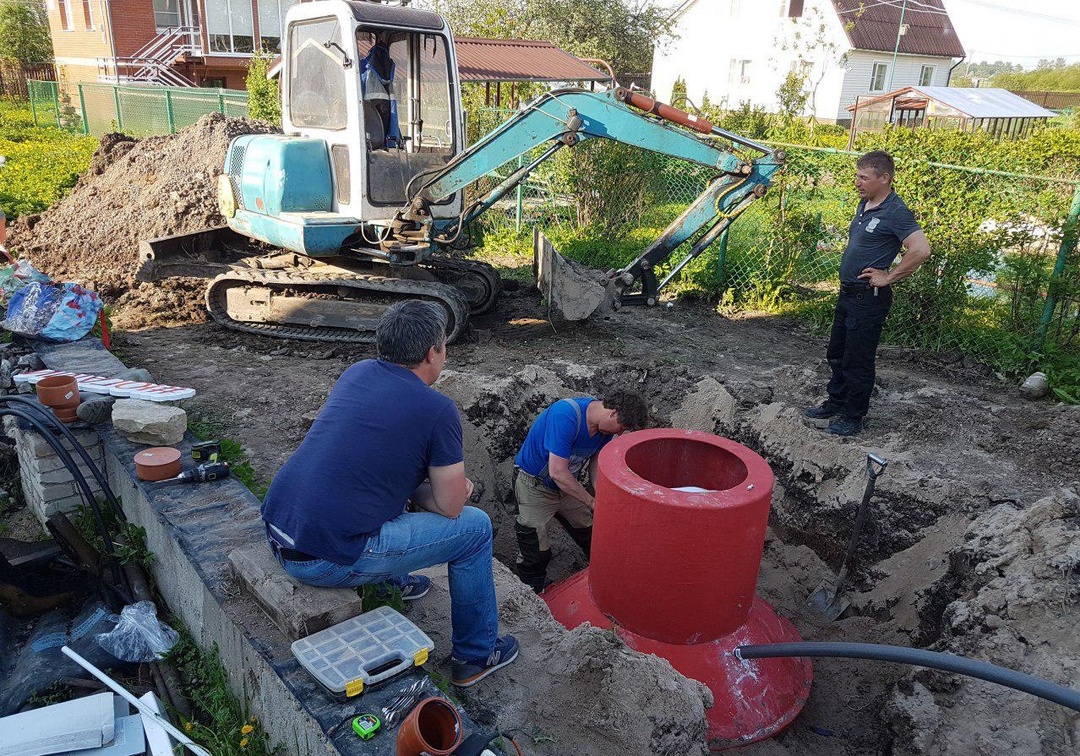
After all the materials have been collected and the drainage system has been removed from the house, it is possible to proceed with the construction of a septic tank.
It consists of two tanks. One of them is a settling tank for large fractions of wastewater, and the second is a filtering well for water flow. Its construction is detailed in the diagram below.

A sketch of a septic tank with a filter well made of tires will help to calculate the material consumption, determine the depth of the bottom of the structure and the depth of the pipe
Mounting tires is easy. The most time-consuming process is digging a pit. The pit of the required size is difficult to dig by yourself. It may take about a week.
If the pit is developed manually, then with a depth of more than one and a half meters it will become difficult to extract soil from it.
You will need a bucket-type adaptation on the rope to raise the blade and a trolley to take out excess land. It is necessary to take care in advance about the place where excess soil will fall. The upper chernozem layer can be scattered around the garden.
Dug out the pit to clean the roots of plants. In the process of growth, the roots of trees such as poplar, can move the septic tank segments or break its tightness. To do this, use an ax.
After the roots are removed, you need to align the place where the bottom of the settler will be located. This is necessary for a snug fit of the rubber to the lower tire. The smoother the place, the better the fit and tightness.
The place where the bottom of the filtering well will be located should be further deepened to the width of one tire from Kirovtsy and the width of the sand cushion.
The thickness of the layer of filtering sandbag is from 30 to 60 cm. It is not necessary to level it, since after that a layer of gravel will follow.
If children live in the house, it is necessary to enclose the pit during the installation of the septic tank. This is necessary to prevent accidents, as the edges of the pit may crumble if you stand on them.
The child does not understand the degree of danger, so it is better to err.
Step # 4 - we put the tires for the sump
Step-by-step instructions for the installation of a settling tank:
- Rubber fits on the prepared base.
- The first tire is laid on the rubber bottom.
- Bus and rubber joints are coated with liquid bitumen.
- On the first tire fit the second.
- The joint between the first and second tires is coated with liquid bitumen.
- The first and second tires are fastened together with clamps or knitting wire.
- The third tire is installed on the second one and is fixed in the same way with subsequent sealing of the joints with bitumen.
- In the third tire with a grinder, a square hole is cut for the drain pipe from the house.
- On the third tire fit tire from Kamaz.
- Joints between the fourth and third tires are sealed with liquid bitumen.
The foundation pit with a settling tank does not need to be filled up until a supply sewer line has been inserted into it, and a pipe has been led out of it to the filter well.

Input and output of pipes from the septic tank-sump is made after the installation of all objects of external sewage. Do not forget that the input must be higher than the outlet
Step # 5 - we put the tires for the filter well
Step by step instructions for installing the well:
- The first tire is laid on the sandy bottom.
- A rubble or gravel is poured into the tire.
- On the first tire fit the second.
- The joint between the first and second tires is coated with liquid bitumen.
- The first and second tires are fastened together with clamps or knitting wire.
- The third tire is installed on the second one and is fixed in the same way with subsequent sealing of the joints with bitumen.
- Installs the fourth tire.
- In the fourth tire with a grinder, a square hole is cut for the drain pipe.
- On the fourth tire the tire from KamAZ keeps within.
- The joints between the fourth and fifth tires are sealed with liquid bitumen.
Having finished the installation of the sump and the filtering well, it is necessary to proceed to the laying of the pipe between the tanks. The pipe should be 110 mm in diameter, because when it is used, a thick coating appears on the walls.
Over time, the lumen of the pipe will be less. If you trim the edges of the tires on the inside, the volume of the absorption well will increase significantly.
The dumping of gravel in the absorption pit is performed so that its lower layers are the smallest of the available fractions. With the climb, the fractional composition should be increased.
By this method, finer cleaning will be carried out at the exit of the gravel filter.
Step # 6 - connect the sump and filter well
To do this, grinder cut two holes. The exit of the pipe from the sump into the well should be located below the level of the drain pipe from the house.
The hole can be made at the bottom of the third tire or in the upper area of the second. The pipe can be installed horizontally or under a slope of 15-20 degrees.

Sewage pipes are stacked with a slope that ensures the spontaneous movement of drains and prevents their outflow in the opposite direction in case of a septic tank flooding
The places where the pipe connects to the tires need additionally seal. To do this, it is necessary to cut out small patches from roofing material and glue with liquid bitumen.
This is necessary so that the earth does not fall through the gaps from the pipe. When sealing is completed, you can proceed to the final stage.
The external sewer branch is necessarily equipped with a ventilation pipe, which is easier and more convenient to arrange in the lid of the filter well.
However, the best is considered to be out of the house or the area between the receiving and absorption wells. Best of all, if the ventilation is arranged at two points: at the exit of the building and above the filter well.
The distance between the walls of the pit and containers need to be filled with sand. Periodically have to go down and tamp the ground. This can be done with a small wooden post or a piece of carriage. It is better to take a pine, as it is easier.
The soil in the pit will settle immediately after the first rain, after which it will be necessary to additionally fill it with earth. After that, you can remove all the excess land on the site. For this you need a car or a bucket. Covers on a septic tank can be cut with a grinder from an iron sheet.
The service life of such a drainage system is more than 15 years. It will only be necessary to pump out the settler as it is filled with heavy fractions of sewage.
You may also need information about sewage pumps for forced pumping, reviewed here.
Conclusions and useful video on the topic
Roller with practical experience building a septic tank of tires:
Construction of a three-section septic tank:
Video about the best options for connecting sewer pipes:
We have described a cheap and reliable way to make a septic tank with our own hands. It protects soils and groundwater from pollution.. In addition, nothing but the cost is not inferior to the analogue of concrete rings.
Do you have a septic tank made of old tires on the site? Please tell us how difficult it was for you to build it and what nuances you had to face. Or did you notice a discrepancy in the instructions given in the article? Write us about this in the comments.