In this article, we will analyze the types of building bubble levels, what the bubble level consists of, why additional marks are needed on level flasks, how to use, check and adjust the bubble building level, how to use and adjust the electronic level.
The content of the article
- What are the types of bubble levels?
- Marks on level flasks - what is it
- How to use a bubble level
- Electronic level. Adjustment of electronic levels
- How to test, adjust the bubble building level
What are the types of bubble levels?

Since the design of the bubble levels is the same - a solid rectangular frame, they are distinguished mainly by the number of flasks. There are:
- Levels with one flask. Suitable only for measuring the evenness of horizontal surfaces.
- Levels with two flasks. One flask for the horizon, the second - for the vertical. These levels can measure both horizontal and vertical surfaces.
- Levels with three flasks. One of the most popular levels is with three flasks. One for measuring the horizon, the second for the vertical, the third for the angle. Usually a bulb is placed for an angle of 45 degrees, but there are models for 30 and 60 degrees.
- Professional models (up to six flasks). Used by experts/professionals. Two flasks for measuring the evenness of horizontal and vertical surfaces, the rest - for angles (15, 30, 45, 60 degrees, there are models with other angles).
Marks on level flasks - what is it
It is intuitively clear even to a novice user that these are labels indicating within what limits the air bubble should be. The construction bubble level consists of a body and flasks with liquid. An alcohol-based solution is used as a liquid so that it does not freeze during operation at low temperatures. The flasks do not fill completely, leaving an air bubble. There are marks on the side surface of the cylinder. If the bubble is within these marks, the measured surface is flat. A little closer to the edges of the flask there are thin marks - this is the marking of the error. That is, depending on the situation, the bubble may be within these lines. Additional error marks are drawn at expensive, professional and mid-range levels.
How to use a bubble level
Examine the meter. Clean the surface to be measured. Each level has a working side. Usually made from a different, coarser material, sometimes they differ in color. This side must be applied to the measured surface.
If you apply the level on the other side, nothing bad will happen, only the measurement error will increase. If you need high measurement accuracy, apply the level only with the working side.
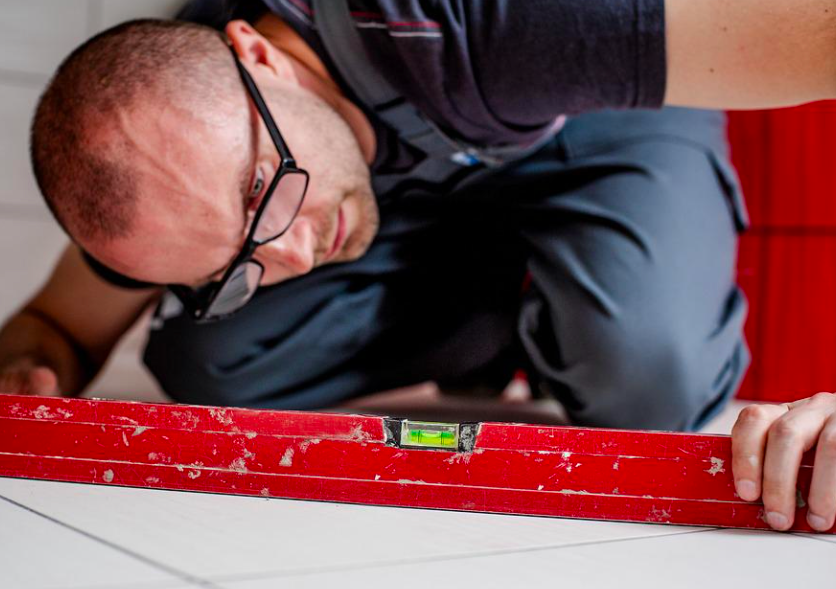
Let's look at how to use the bubble level, using the example of installing a shelf. Make an approximate markup where the shelf will be located. Apply a level to it with a working surface. Rotate the instrument until the air bubble in the flask is within the range of the marks. Draw a line along the level, make marks for fasteners. This is the control of horizontal surfaces.
To check the evenness of a vertical surface, for example, the quality of the plaster on the wall, you need to attach the level with the working side to the wall. Move the level up and down without moving it to the sides. The air bubble should be on top. There are separate models where it should be from below. Such devices have corresponding marks on the case, packaging. If the wall is flat, the bubble should always be in the range of marks. If it is not located, you need to increase / decrease the plaster on the wall gap.
To measure the slope, you need to apply a level to the surface in the same way as when checking the vertical. If the tilt bubble is within the appropriate labels, the surface is properly tilted. Flasks are placed at the levels to measure angles of 30, 45 and 60 degrees.
Do not apply the level with the short/wide side. Devices are not designed for such measurements - with this method, a non-existent surface between the level and the wall is measured, these readings will differ from the real ones.
Electronic level. Adjustment of electronic levels
Electronic levels are more convenient, advanced and accurate than bubble levels. Their popularity is growing. Such devices are equipped with three blocks - one for adjusting horizontal surfaces, the second - vertical, the third - with a gyroscope. The latter allows you to measure the evenness of all corners. On the electronic panel, the angle is set from 0 to 90, at this angle the line will be displayed.
Measuring devices go astray over time. This is due to various factors - how they are used, how often, how they are stored, and more. Therefore, an additional plus of electronic levels is self-adjustment. To adjust the electronic building level, just press the button. Adjust the electronic levels according to the manufacturer's instructions. The concept of adjustment for all models is the same - you need to find a flat surface and press the adjustment button. Flat means perfectly flat, as the device will take this data as a basis. In an apartment, a foam plastic in a container with water can be a perfectly flat surface. At construction sites, troughs are used for solutions. The entire process of calibrating the electronic level lasts less than one and a half minutes.
How to test, adjust the bubble building level
Bubble level test:
- Lay the device on the surface.
- Put something under the level, such as paper, until the air bubble in the flask levels out - it will be between the marks.
- Turn the level upside down.
If the readings do not change, the device is configured correctly. If changed, the level must be adjusted. For this:
- Fill a tub/container large enough to fit a level.
- Place a sheet/piece of Styrofoam on the water.
- Put a level on the foam.
- Mark the direction in which the bubble moves.
- Rotate the flask/twist the screw until the bubble is exactly between the marks.
- Flip the level.
- Check that the bubble is also in the label range.
- Flip, twist, rotate - adjust the level - until the bubble is in the middle of the flasks on both sides.
- Tighten the screws when finished.
If your level does not have adjustment screws, it cannot be adjusted. You can try to move the part with the flask with a hammer or screwdriver. Chances are you'll break the level
Problems can arise when adjusting deformed building levels.