You can overlay a potbelly stove with bricks yourself by choosing the desired scheme and calculating the consumption of materials. The masonry mixture can be purchased ready-made or prepared independently on the basis of cement with sand (cement can also be replaced with clay). Classic design drawings, as well as step-by-step construction instructions, can be found in this article.
The content of the article
- Drawings and selection of materials
-
Step-by-step instruction
- Solution preparation
- masonry
- Drying
Drawings and selection of materials
Before you figure out how to overlay a potbelly stove with bricks, you need to select materials and calculate by quantity. First of all, a brick is selected. it must be full-bodied and withstand high temperatures. Only refractory ceramic blocks are suitable for lining the furnace area and chimney channels.
As for the base, frost-resistant materials are needed here, so fireclay bricks are used. Moreover, in both cases, they must be full-bodied, have good heat capacity and heat transfer.
Instructions on how to overlay a potbelly stove with bricks in the country, involves the preliminary drawing up of a drawing - a masonry scheme. Depending on this, you can calculate the number of rows and the blocks themselves of the desired size. As a basis, you can take such a sketch.
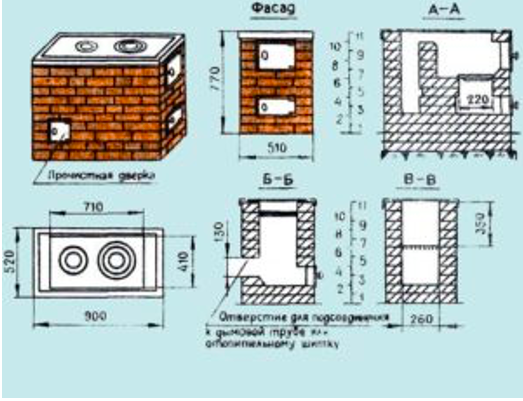
To understand how to correctly overlay a potbelly stove with bricks, the order layout scheme allows. For a classic design, you will need 95 bricks (of which 60 are ceramic refractory and 35 fireclay). Standard dimensions 250*120*65 mm.
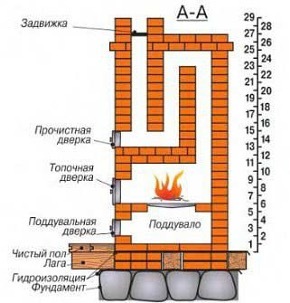
If you correctly imagine how to overlay a potbelly stove with bricks, you can calculate the amount of mortar and other materials:
- dry mix for preparing a mortar 123 kg (standard consumption 470 kg per cubic meter, masonry volume 0.26 cubic meters, therefore 0.26 * 470 \u003d 123 kg);
- cast-iron grate (grate);
- cast iron hob (stove) 4
- metal sheets 4 mm thick, 1200 mm long and 600 mm wide;
- set of electrodes for welding.
To fulfill all the conditions of the instruction on how to overlay a potbelly stove with a brick with your own hands, you will need the following tools at hand:
- building level;
- trowel;
- Master OK;
- plumb;
- roulette;
- welding machine;
- Bulgarian.
Step-by-step instruction
Do-it-yourself brick potbelly stove for giving with your own hands is laid in several stages. Work begins with the preparation of a solution, which is easier to make from a ready-made mixture, sold in 25 kg bags. Next, masonry is carried out according to the chosen scheme, a door, grates and a hob are installed, after which the bricks are dried and (optionally) sheathed with metal.
Solution preparation
You can overlay a potbelly stove with bricks with your own hands using a ready-made mixture, which is of high quality, but it is quite expensive. If this option does not work, you can prepare a solution yourself from cement and sand in a ratio of 1: 4. You can also use clay with sand in an approximate ratio of 2: 1. In this case, it is more difficult to specify the exact ratio, since much depends on the characteristics of the raw material.
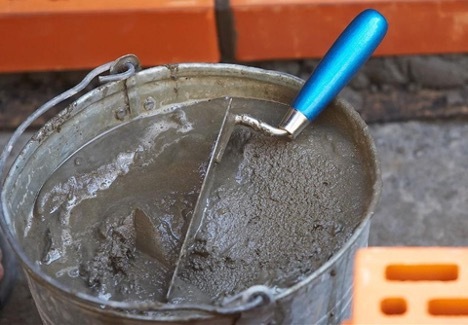
Moreover, you need to understand whether it is possible to overlay a potbelly stove with bricks so that the structure is durable. To do this, check the quality of the clay:
- Roll into a bundle with a small thickness of 1-1.5 cm.
- Wrap this rope around a rolling pin with a diameter of 5 cm.
- Pull the tourniquet a little, increasing its length by about 20%.
- If it stretches harder and does not break, the masonry will shrink over time due to constant exposure to heat. If the clay breaks almost immediately, the solution will crumble into small fragments after drying.
Next, they begin to prepare the masonry mixture in order to overlay the potbelly stove with bricks with their own hands, as in the photo. If you use a ready-made composition, it is diluted according to the instructions. If made on the basis of cement and sand, water is added to them until the consistency of thick sour cream is obtained. You can check by applying the mixture to the top side of the brick and placing it at a 45 degree angle. Normally, the solution should not drain from the surface.
If it is planned to line the potbelly stove with clay-based bricks, it is required to wash it, as well as sand. The instruction is this:
- Pour sand into the bag.
- Rinse under moderate pressure of cold water until a clear liquid (without cloudiness) flows.
- Next, the clay is washed in the same way.
- Then it is placed in a large container and completely filled with water, allowed to stand for a day.
- After that, the water is drained through the burlap (it is also possible through a sieve with cells of no more than 1.5 mm).
- The process is repeated several times until the consistency of the clay resembles toothpaste.
- Combine clay with sand in a ratio of 2:1 and mix with a drill with a mixer nozzle for several minutes.
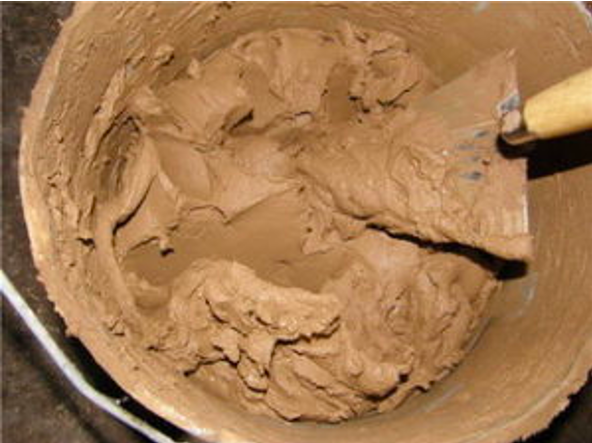
masonry
A potbelly stove lined with bricks is laid in several rows, like other similar structures. When the solution is ready, it is recommended to start work immediately so that it does not freeze. The step by step instructions are as follows:
- The first row of bricks is laid on the cleaned surface, as shown in the photo (without mortar). Determine the correct location according to the building level.
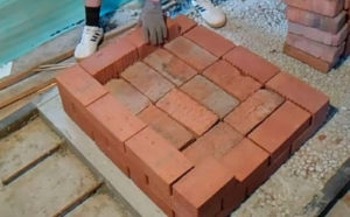
- The next step in the instructions on how to overlay a potbelly stove with bricks in the country with your own hands is to install a door leading to the combustion chamber. It can be temporarily fixed with wire and wrapped with asbestos cord.
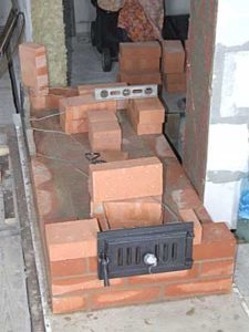
- Next, put a new row in exactly the same order. Fireclay bricks are used, which are frost-resistant. Grid-irons are mounted on top of the blower.
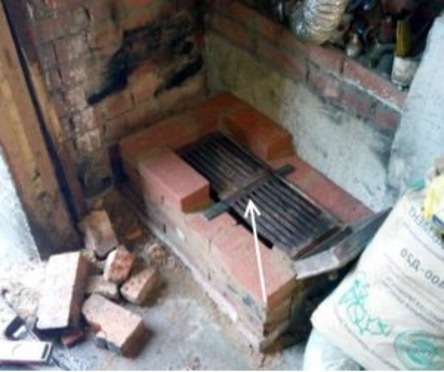
- The next (third) row is placed on a spoon. The rear surface, which adjoins the wall, is placed mechanically, without the use of a mixture (knockout brick).
- The next rows are laid out in the same way, alternating spoons with the bed. Moreover, it is important not to confuse which brick to impose on the potbelly stove. As already mentioned, fireclay blocks are used for the base, and refractory ceramic blocks are used for the furnace hole and chimney.
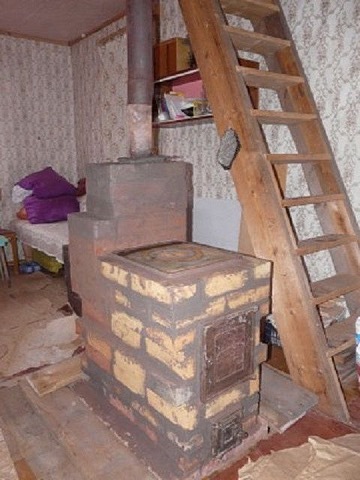
- The top row above the furnace door should completely cover it and end 13 cm higher, as shown in the photo of a potbelly stove lined with bricks.
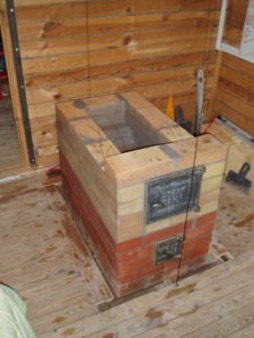
- The subsequent rows are built in the same way, gradually shifting the blocks back. An asbestos cord is fixed - then the surface of the hob is placed on it.
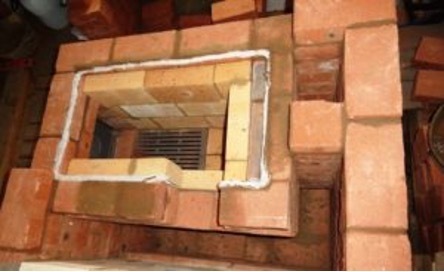
- The next row after the hob, they begin to form a chimney. A pipe made of aluminum or tin is used as a chimney channel. Heavy products should not be taken - because of them, the strength of the masonry is reduced.
- When they reach the 11th row, install a valve in the chimney that regulates the flow of air. It is also compacted with an asbestos cord and covered with clay.
- The next step in the instructions on how to overlay a potbelly stove is the installation of a chimney that fits into a metal one. To make it stand evenly, the base is reinforced with three rows of bricks.
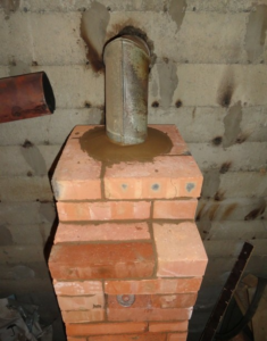
- Then you can remove the knockout bricks from row 4 and clean the chimney. This completes the lining of the potbelly stove with bricks. It remains only to whitewash the surface, put a sheet of metal in front of the furnace chamber and lay the plinth.
Drying
It is quite obvious that it is impossible to immediately use the stove for its intended purpose, since it is necessary to thoroughly dry the masonry. You can do this in 2 steps:
- Open the door and the chimney, put an incandescent lamp (classic, which gets very hot) into the chamber, and put and turn on the fan in front of the firebox. Wait 5-7 days.
- Having figured out how to overlay a potbelly stove with bricks in a garage or in a bathhouse, you can proceed to the second stage - forced drying. To do this, dry small firewood is burned once a day for several days, opening the plug halfway, and blowing the door about a quarter.
A brick potbelly stove will last even longer if sheathed with metal. This is an optional but desirable step, due to which the structure will become more resistant to chipping and cracking. Use sheet steel with a thickness of 4 mm. Then they heat it up in test mode and check how well the firebox heats up and how quickly it cools down.
